I would like to give a huge shoutout to @MyDFIR for the idea of this project!
Let’s start off by starting up our Windows 10 machine. Next, the file path:
C:\Program Files (x86)\ossec-agent\ossec.conf
It holds all configurations for Wazuh in this .conf file.
Note: Run as administrator and open up notepad for file permissions.
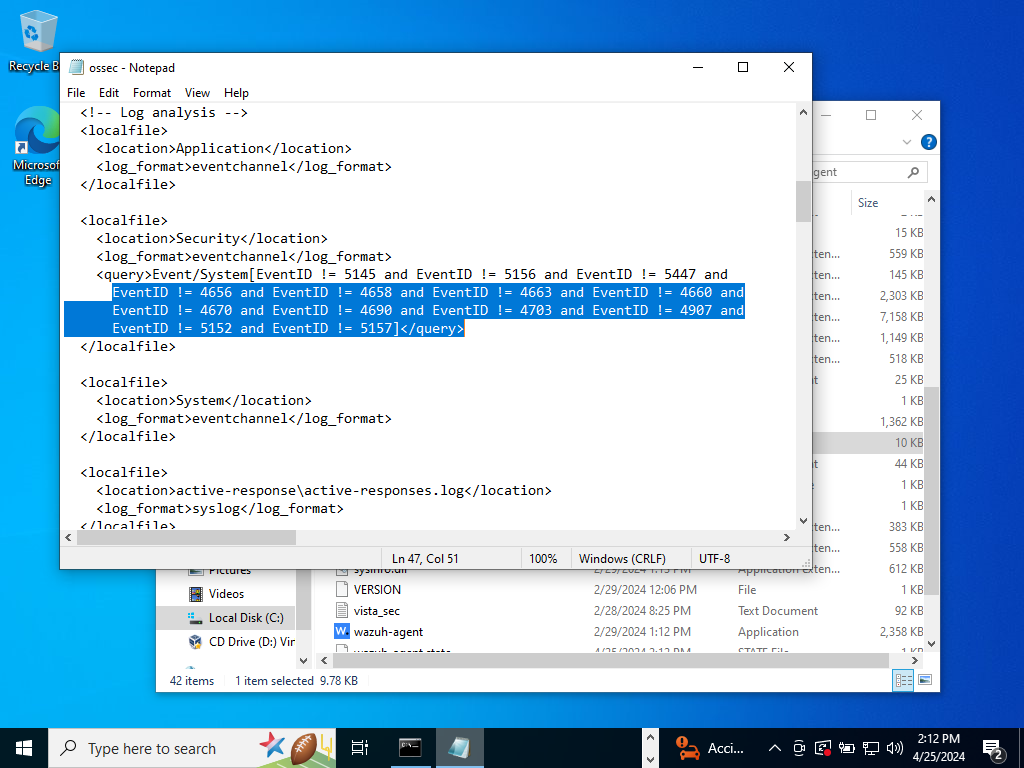
Scroll down a bit until we get to the log analysis syntax. In the local files syntax, do you see that it excludes using the ‘!=’ operator excludes the highlighted event IDs. (!= ‘does not equal to)
If I wanted to monitor Powershell we could copy the same syntax as the local file. Right underneath paste it and type “Powershell” under the ‘localfiles’ syntax. Since, I am not interested we do not need to. What we really want is to watch out for are Mimikatz processes! >:)
Two ways to go about this by either using Sysmon or enabling EventID 4688. Of course, we want to use Sysmon since in the previous article we took the time to install it. In order to do so, we will configure the ossec.conf file and edit it to ingest our Sysmon logs.
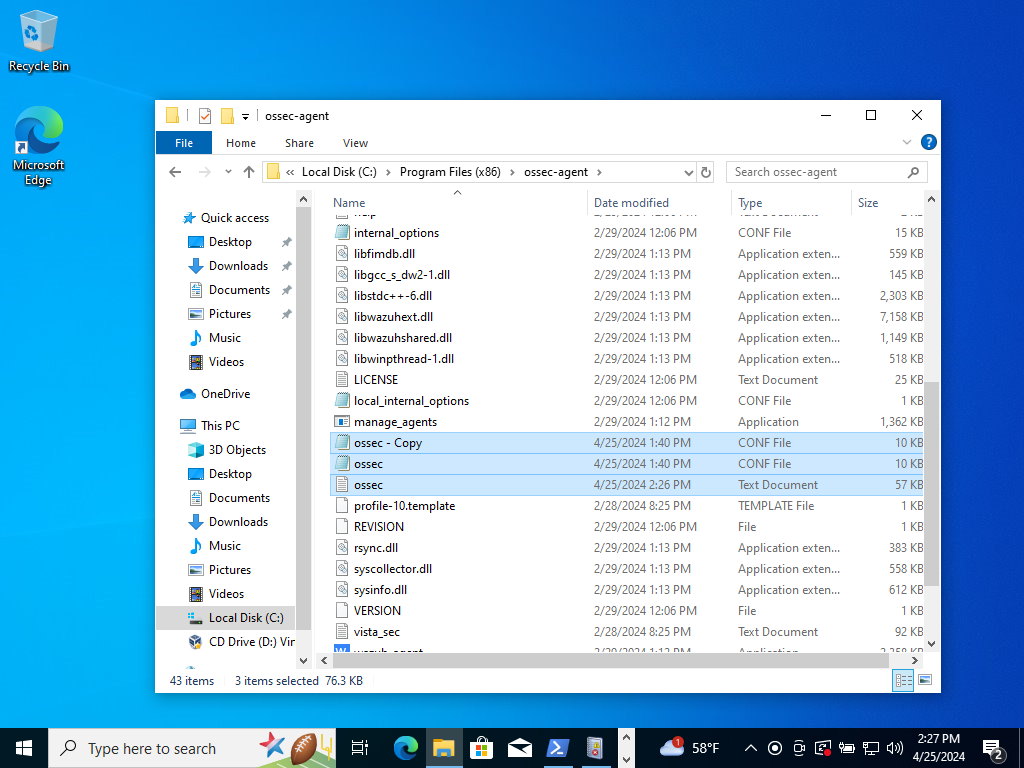
Let’s make a backup of it just in case we break things.
Back in the configuration file we shall want to copy and paste the first syntax right under local files.
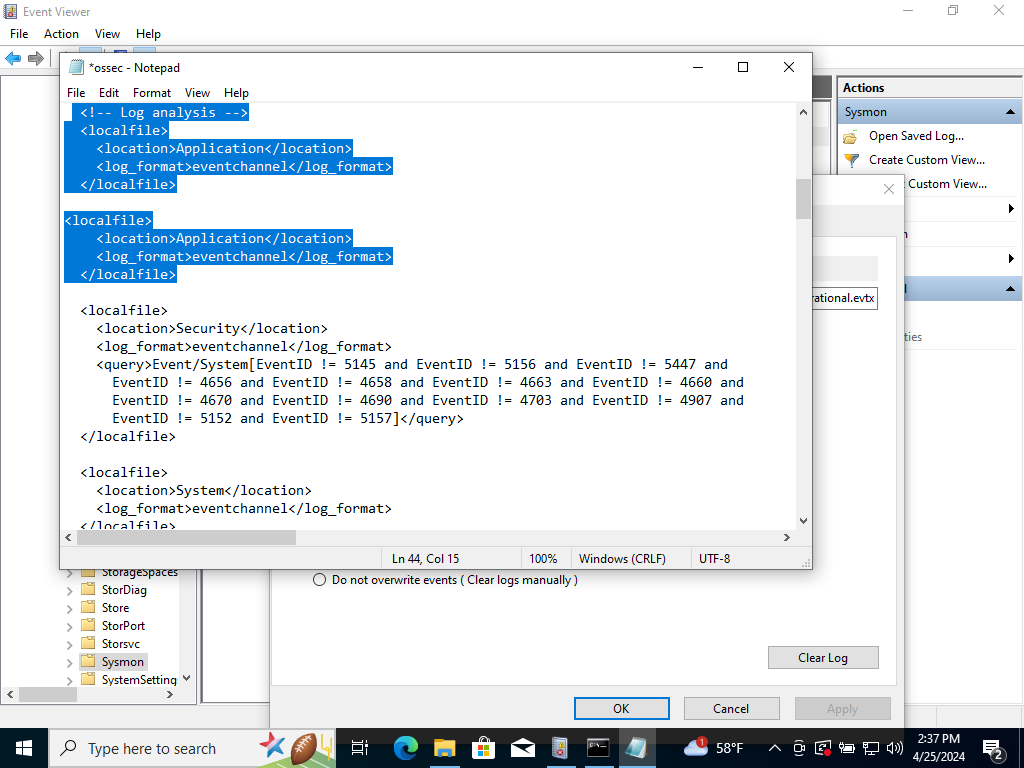
We want to change the file path of the Application to Sysmon. We are going to find that specific file path in Sysmon. By following this path:
Application & Services Logs> Microsoft>Windows>Click the services & type ‘S’>Scroll down until we find Sysmon>Double Click it>Right Click Operational>Click Properties
Go back to the configuration file and paste the highlighted text shown above and replace “Application”.
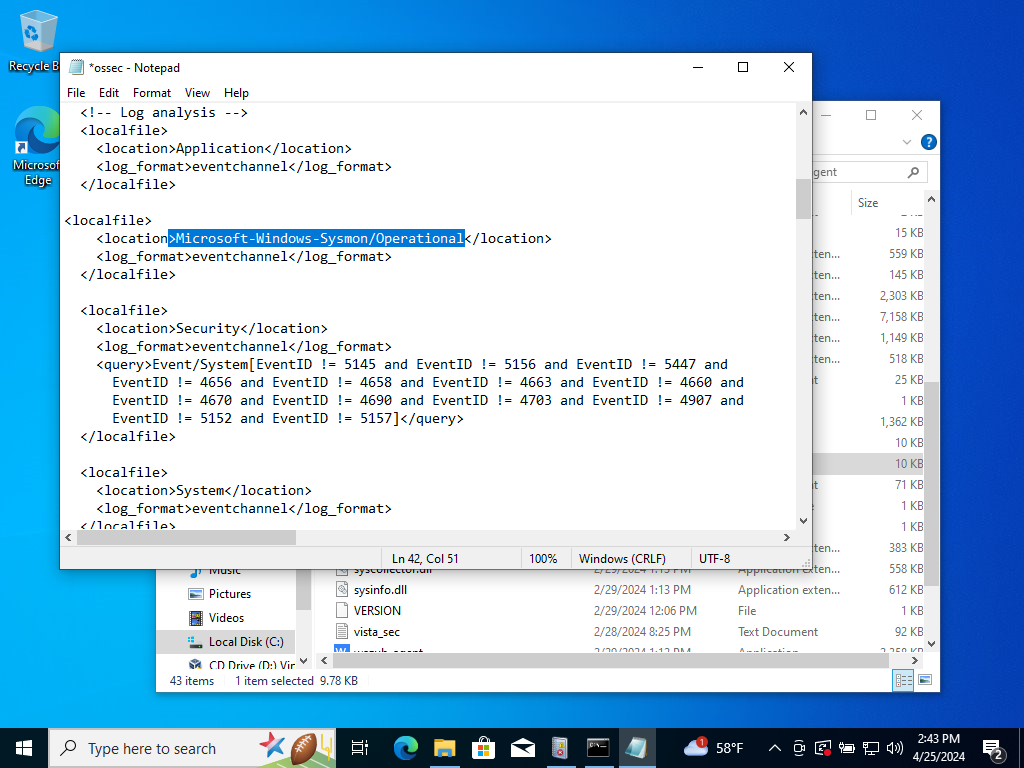
It should look exactly as shown above. We can run the same process for Powershell if we wanted to ingest the logs.
We are going to be more thorough and remove the local file application, security, and system event log ingestions.
We could leave it but it will take a lot more resources to ingest and all we need to prioritize are the Sysmon and active-response event logs.
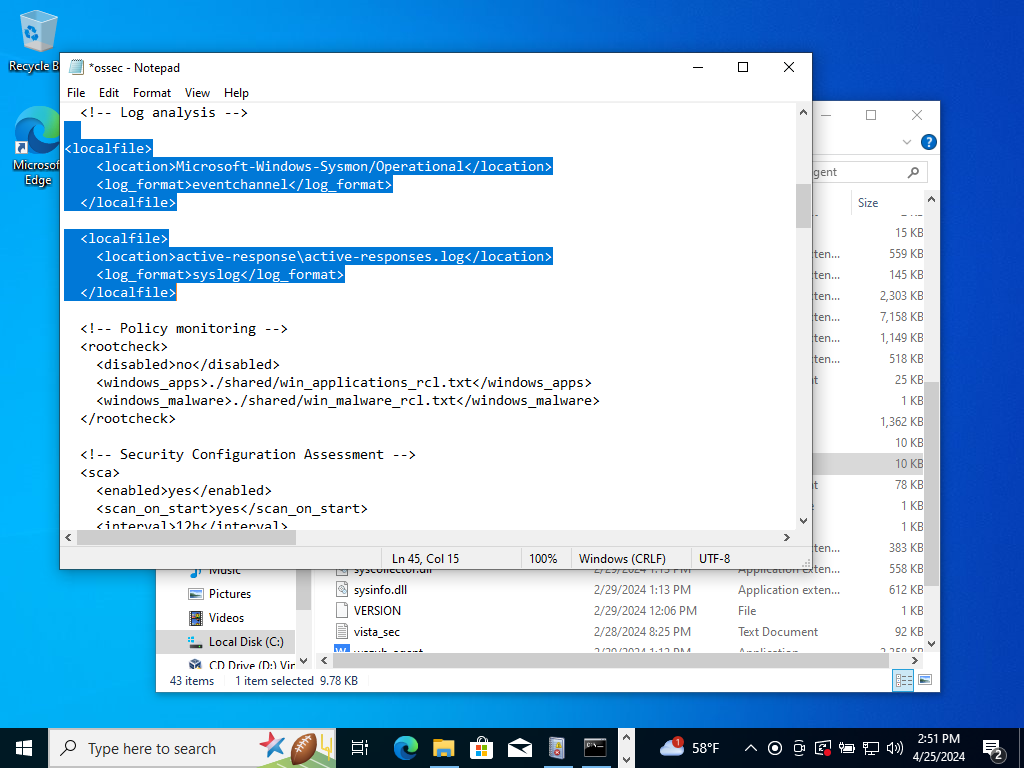
Go ahead and overwrite the ossec.conf file.
Search in the search bar “Services”. Click on the services and type ‘W’. Scroll down until we find Wazuh and Restart the service.
Note: Anytime changing the configurations of a service we must restart the service to apply changes.
Head back over to our Wazuh dashboard and click under Events. Search for “Sysmon.” It might take some time for Sysmon Events to ingest and it’s fine.
Next thing we want to do is download Mimikatz onto our Windows 10 machine. First, we will want to do is disable Defender to allow Mimikatz to execute.
Windows Security>Virus & Threat Protection>Scroll down a bit Managed Settings>Scroll down and click on “Add or remove exclusion”>Click on “Add an exclusion”>Click on “Folder”>Select our “Downloads” folder to exclude
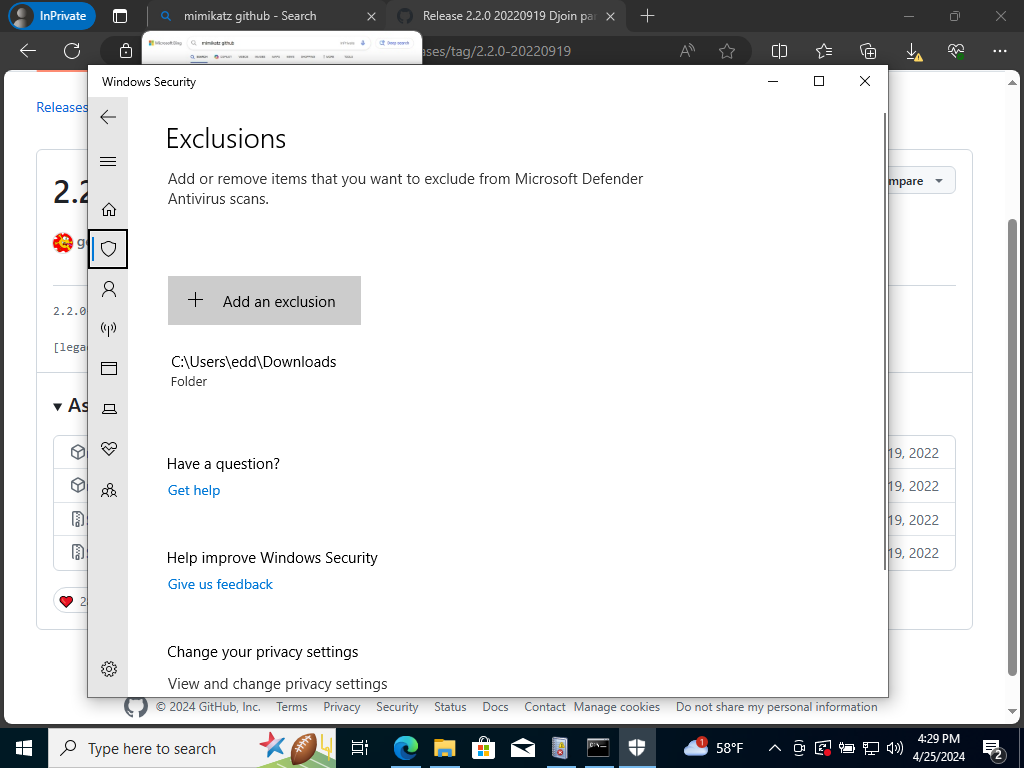
This will allow us to download Mimikatz within the Downloads folder.
Note: In Edge settings on the left hand side click on “Privacy,search, and services.”
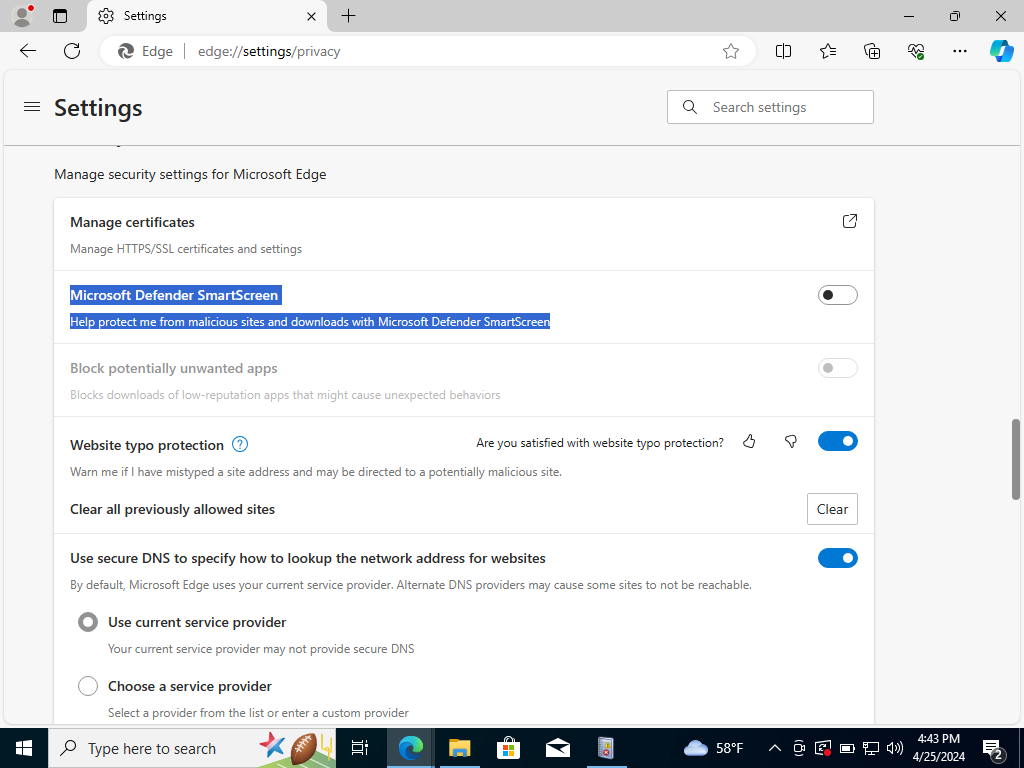
Scroll down and disable Defender Smartscreen. Now it should let you donwload Mimikatz now! >:) Make sure to extract all in the Downloads.
Let’s copy our file path that leads to Mimikatz into Powershell.
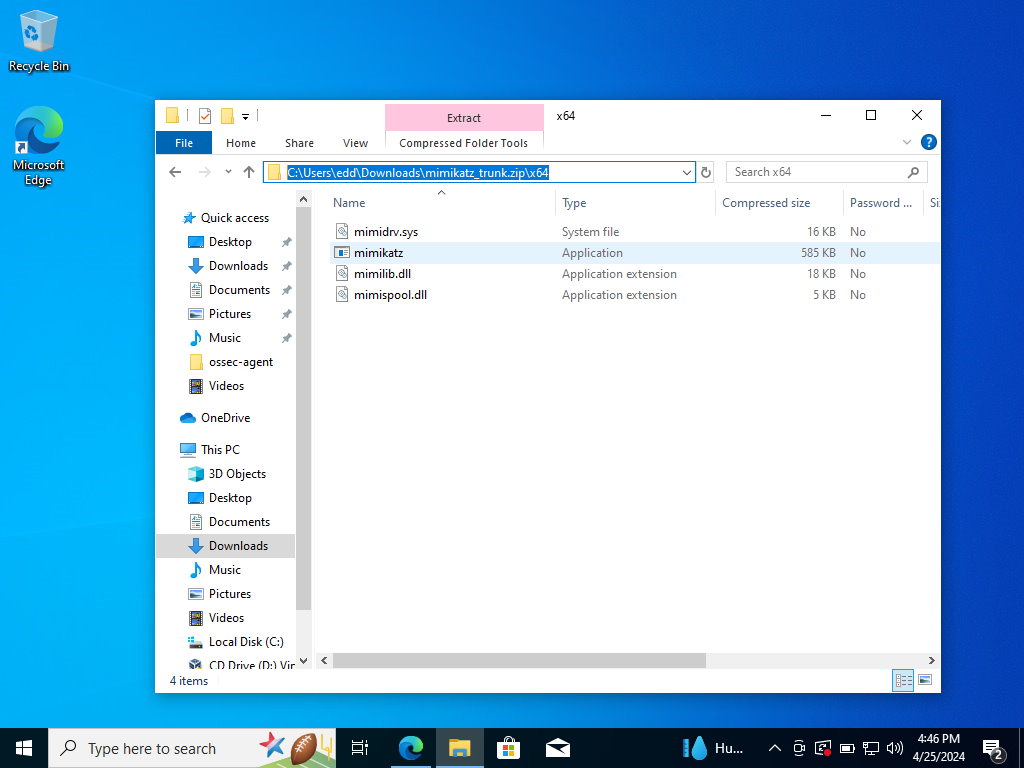
Open up Powershell and run as administrator. Then, change directories into the file path copied shown above.
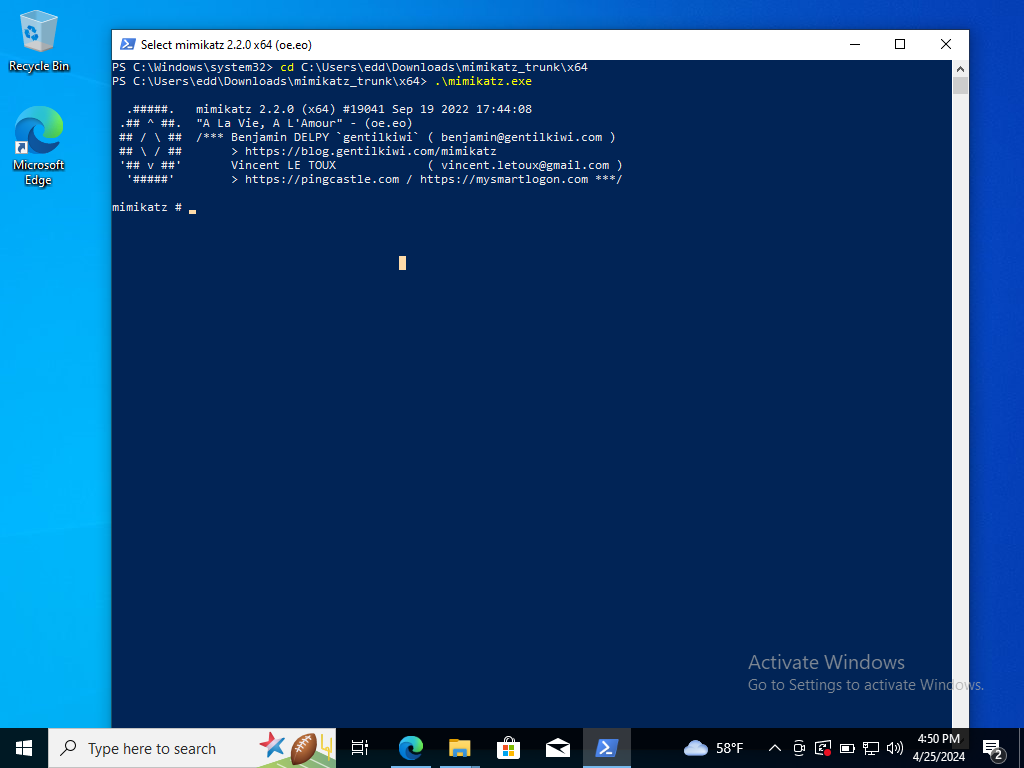
Afterwards run Mimikatz as shown above. We will then check Wazuh if there were any events related to Mimikatz.
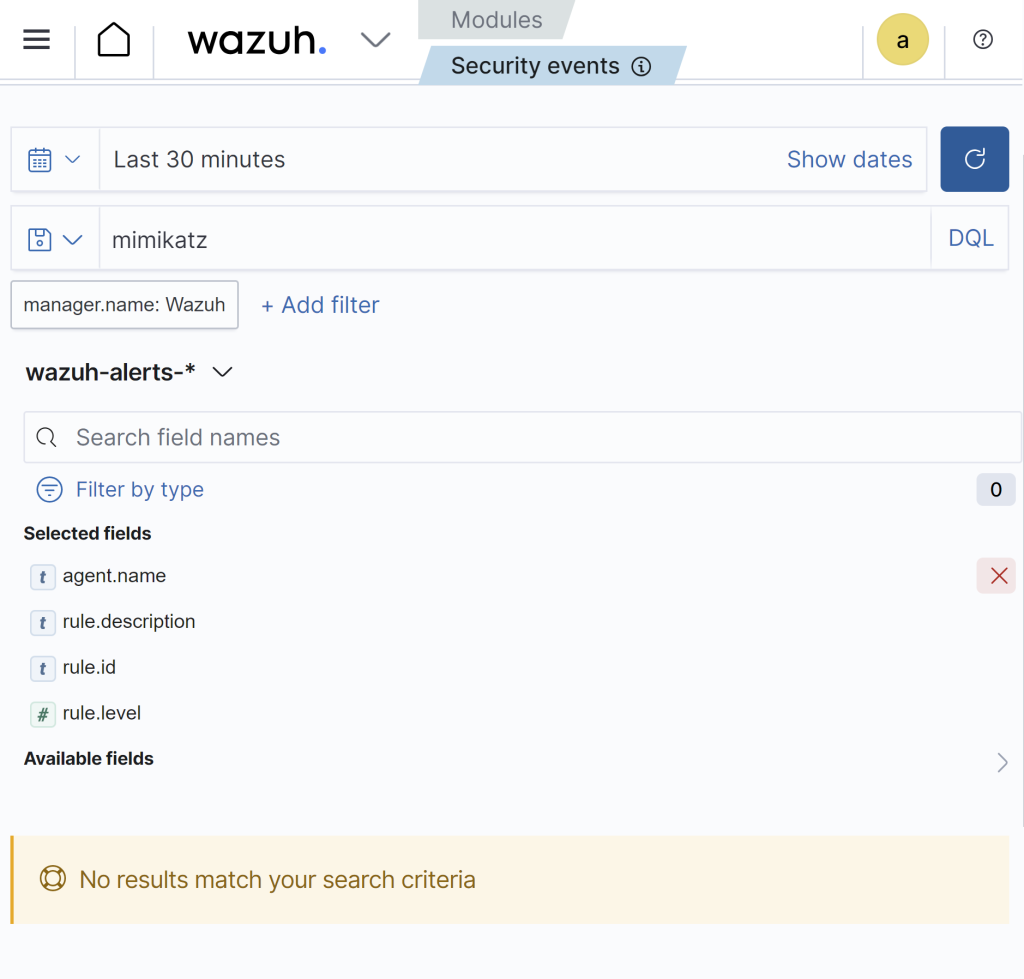
We get sysmon logs but not Mimikatz. By default Wazuh doesn’t detect everything. This is where the magic happens we must create detection rules for it, to look for Mimikatz specifically. It can be changed by going into the Wazuh manger and configuring the ossec.conf file to force it to look at everthing or create rules that looks at specific events like Mimikatz! Once it’s executed it will trigger automatically upon detection. Soon thereafter, we should have the log ingested and investigated.
By going into our Wazuh SSH terminal from there able to modify the ossec.conf file by forcing it to detect everything.
First, things first we want to create a backup to the ossec.conf file just in case we break things by running the following command:
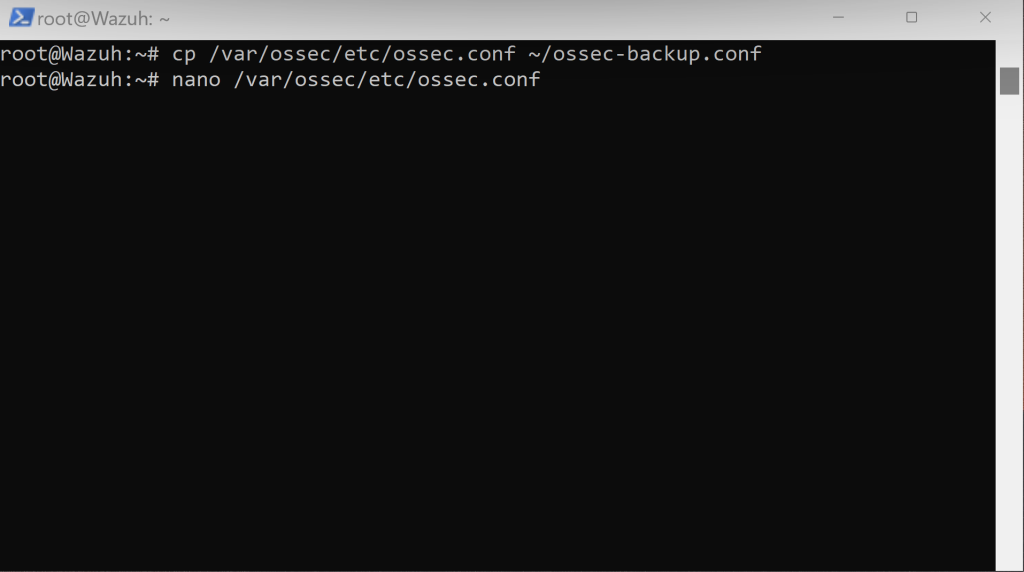
Afterwards, as shown above we are going to edit the file using nano.
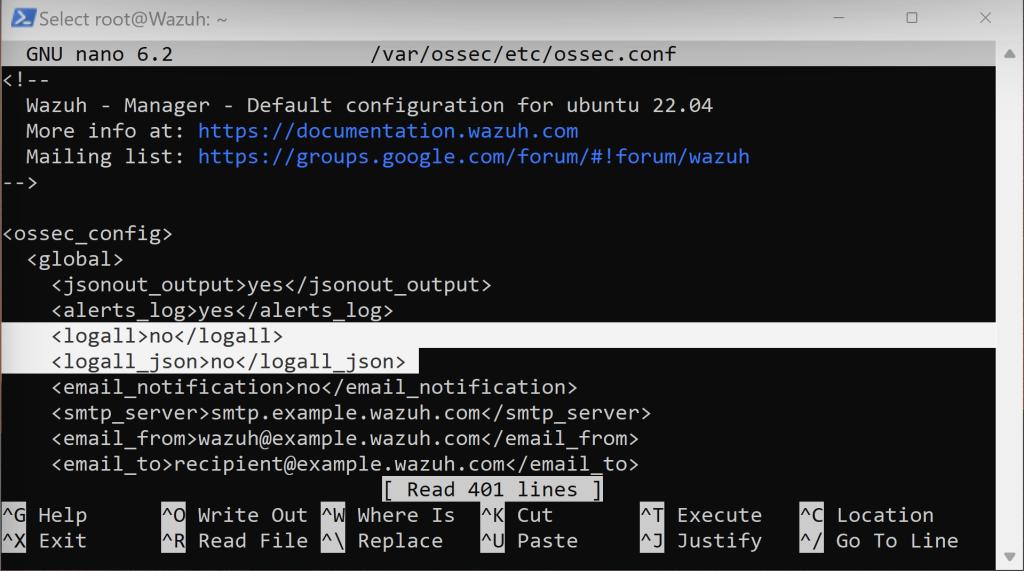
Scroll down a bit and see that <logall> and <logall_json> syntaxes are set to ‘no’. Let’s change both to ‘yes’.
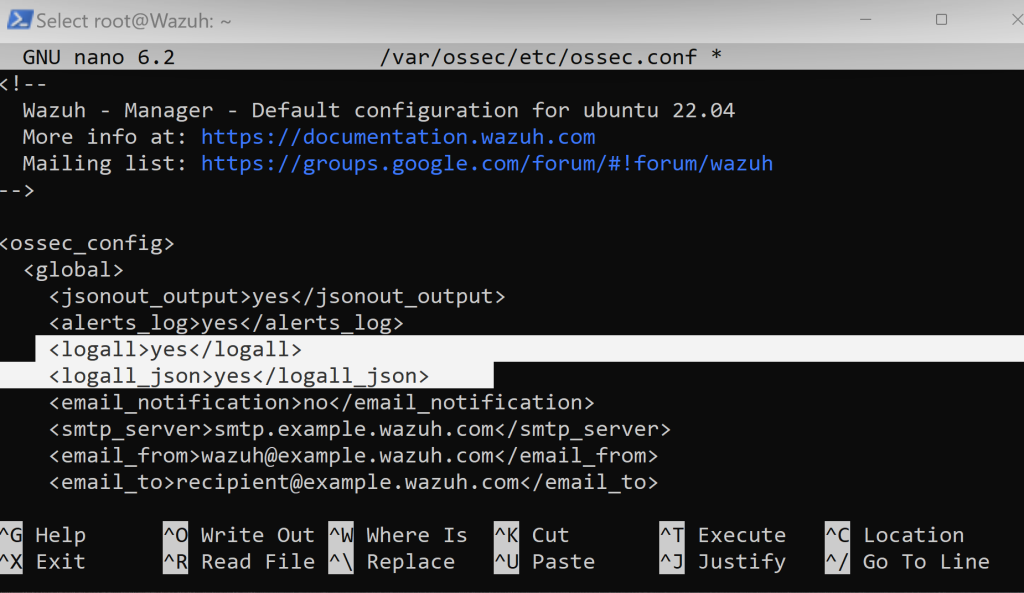
Now, that the configurations have been made go ahead and overwrite the file.

What this does is force Wazuh to archive all logs into a file named “Archive.”

Change directory into the archives directory and ls into it to see the files contained in there. There will the be all the logs archived there. What we would like is for Wazuh to ingest those logs.
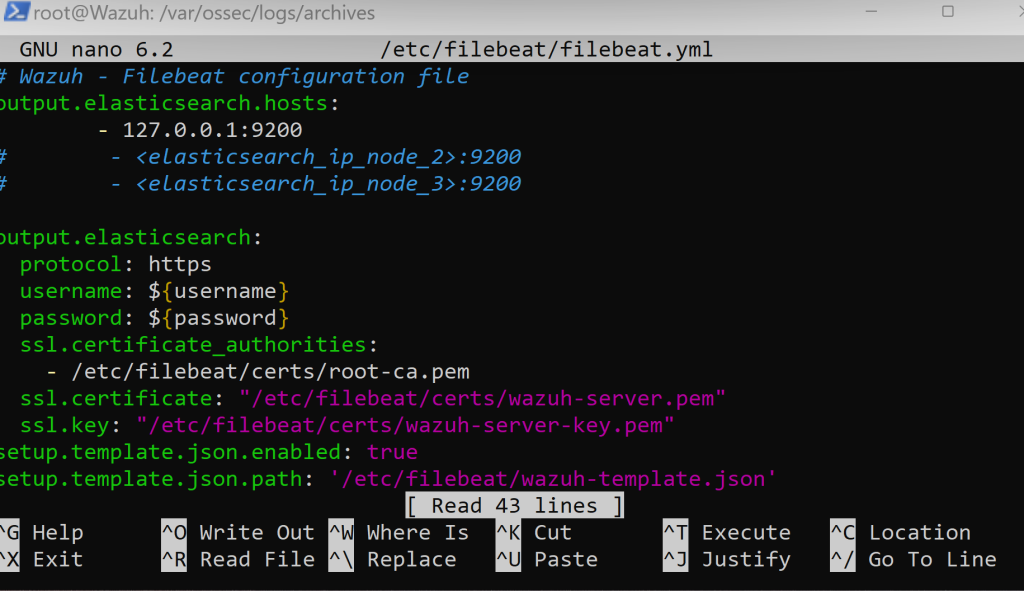
We will be editing the .yaml file using nano and using the /etc/filebeat/filebeat.yml filepath to access it. Scrolll until you see…
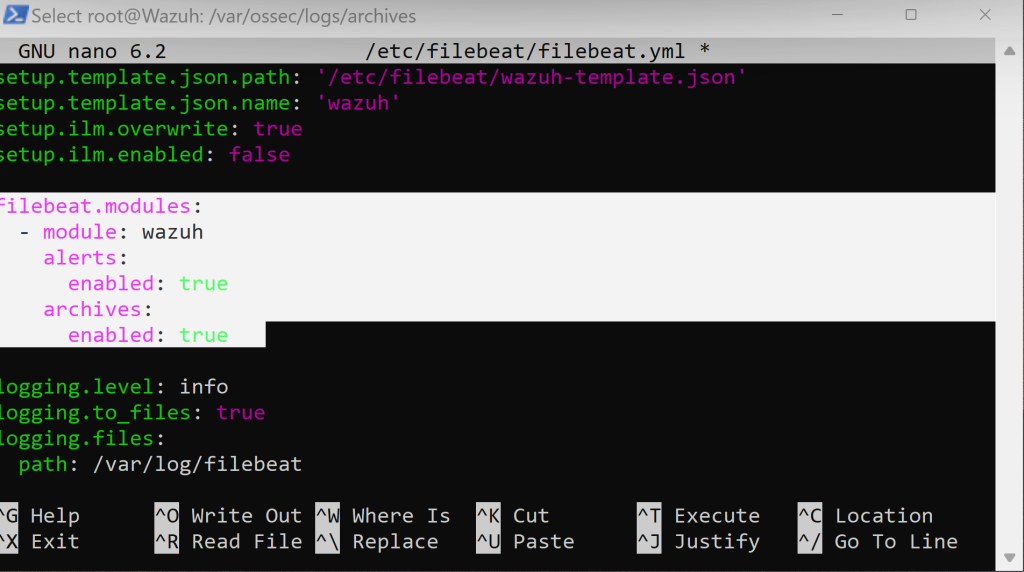
Changing all filebeat.modules to ‘true’. Afterwards, overwrite the file. Remember, everytime we must restart the service to apply changes.
systemctl restart filebeat
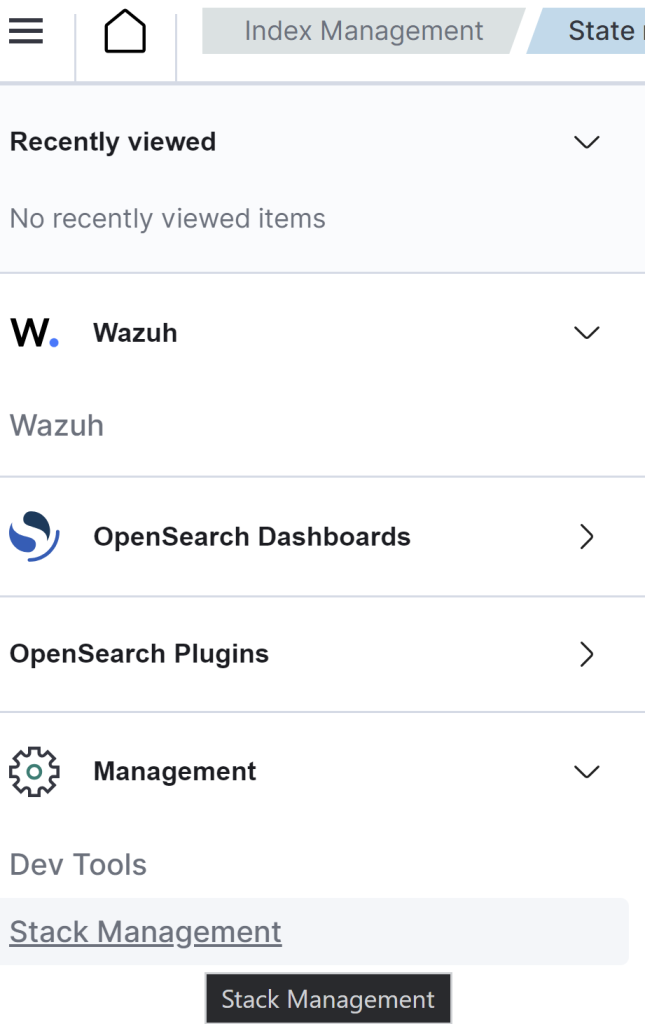
Back to Wazuh on the left handside click on Management and right under ‘Stack Management’.
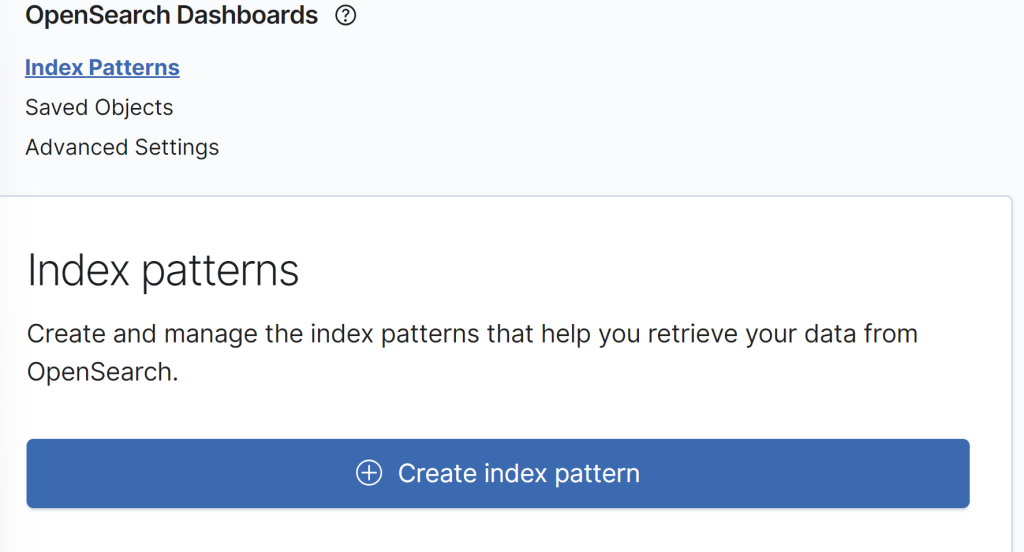
Click on Index patterns and on “Create index pattern.”
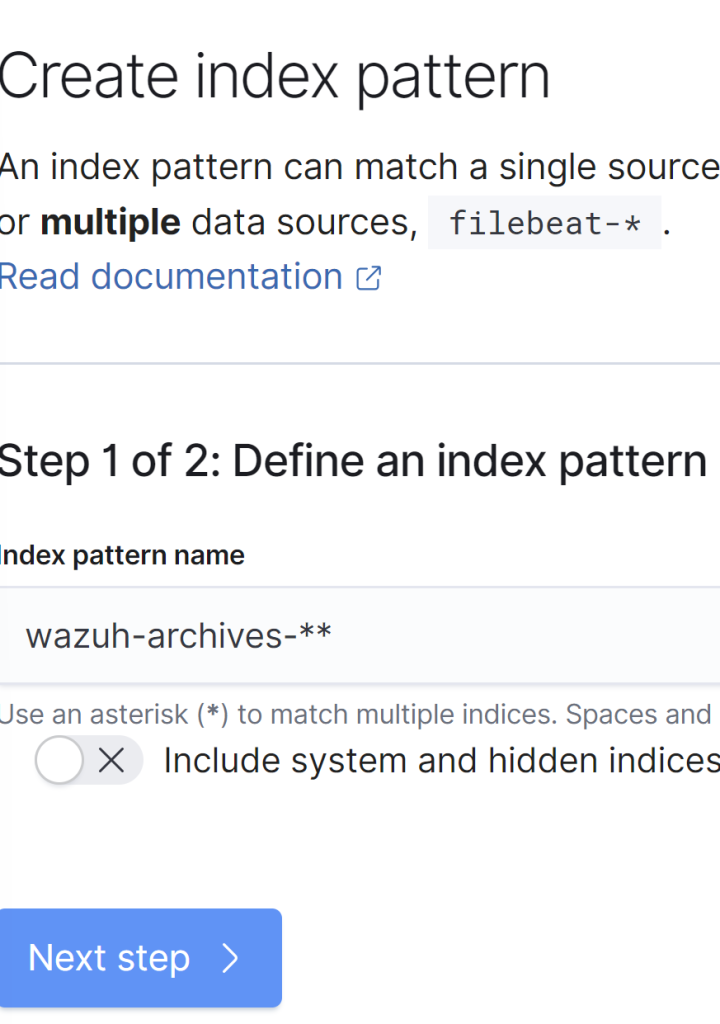
Name the Index pattern shown above and click Next.
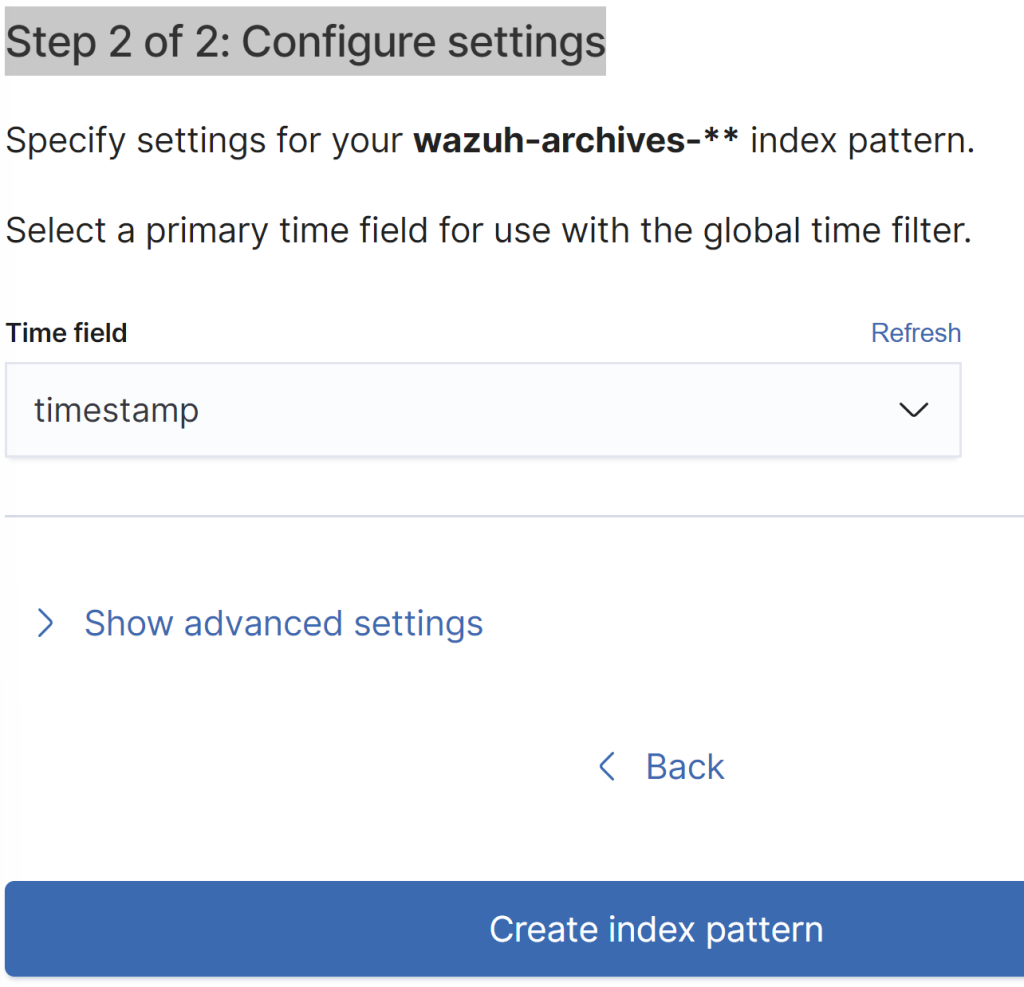
Scroll down and click on Timestamp. Afterwards click “Create index pattern.”

Go back on the left handside and click on “Discover.”
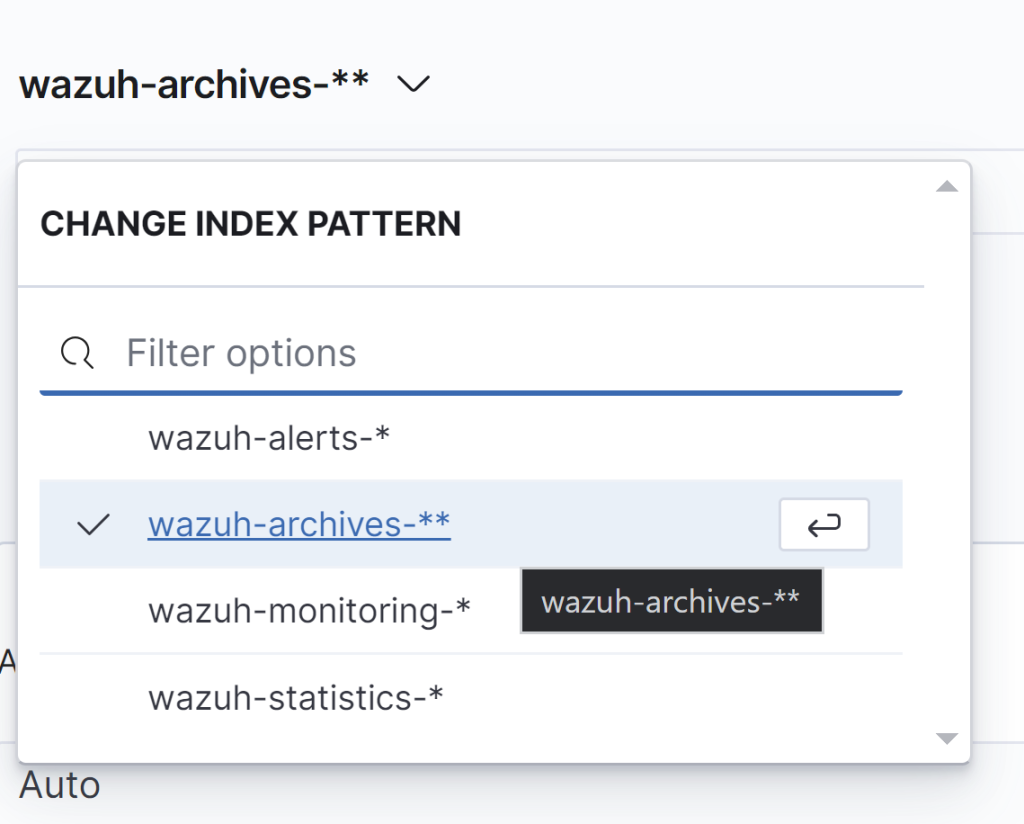
Select our ‘archives’ index pattern.
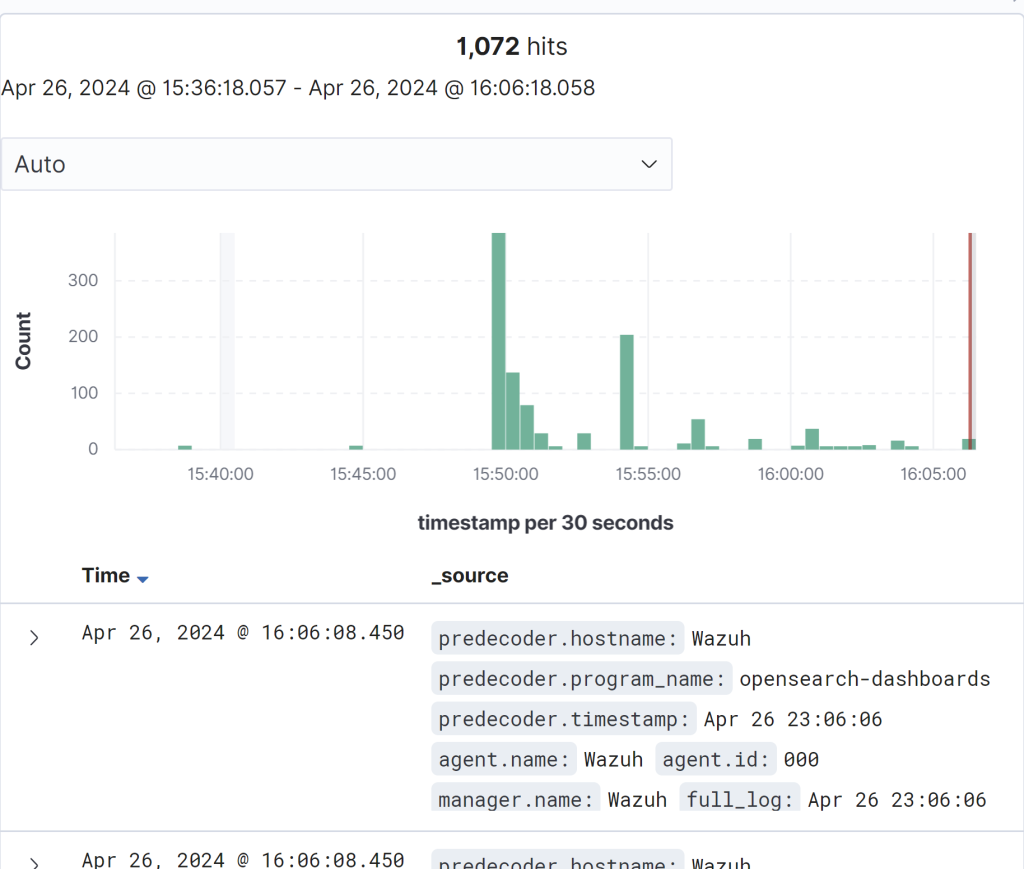
Give it some time to ingest the logs in regards to Mimikatz.
Remember, that Wazuh is special in regards to it not logging everthing unless a detection rule is created. This hinders our ability to test our environment because in our demo we want to test things out and look for many types of possible incidents to investigate and become familiar with.
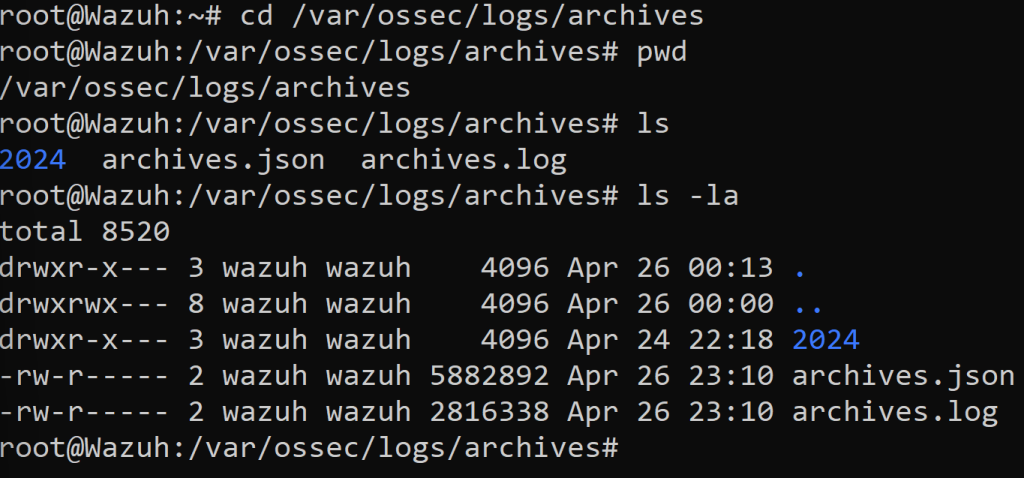
Back in our Wazuh Server CLI we want to follow the directory path using the ‘pwd’ command. Let’s ‘ls’ and see what directories we have in there. We see that theres an archives.json and archives.log files within the 2024 directory. There are definitely tons of events in those files because of the amount of bytes within those archive files.
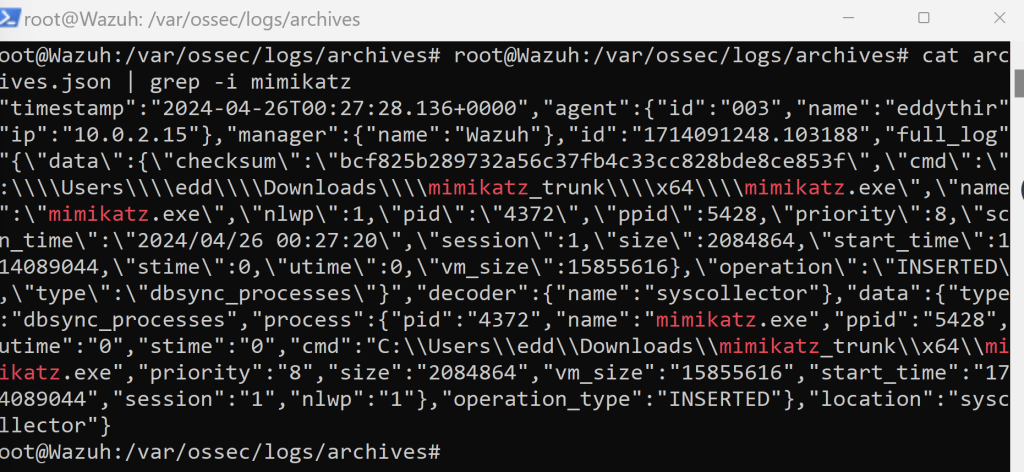
We were able to troubleshoot the Mimikatz event using the cat command. Followed by a pipe with a lower case grep and the specific Mimikatz event. If that doesn’t work we can hop on over to our windows 10 machine.
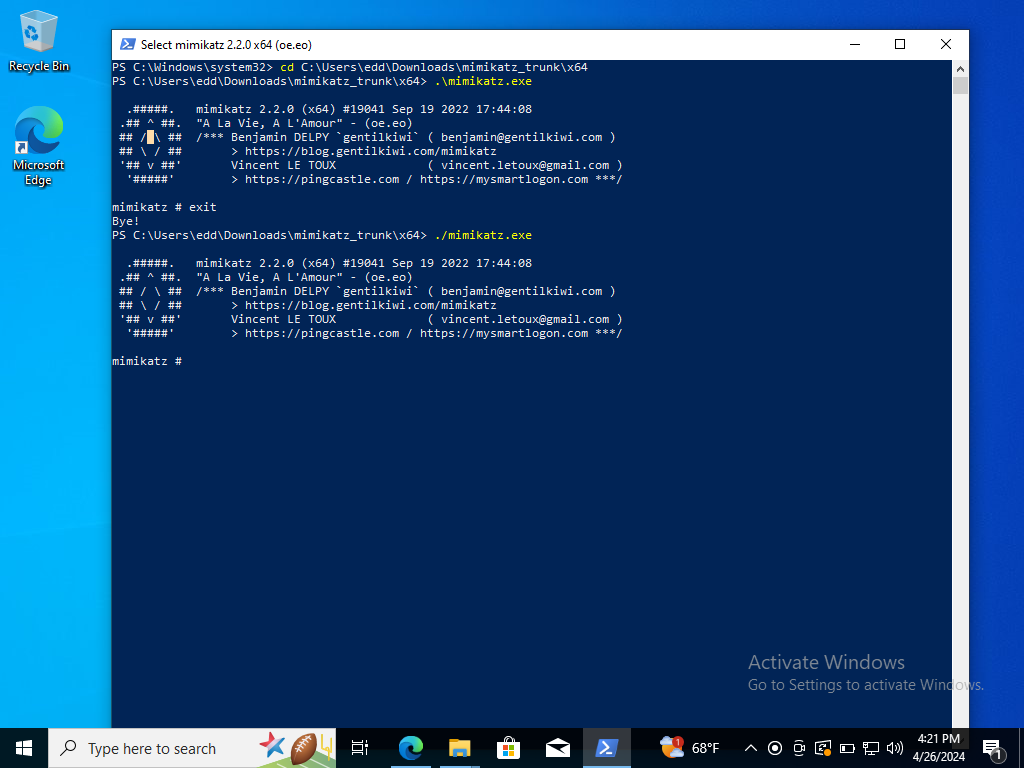
Let’s exit out of Mimikatz and execute it again. Let’s search up “Event Viewer” in the searchbar. In order to make certain that Sysmon is capturing the Mimikatz executable.
Application & Services Log>Microsoft>Windows>Sysmon>Operation>Filter Current Logs>Event ID “1”
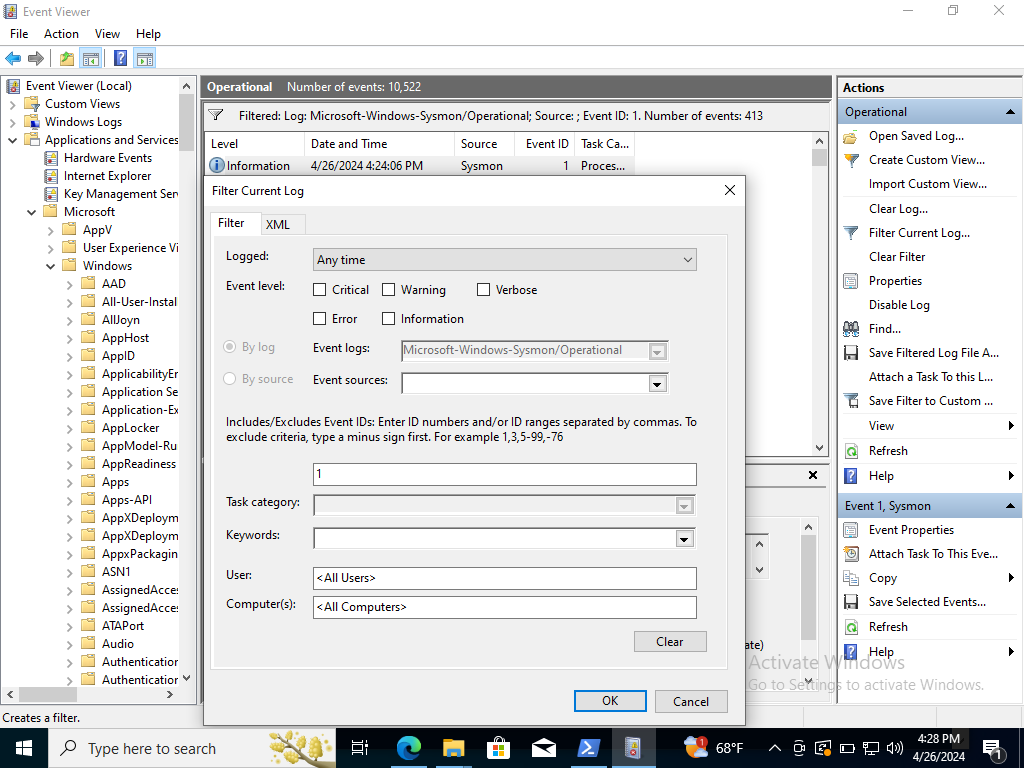
Upon filtration it should generate the EventID 1 Events. Let’s double click one and should show the Mimikatz executable.
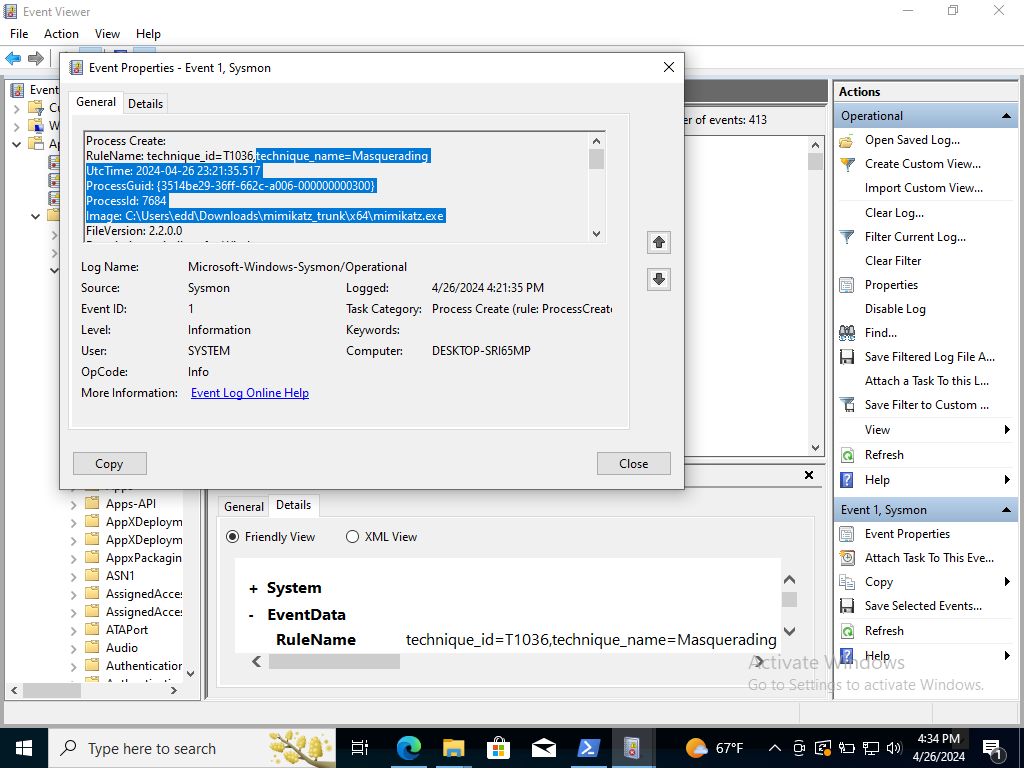
We see that the executable is trying to Masquerade.

We go back and cat and grep Mimikatz again we get a whole lot more Telemetry than before we had only one event.
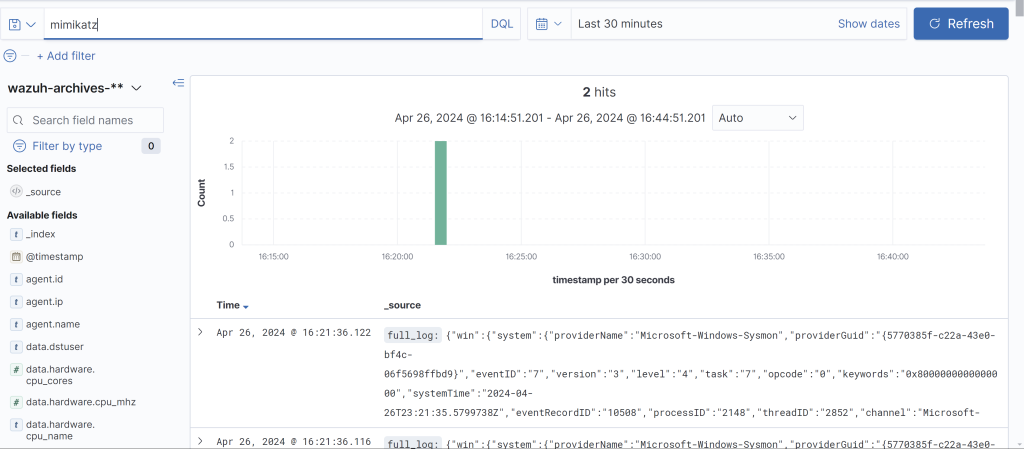
Let’s get back to our Wazuh dashboard and search for specifically mimikatz within our events. Sweet! We got 2 hits!! Let’s expand on one of the events and scroll down a bit.
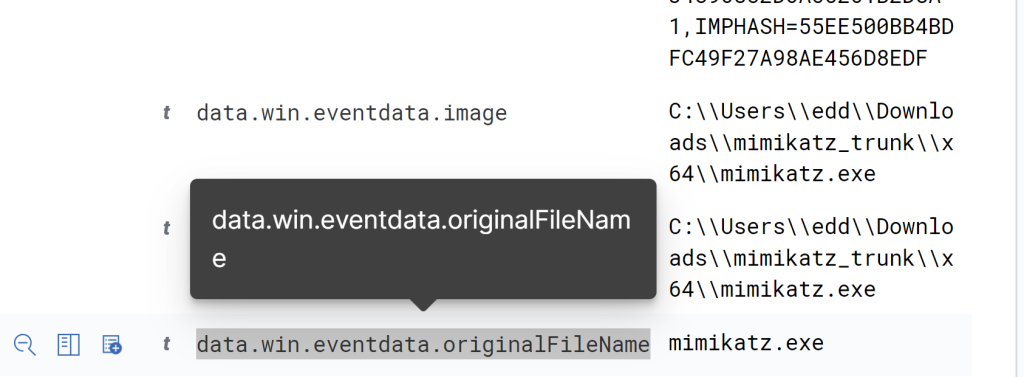
Search in the table and search for the ‘OriginalFileName’ of the Mimikatz executable. We want to create a detection rule based off this field. For example, an adversary could possible circumvent our detection rule if we wanted to detect for the image instead by changing the executable name to MimiKow instead. Now, with the originalFileName we should still be able to see the origianl file name no matter if it’s changed.
Next, within the dashboard we are going to begin creating our detection rule for Mimikatz.

The gear icon is “Management” and within it there’s ‘Rules’. Click on it.
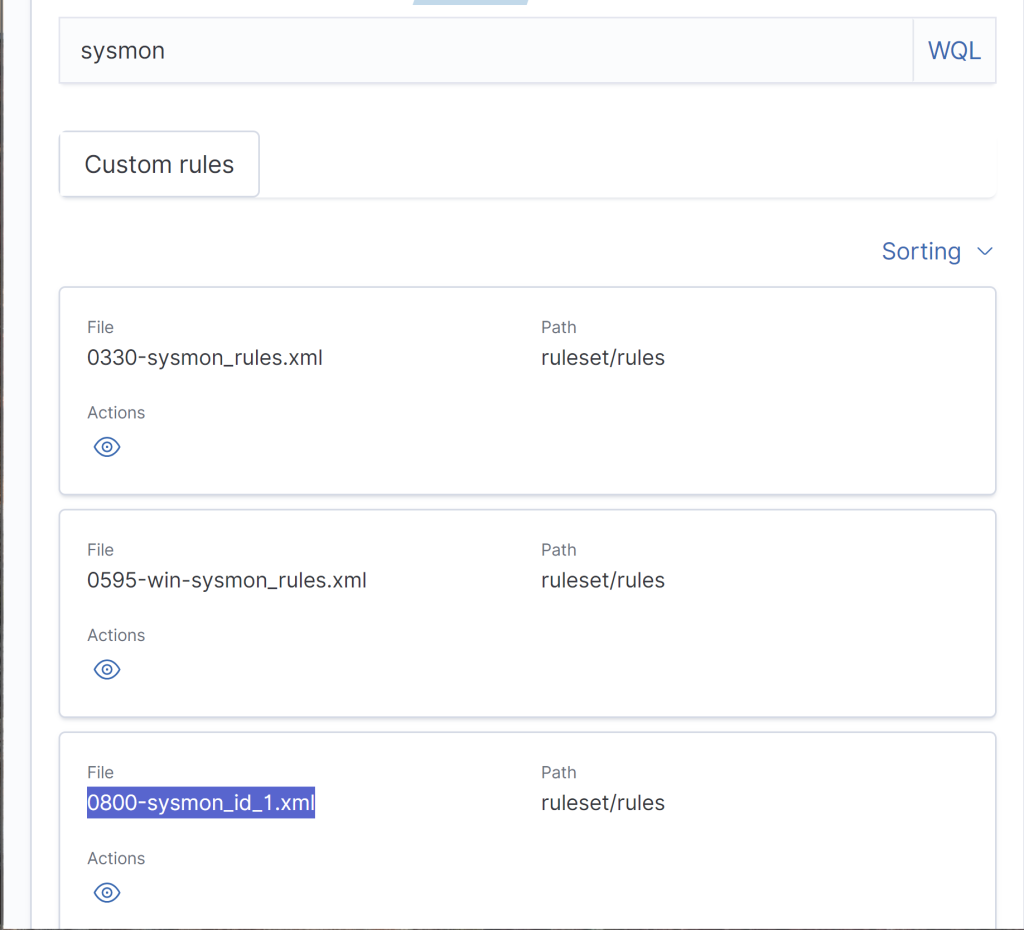
Scroll a bit down below and search for “Sysmon.” We want to look for the specific rule that contains EventID ‘1’ which is the highlighted file shown above.

Click the eye icon to take a look at the rule.
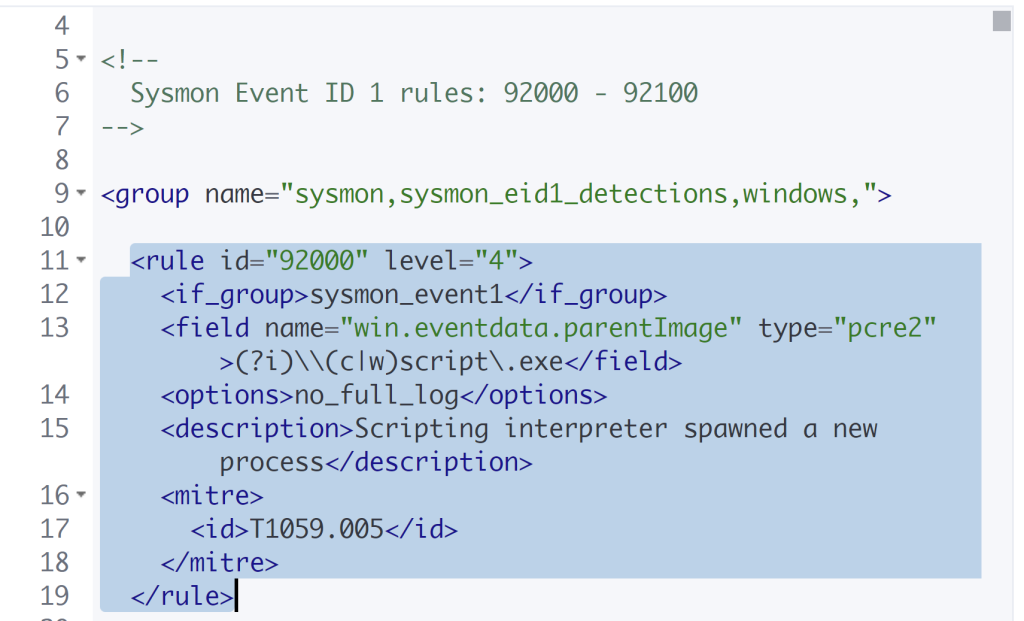
These are Sysmon rules built into Wazuh specifically built for EventID 1. We will copy one of these for reference starting with the first one shown all the way until it hits the rule syntax.
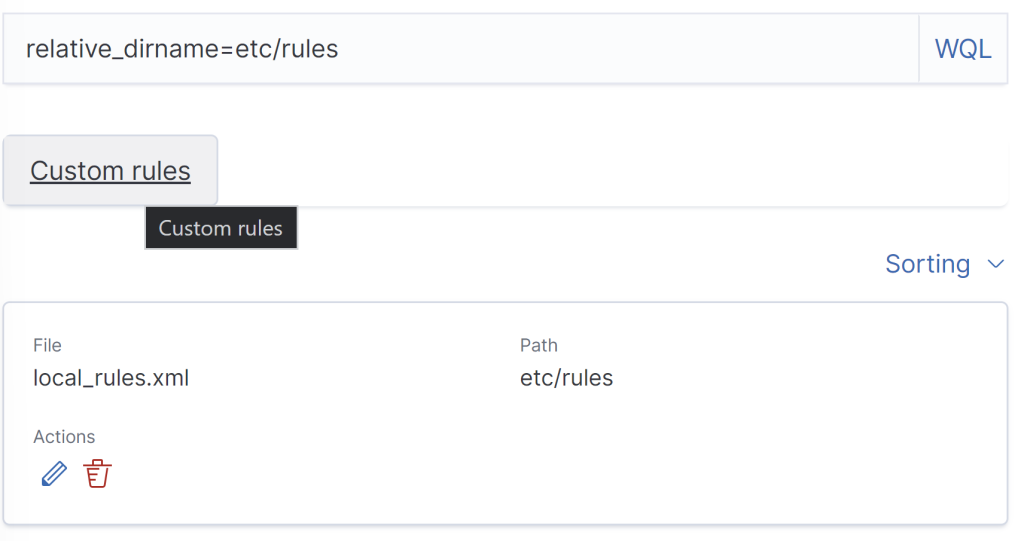
Head back and click on “Custom Rules.” Right after, click on the pencil icon.
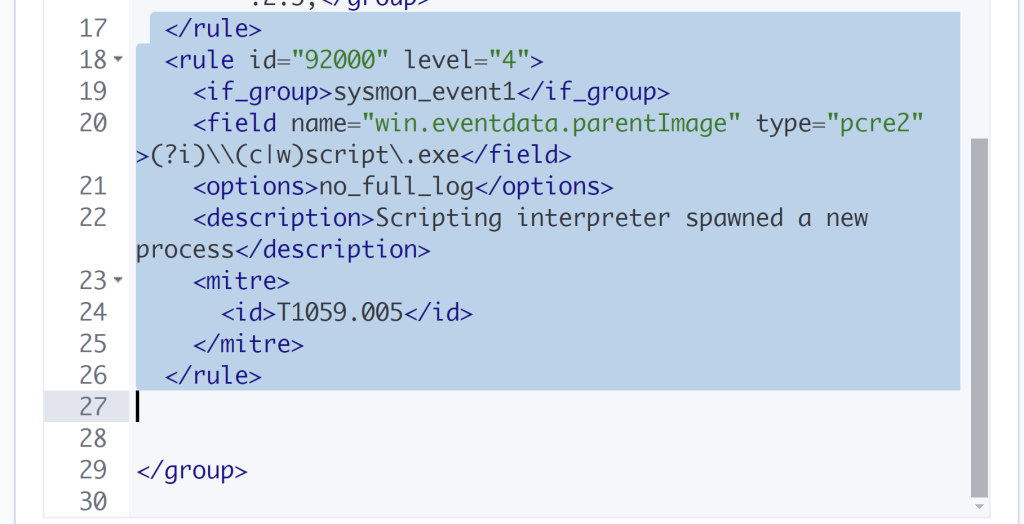
Let’s copy and paste the rule we had done previously.
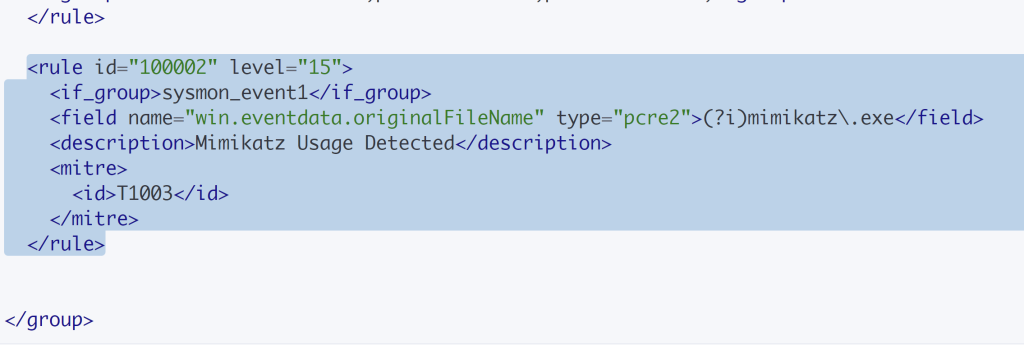
This is our new field now. Let me explain it. We changed the rule id to match with the first one above and made it the second rule. We priortized it for the heck of it to Level 15 for absolute priority as 15 is the highest it can go. We removed ‘parentImage’ with ‘originalFileName’ with no case sensitivity. If it was, the alert would never trigger. The type is essentially regex. The (?i) ‘mimikatz’ just ignoring case sensitivity for the filed value ‘mimikatz’. We remove the option ‘no full_log’ because we want all the logs. We then insert a description of our detection rule. For the ID we change it to T1003 because that is credential dumping which is what Mimikatz is known for. After that we can save and restart the manager.
To prove a point let’s head on over to our Windows 10 machine and go to the Mimikatz file path.
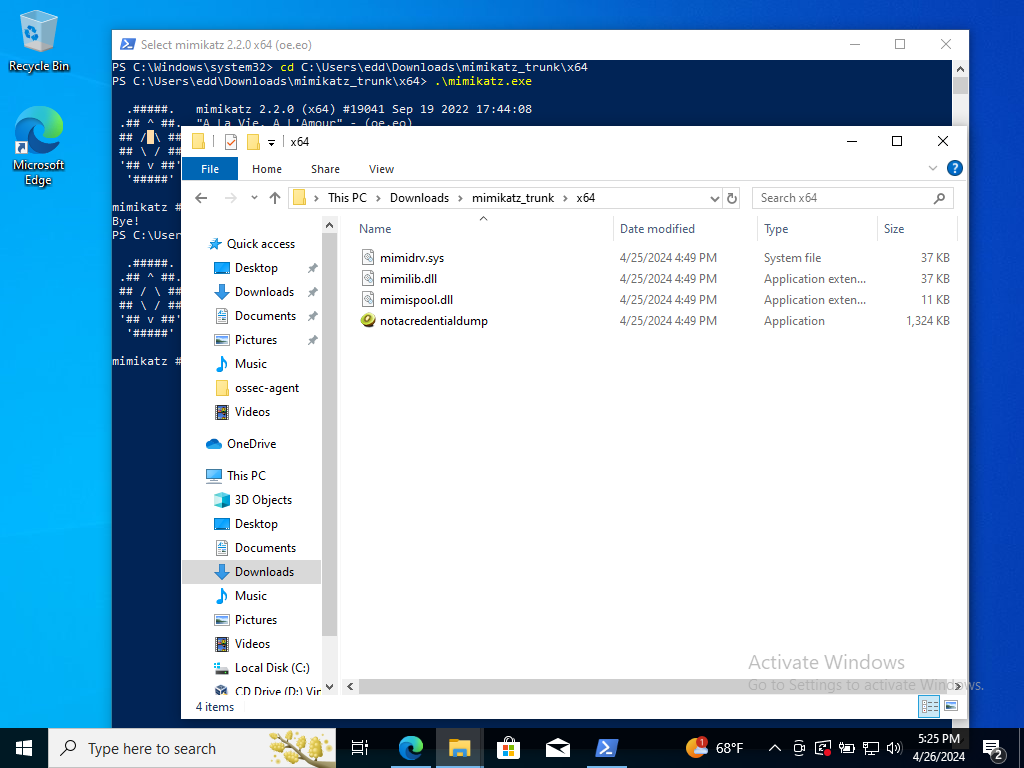
Rename the file to “notacredentialdump.” Go to the Mimikatz shell. Exit out of it. First, let’s return to our Wazuh dashboard.
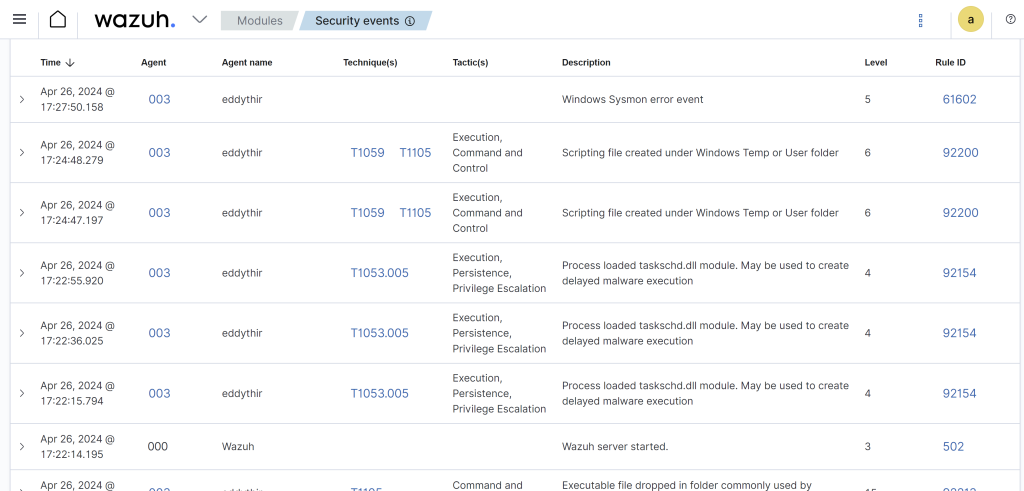
We want to make sure there isn’t any alerts on Mimikatz being triggered which we don’t which is good.
./notacredentialdump.exe
Run Mimikatz again using our obfuscated filename.

Took a couple minutes for the alert to trigger for me despite the rename. It still was able to trigger the alert because the originalFileName was changed.

Well done! We just created our first detection rule and triggered it! On top of that configured our Wazuh to ingest all logs as well as Sysmon. In the next blog post we start touching on automation using The Shuffle. This is what will truly set us apart as SOC Analysts! Remember, to stay legendary!

