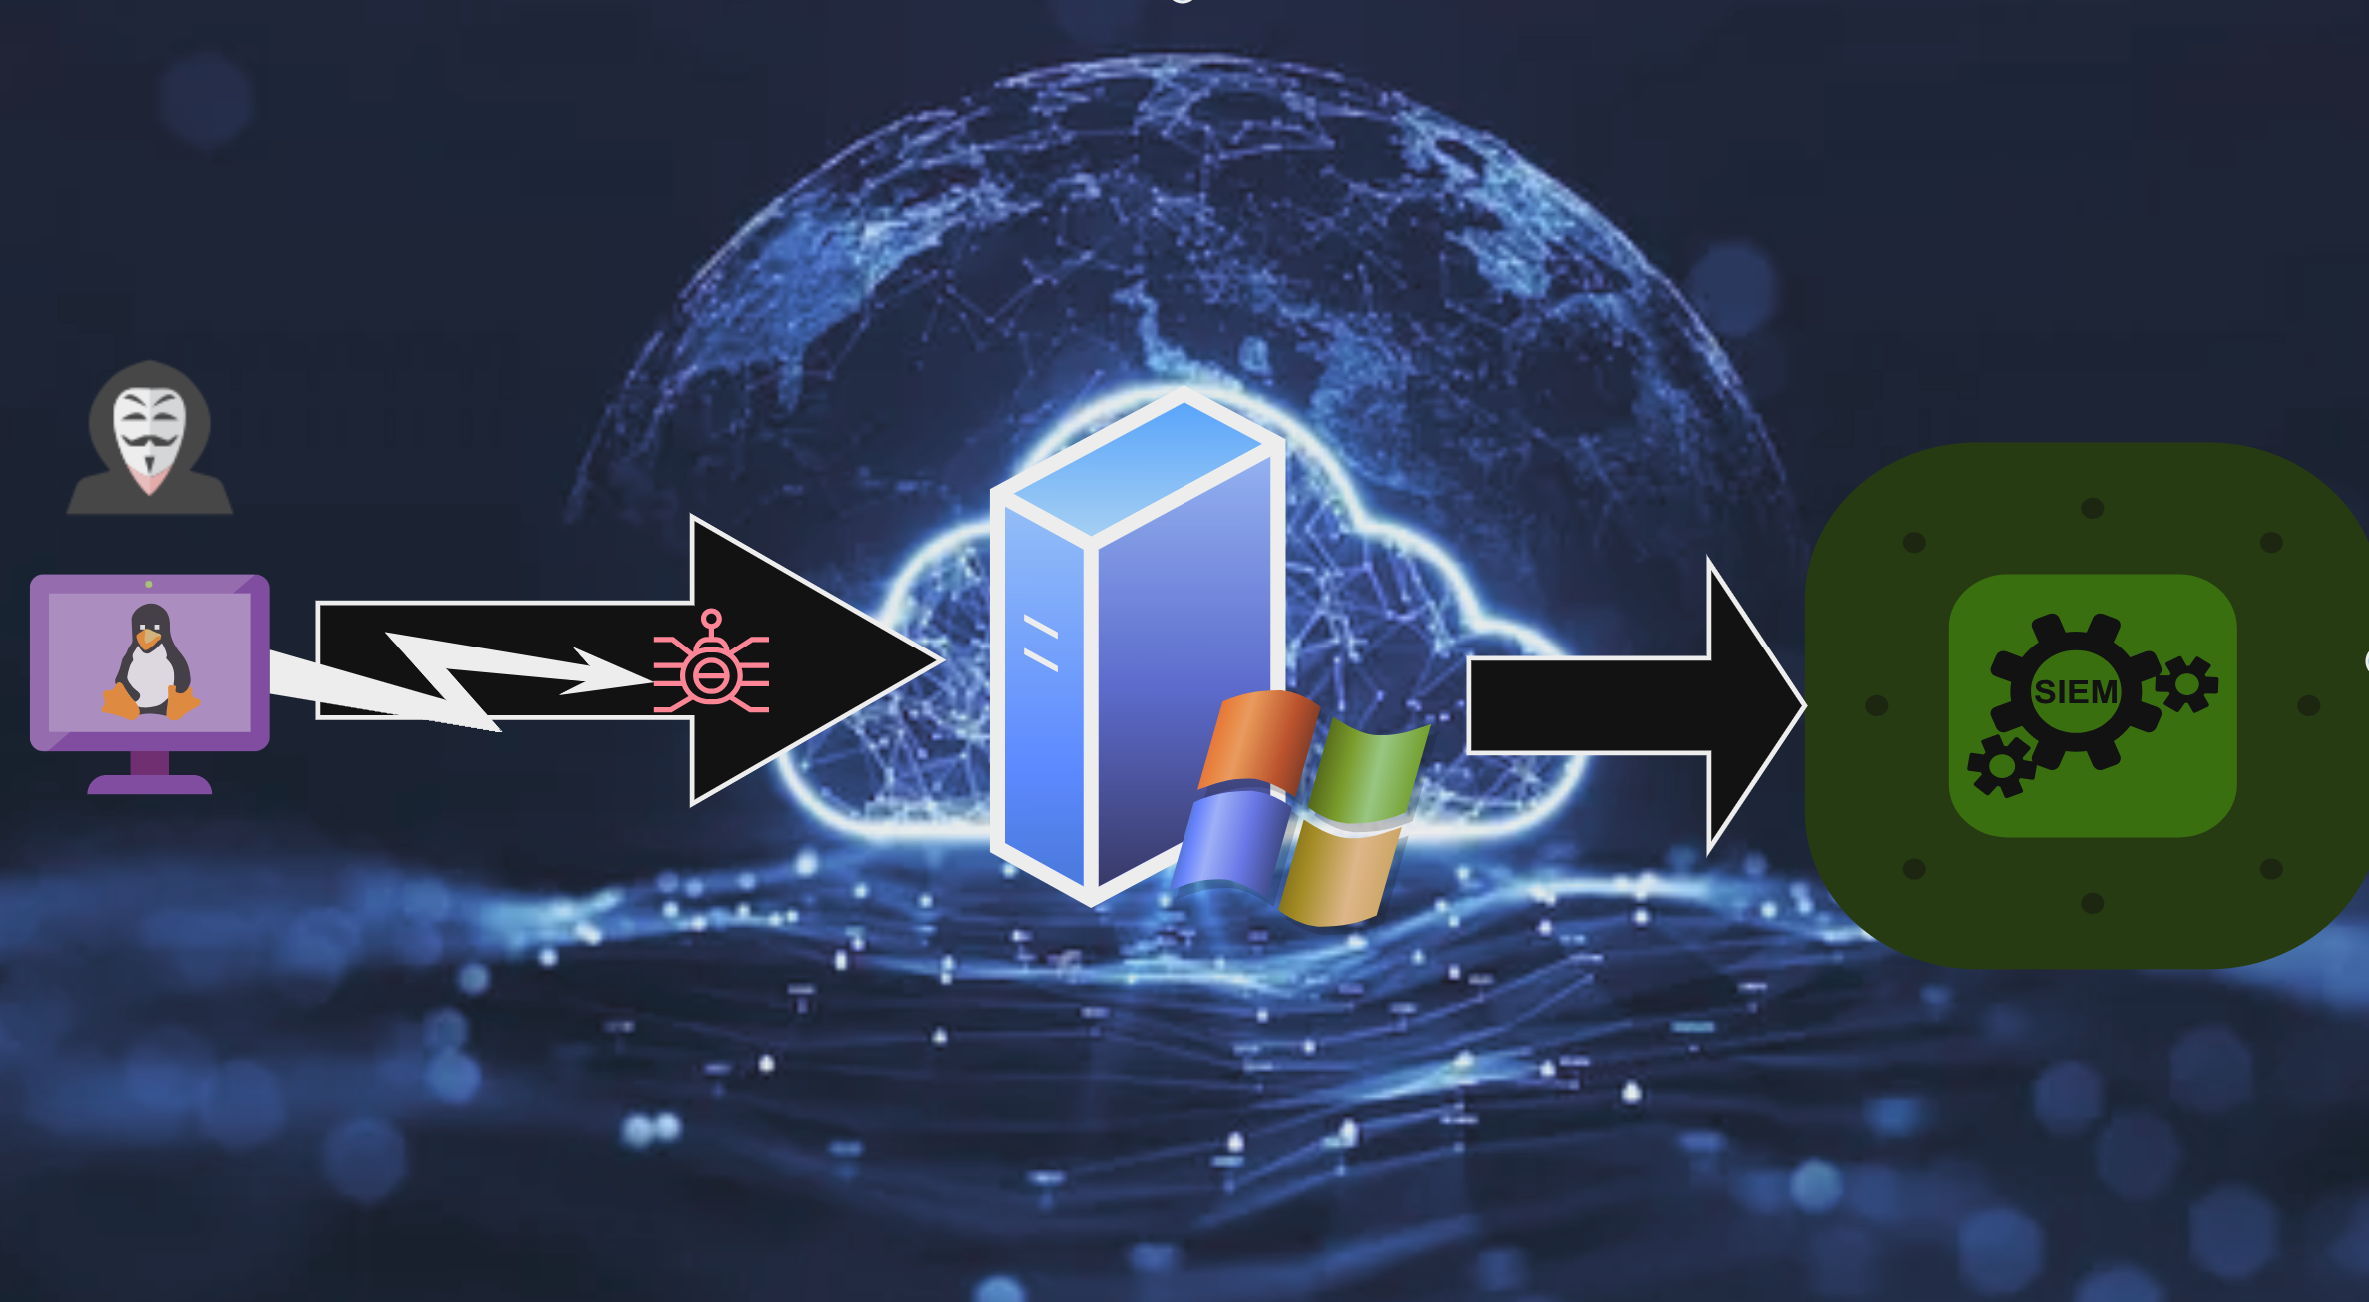
I would like to give a huge shoutout to @MyDFIR for the idea of this project!
Objective: Use our Kali Linux machine to launch a brute force attack onto our vulnerable machine to generate telemetry in Splunk. After, setup and install Atomic Red Team and use it to run tests to also, generate telemetry via Splunk.
Note: Now would be a good time to shut down both Target-Pc and ACCDC01 downgrade machines to 2gb ram if we are running on 16gb ram to be able to run all the necessary VMs at once.
We will want to turn on our Kali machine and set a static IP of 192.168.10.250 per our diagram in the first part of our project.
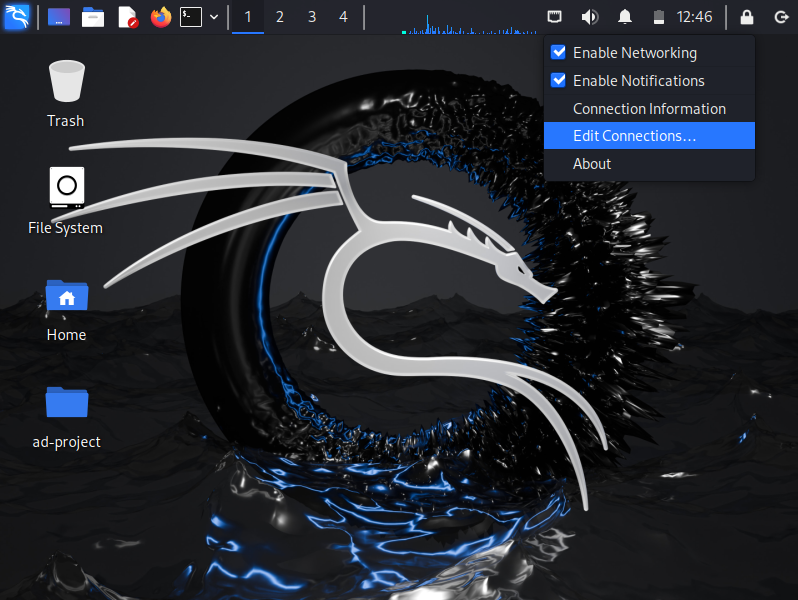
Right click on the top right where the connections icon is at and click on ‘Edit Connections’.
We will want to select the first profile which is ‘Wired Connection 1’.
We will want to click on the section of of the settings like before on our Windows machine on IPv4 settings.
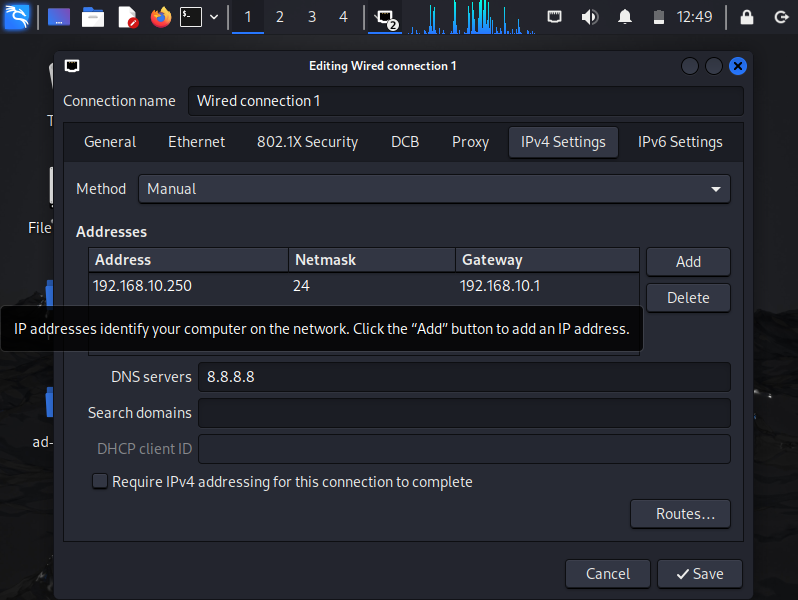
The exact configuration should be as shown above with our IP address as shown above with a netmask /24 that being an available 256 IP addresses minus two being occupied by the network and broadcast respectively. Our first address of the subnet will be used as our Gateway address. We will then proceed to set the static IP to 192.168.10.250 and the DNS servers pointing to Google’s DNS servers.
We shall proceed by opening up a terminal and typing the following command:
ip a
We shall notice the Ip address hasn’t changed all we will need to do is disconnect our machine connection to apply changes.
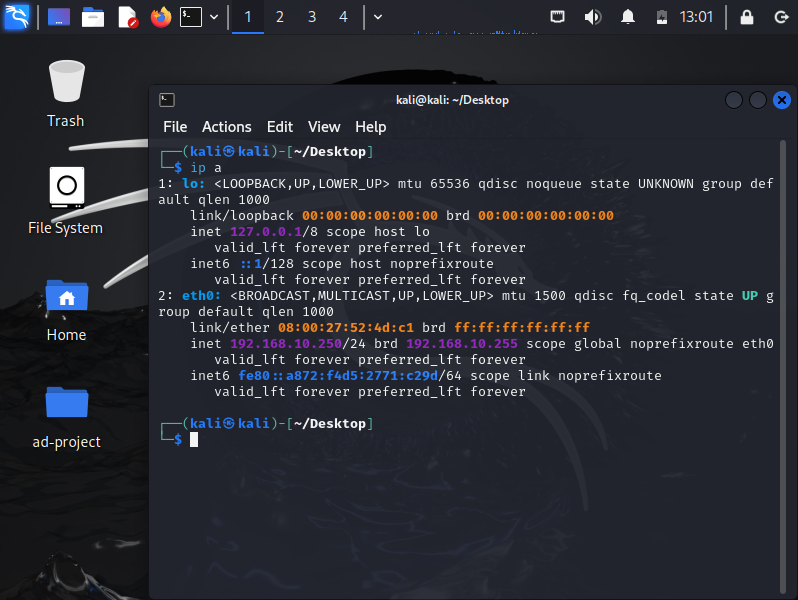
We will click our connection and click on disconnect. It should look like this right after the disconnect and reconnect. Next, let’s very our connectivity.
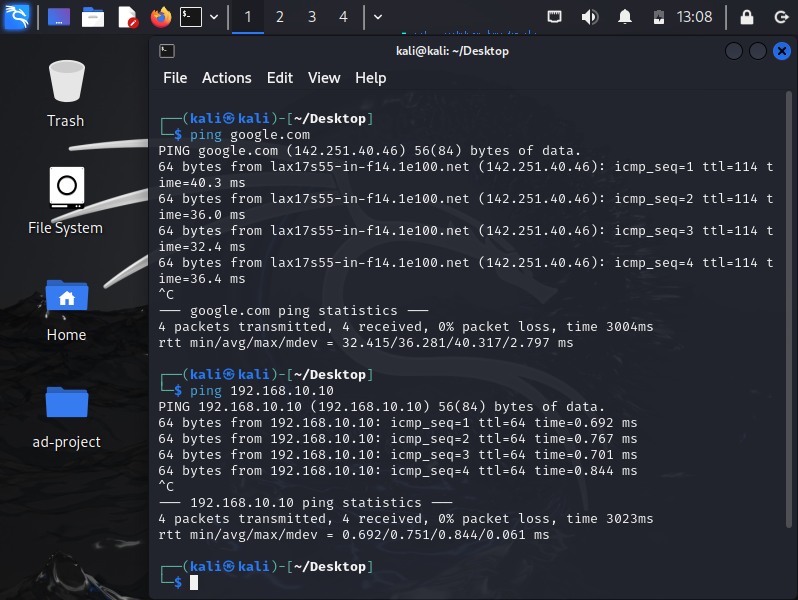
We shall go about verifying our connectivity by pinging google.com & our Splunk server.
Note: Boot up your splunk server to enable connectivity and start it up via the commands shown in part 1
We will run the following commands to simultaneously update and upgrade our machines repositories and saying yes to all prompts.
sudo apt-get update && sudo apt-get upgrade -y
It shall take a while dependent on connection speed. Once, it’s done we can begin launching our attack by creating a new directory.
mkdir ad-project
All the files we create and use will be put under this directory for organizational purposes. The tool we will be using next is crowbar.
sudo apt-get install -y crowbar
Now that we have it installed we will want to install a popular word list called ‘rockyou.’ If we change our directory:
cd /usr/share/wordlists/
Afterwards lets see what files are in the wordlists directory by running;
ls
Afterwards we will want to unzip the file ‘rockyou.txt.gz’ via:
sudo gunzip rockyou.txt.gz
If we run the ls command again in the ‘wordlists’ directory we shall see that the ‘rockyou.txt.gz’ file was unzipped to ‘rockyou.txt’.
Next, we will want to copy the rockyou.txt file onto our ad-project directory
cp rockyou.txt ~/Desktop/ad-project/
Click enter and should have copied it we will want to change into our ‘ad-project directory.
cd ~/Desktop/ad-project
We shall then proceed to see what’s inside the directory by:
ls -lh
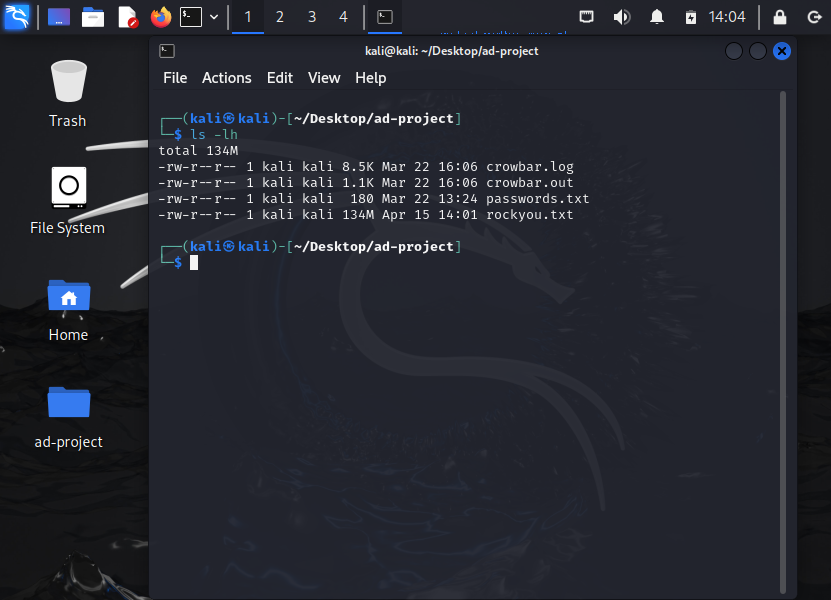
We should only see the rockyou.txt file
Note: Since I have done the project twice I have these other files please disregard we shall be creating the other files later.
We don’t want to use all the passwords in our rockyou.txt file as it would take too long and for demo purposes we will want to create our own password list for crowbar to use instead. Instead, we will use the first 20 lines by running the following command:
head -n 20 rockyou.txt
If we hit enter we shall see the first 20 lines
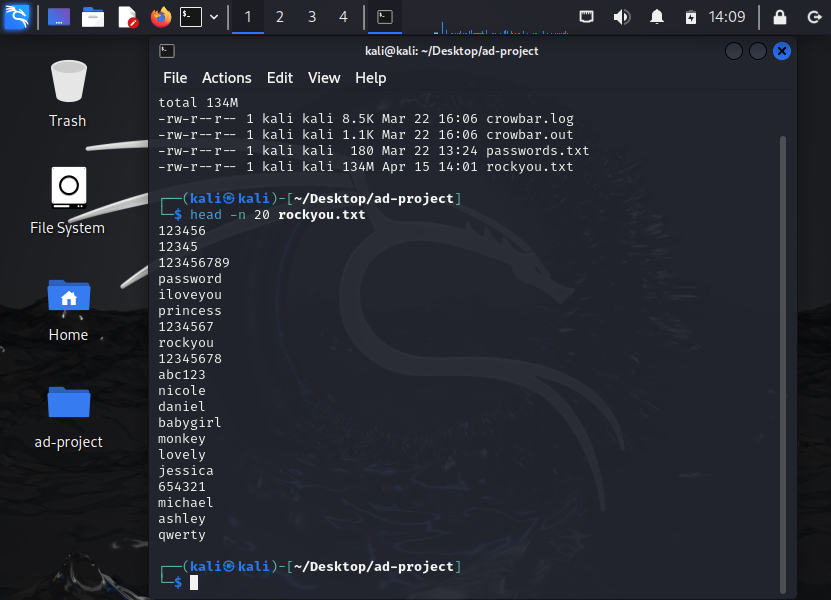
As we can see these are the first 20 most command end users use to sign in.
Next, we are going to output the first 20 commands into a file called passwords.txt via the following command:
head -n 20 rockyou.txt > passwords.txt
We should see the file created by typing ls command
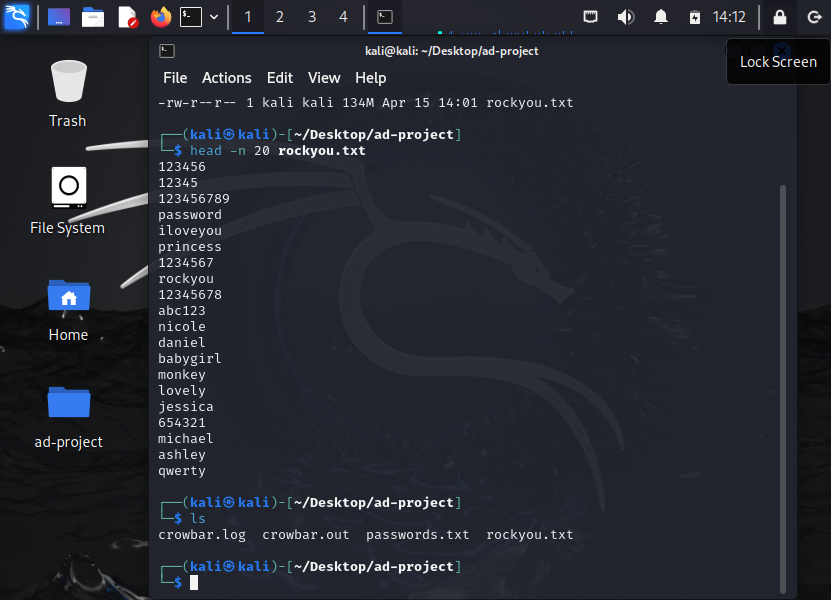
We can open it up by concatenate the file by running:
cat passwords.txt
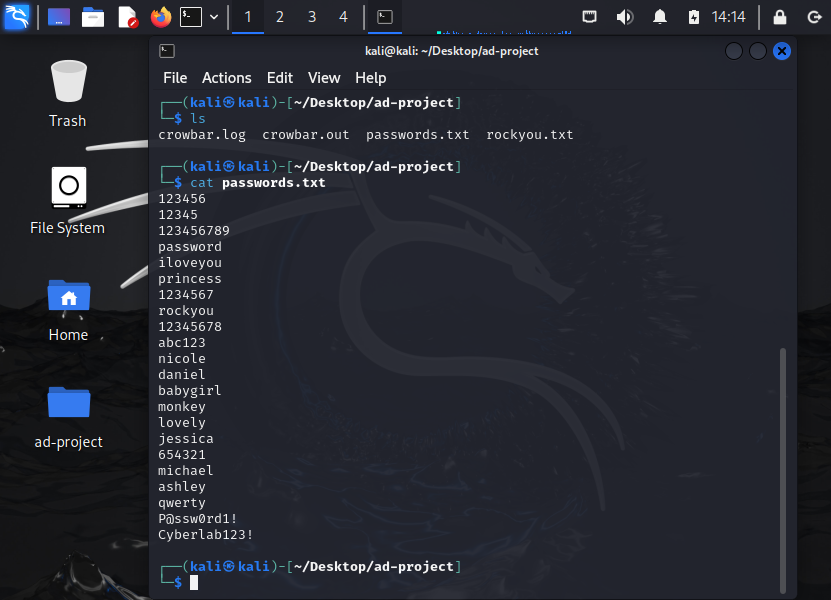
We shall see the first 20 lines we copied over and if you noticed I also added the password to my “TARGET-PC” machine over as well.
We will have it target a specific password by using the text editor nano.
nano password.txt
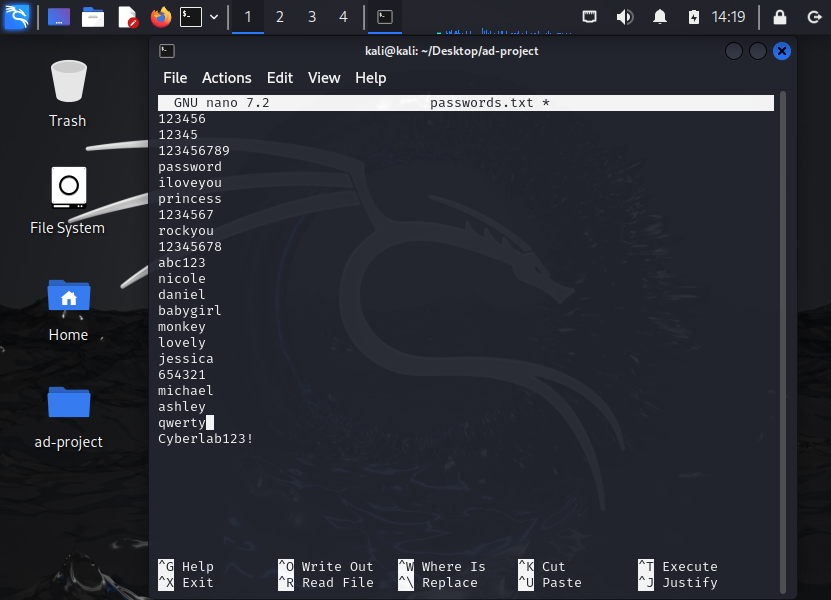
We shall scroll down and adding our TARGET-PC password and save it via the commands shown below.
If we cat passwords.txt again we should be able to see the newly added password in the file and we should be good to go!
Next, we will want to enable RDP in our TARGET-PC machine.
On our windows TARGET machine we will begin to enable RDP by:
Search in search bar “PC”> Click Properties>Advanced system settings> Login via administrator credentials
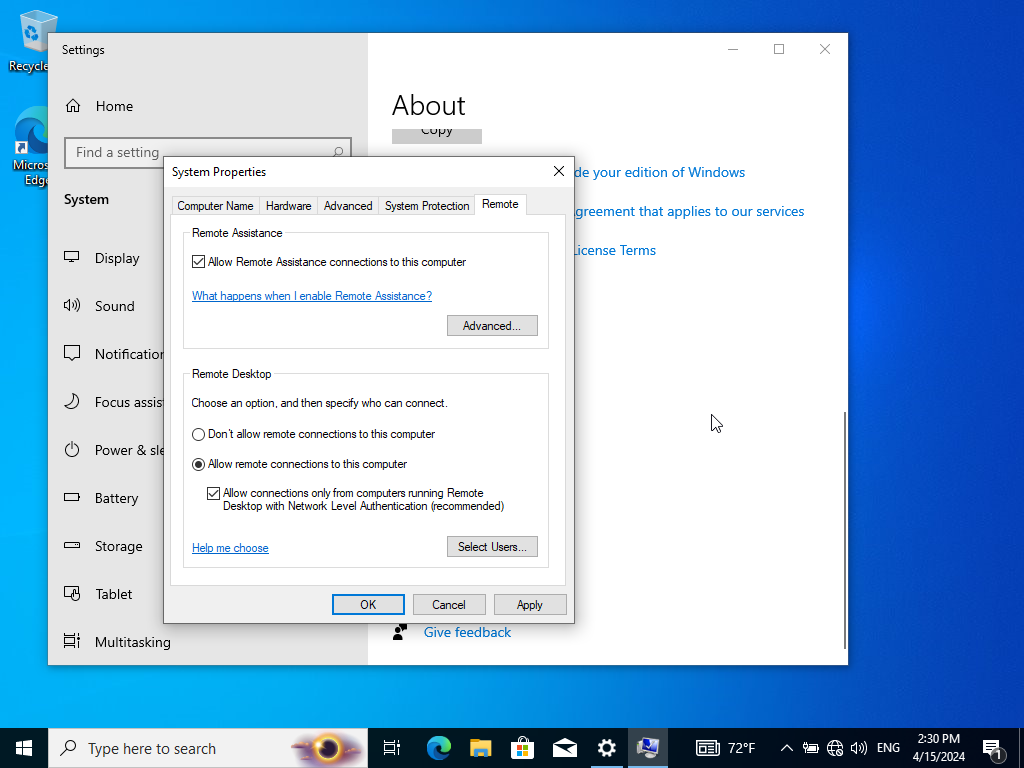
Click on top right on Remote and click on “Allow remote connections to this computer”. Afterwards, click on “Select Users” and “Add” right after.
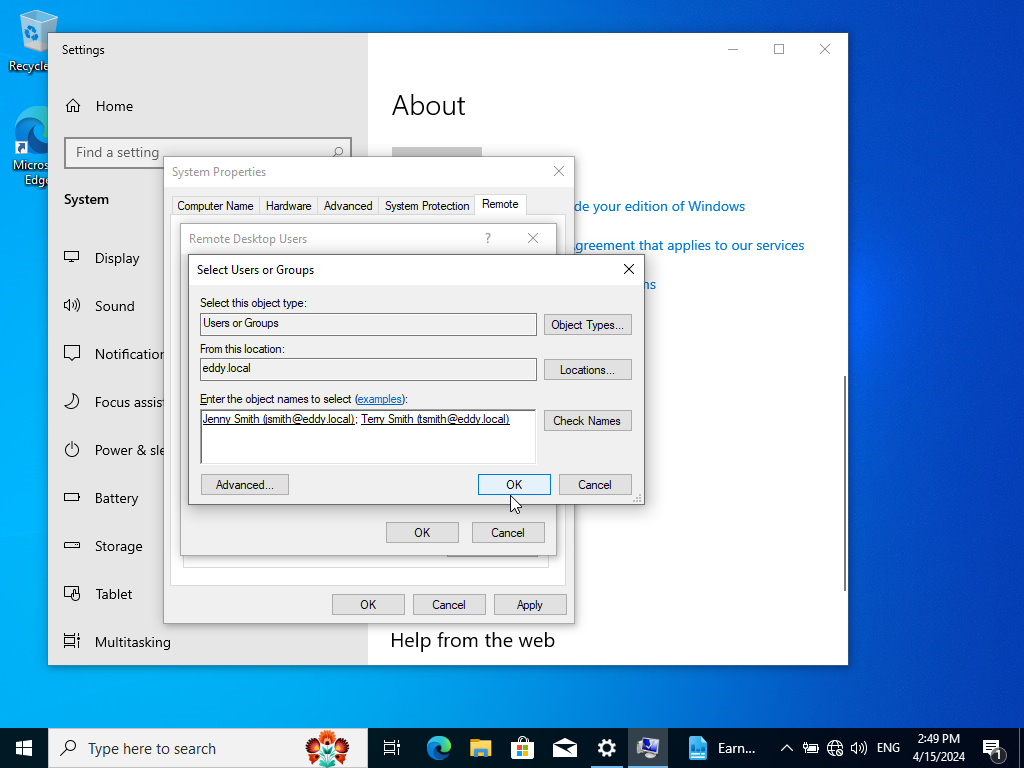
Note: Have our Windows Server 22 running. So our users and domain may appear.
We will want to add our users Jenny and Terry smith by typing ‘jsmith’ & ‘tsmith’ and clicking check names it should automatically add the rest of their info if it was indeed setup correctly. It should look like how it’s shown above. Next, click OK. Click on ‘Apply’. Then click OK to close it out and we have now enabled RDP.
Lets go back to our Linux machine to begin launching our brute force attack using the crowbar tool. We may use crowbar -h to help explain the command abbreviations. Next, run the following command:
crowbar -b rdp -u tsmith -C passwords.txt -s 192.168.10.100/32
-b ; target service to attack
-u; static username to target
-C; the specific password file wordlist to use
-s; specific server to target
/32 to only target that specific IP only since it’s in the /32 subnet.
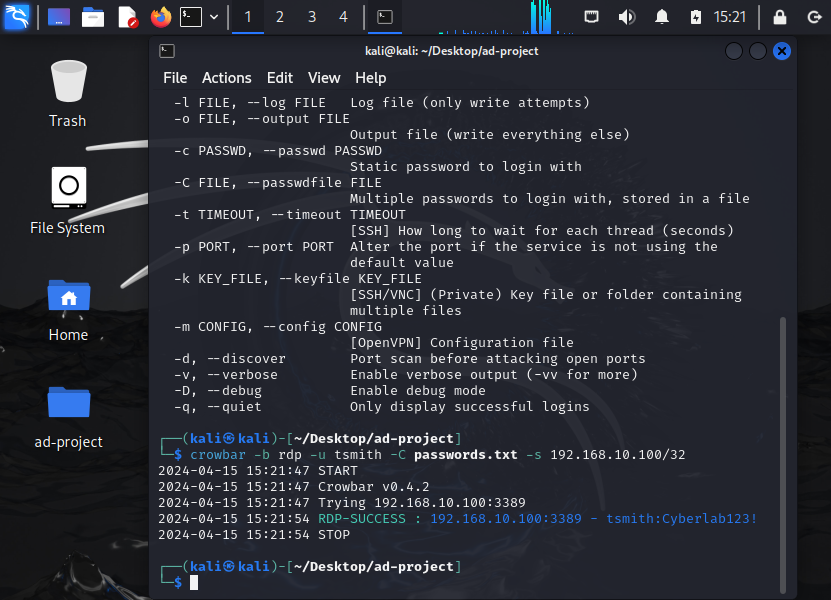
It should have successfully been able to brute force as shown above.
We now have the necessary telemetry to go over to Splunk and inspect the data generated.
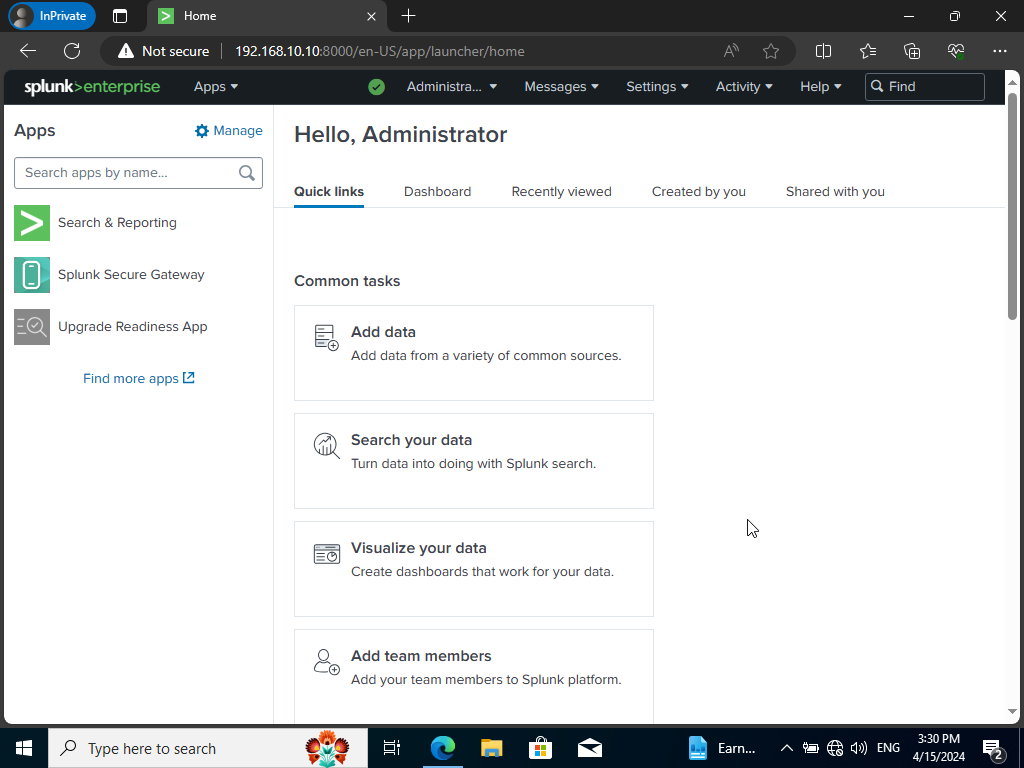
We will be using our Splunk server IP followed by the default port 8000 to login in via our credentials we should have saved. After, we have logged in successfully let’s click on ‘Search & Reporting’. In the search bar type:
index=endpoint tsmith
In my case I will render about 23 results.
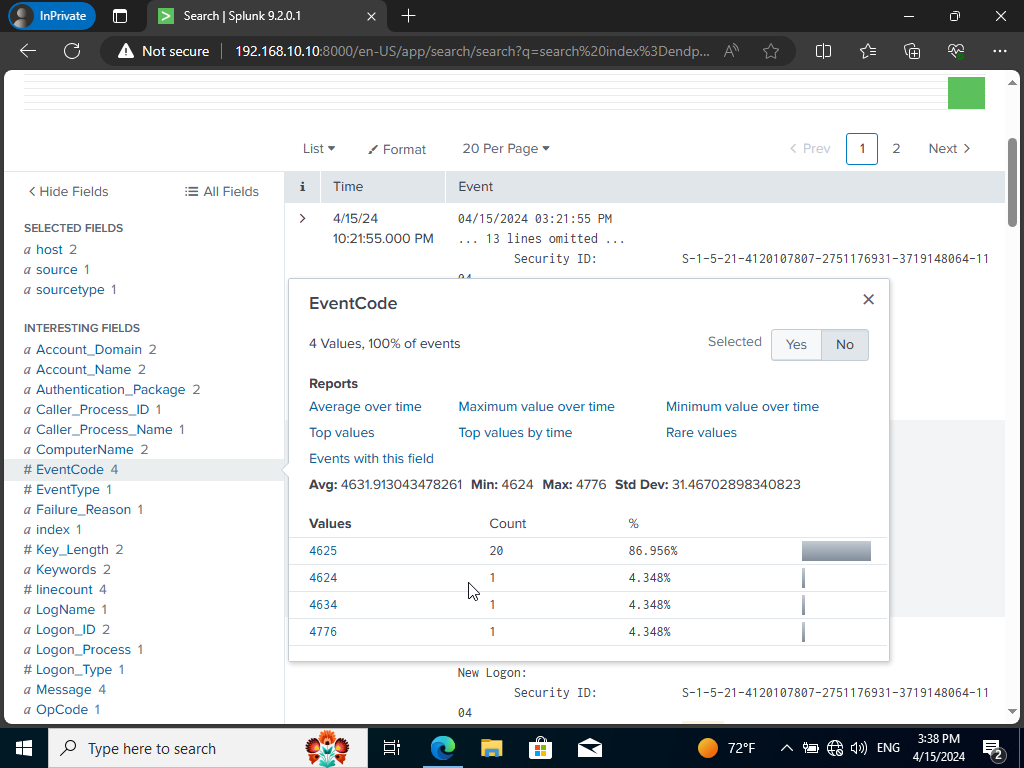
If hover over to ‘EventCode’ and see the EventIDs generated we shall see 4 created. If we were to search up what EventID 4625 means; An account failed to logon. Which means there were 20 attempts to logon. If you remember it was from our crowbar tool attempting the 20 passwords before nailing our actual password at the end! We can specify even further;
index=endpoint tsmith EventCode=4625
Which will specify the search result to only EventID 4625 which will only show the 20 events.
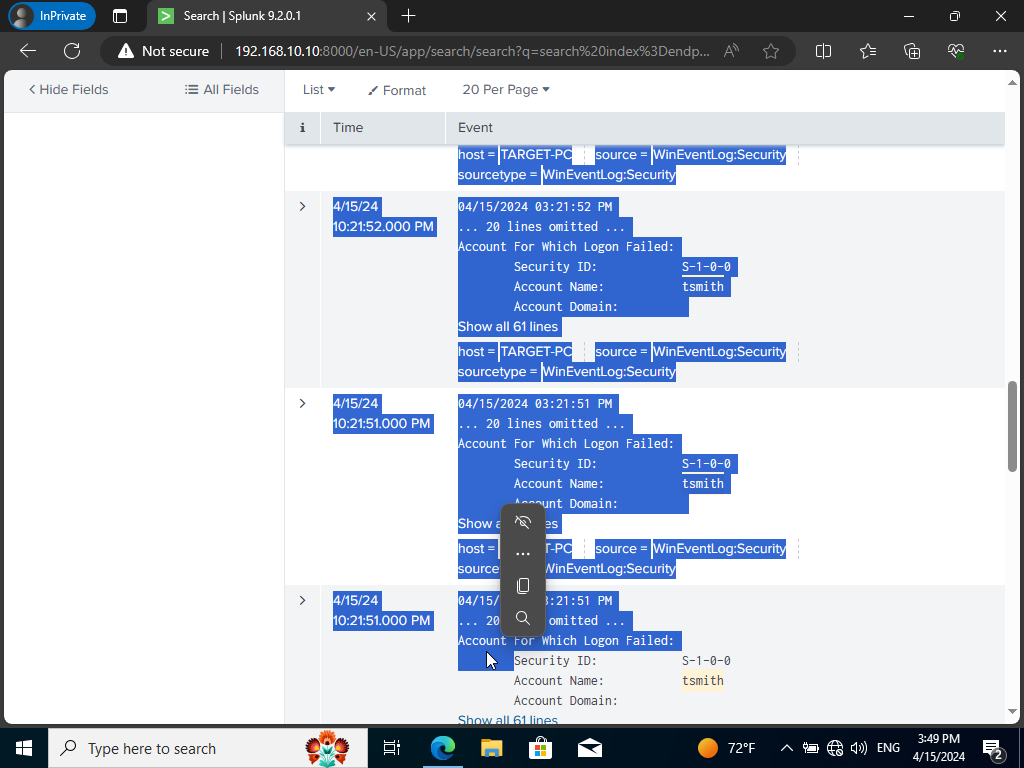
If we look at the time we can see that it’s happening in a matter of seconds. A clear indicator of a brute force attack.
Let’s change up our search from 4625 to 4624.
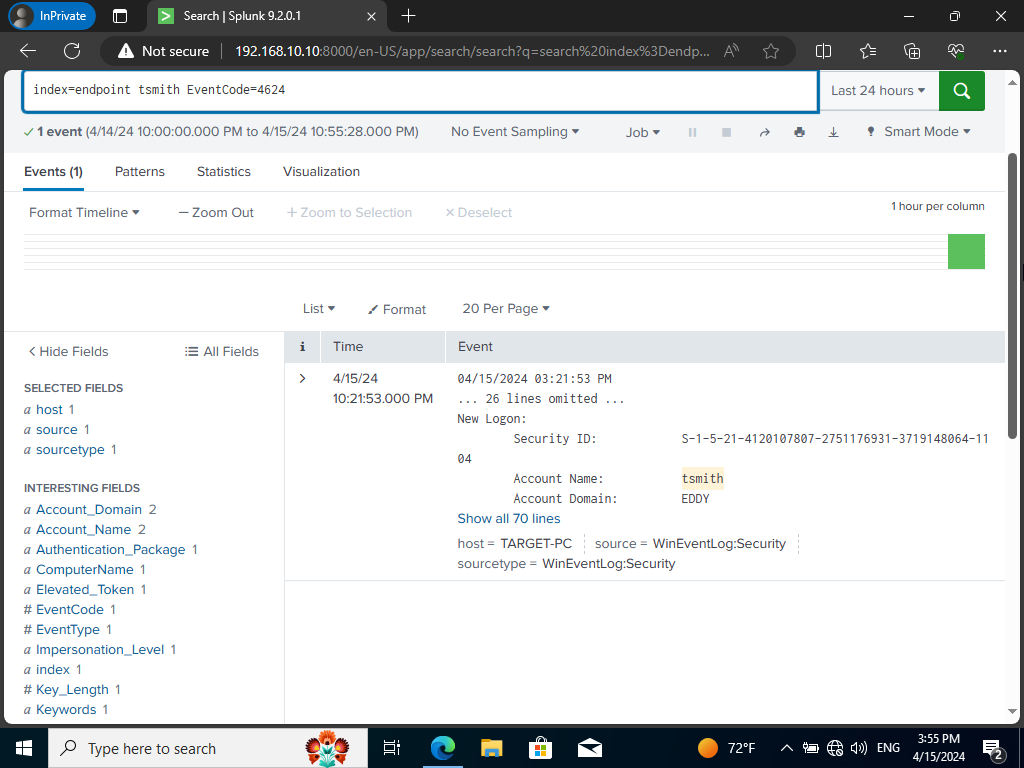
We shall see only one event. If we search up what EventID 4624. We will find out it means account successfully logged on.
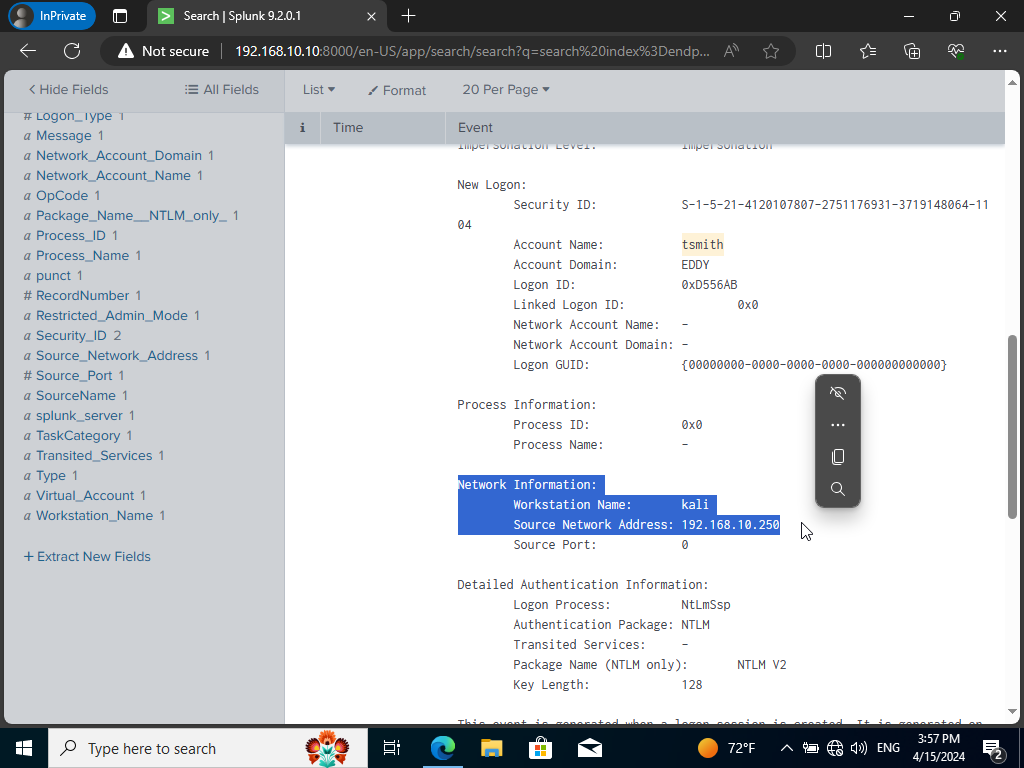
We can expand the event by clicking on ‘show all 70 lines’. This indeed shows that our Kali machine was involved alongside it’s IP address. We will be able to view that our user tsmith was the victim of the attack as well 😉
Let’s go on now to installing Atomic Red Team to begin testing out different telemetry for our Splunk server. Open powershell using admin privileges.
Set-ExecutionPolicy Bypass CurrentUser
Type ‘y’ right after.
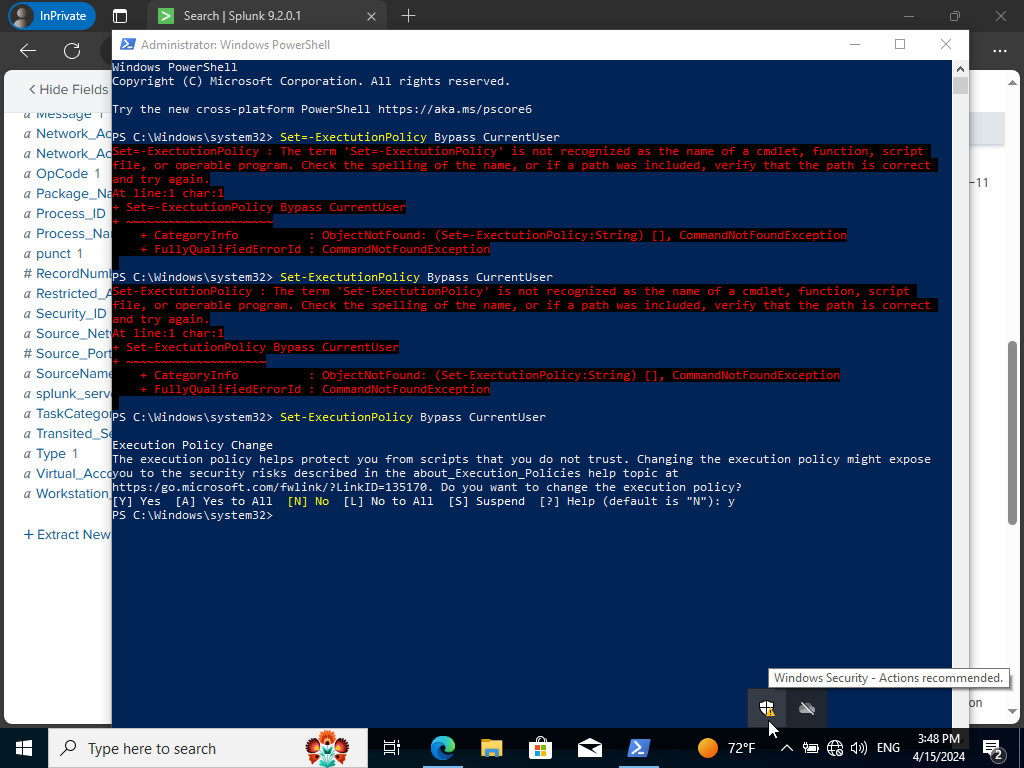
We shall click on the up arrow and click on Windows Security.
Click on ‘Virus & threat protection’> Manage Settings> Scroll Down & Click ‘Add or remove exclusion’> Yes> Add an exclusion> Folder> C:\ Drive
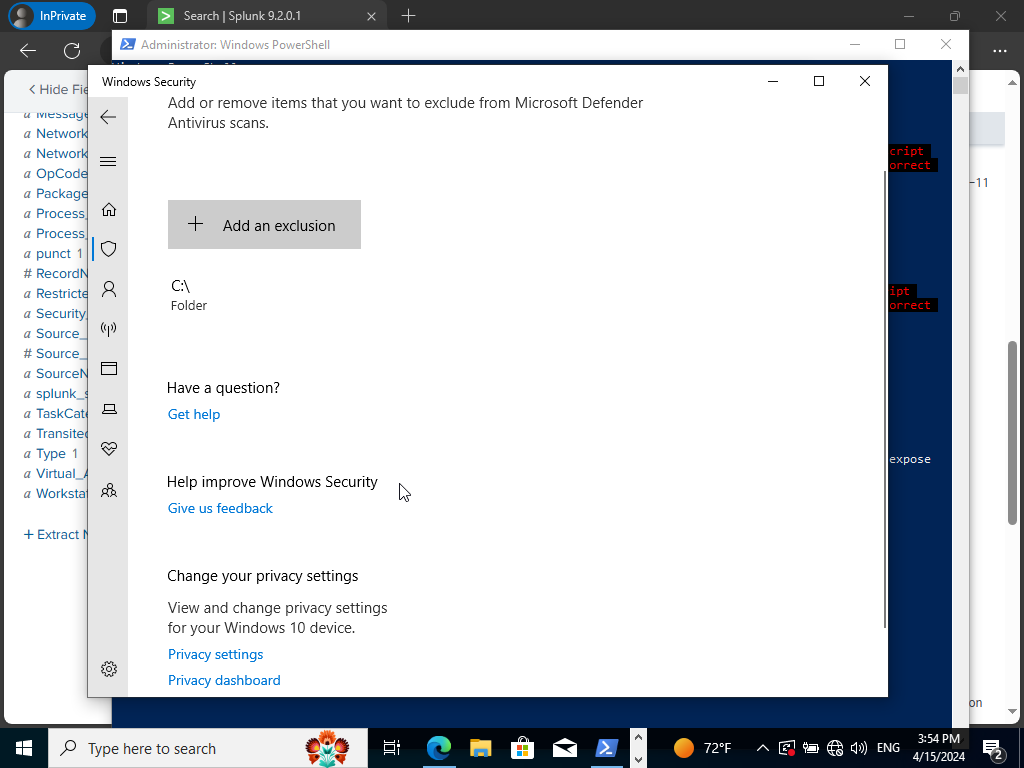
It should look as shown above. Now we will be allowed to install Atomic Red Team! This github link will allow you to copy and paste the appropriate Powershell command. Scroll down until you see ‘Install Execution Framework and Atomics Folder’ copy the following command:
IEX (IWR ‘https://raw.githubusercontent.com/redcanaryco/invoke-atomicredteam/master/install-atomicredteam.ps1’ -UseBasicParsing);
Install-AtomicRedTeam -getAtomics
Type ‘y’ when prompted to continue installation.
Once, finished installing let’s head over to our C:\ drive and head over to our AtomicsRedTeam folder>atomics
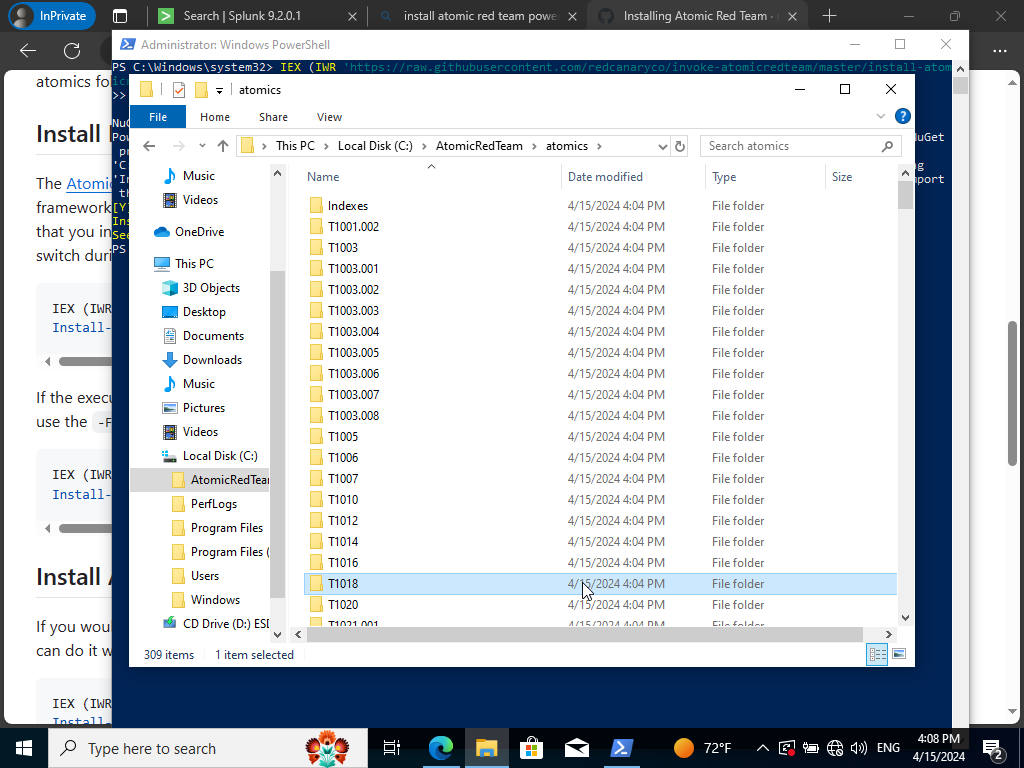
We should see a ton of TechniqueIDs as shown above. Which reference the MITRE Att&ck Framework.
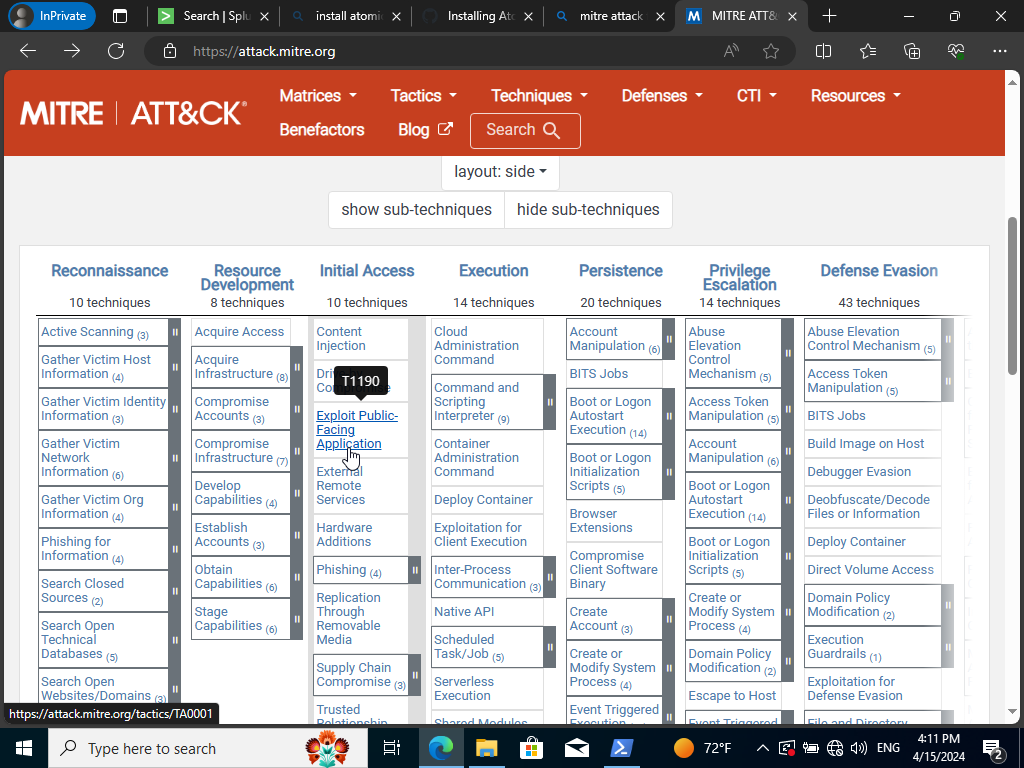
We can hover to “Exploit Public-Facing Application”. If, we wanted to test out that certain technique we can go over to it’s specific folder ‘T190’. It doesn’t appear to be any we can try a different one instead.
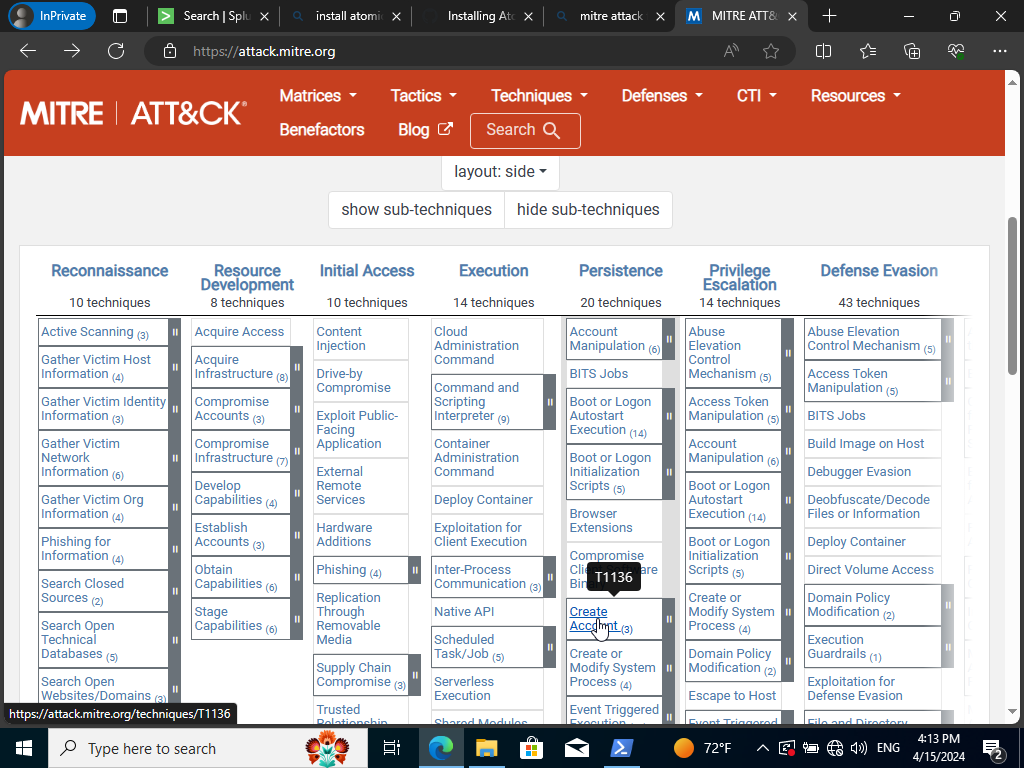
We can hover right under Persistence and hover right under “Create Account”. It’s labelled as T1136. If we go back to our Atomics directory and scroll looking for it we shall find it!
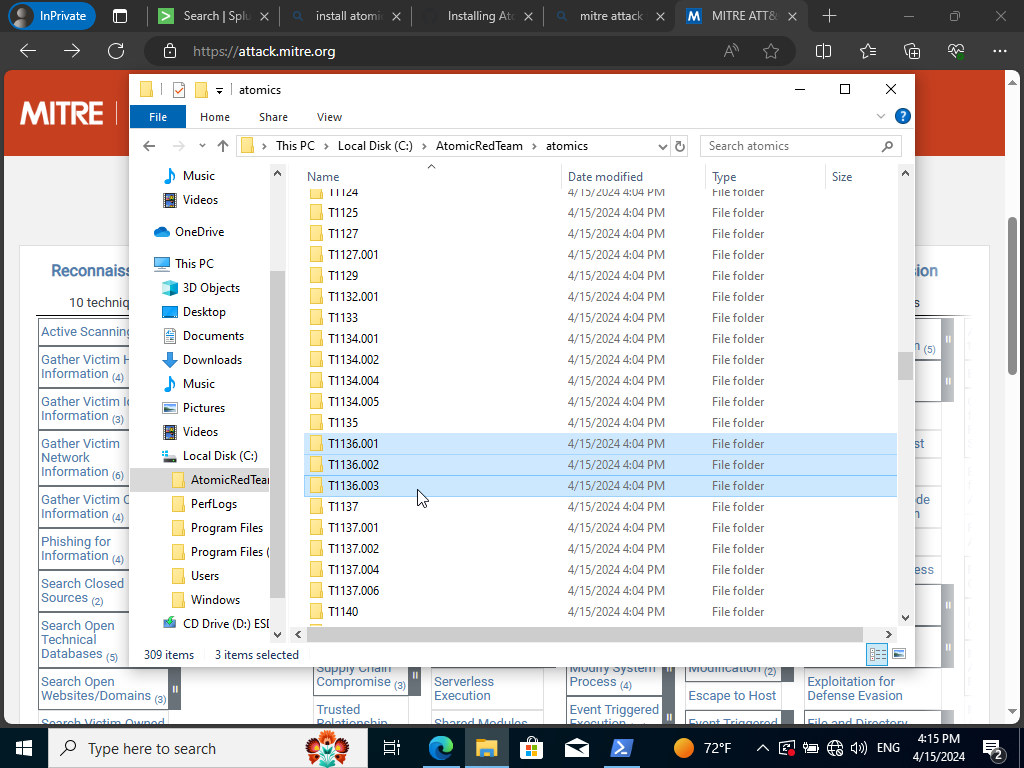
We highlighted there’s three different types of techniques that are eligible to be tested. If we click on our Mitre Att&ck Framework technique we shall one is a local account attack, second being a domain attack, and last being a cloud attack technique. We shall test out the local account attack technique first by running the following command in Powershell:
Invoke-AtomicTest T1136.001
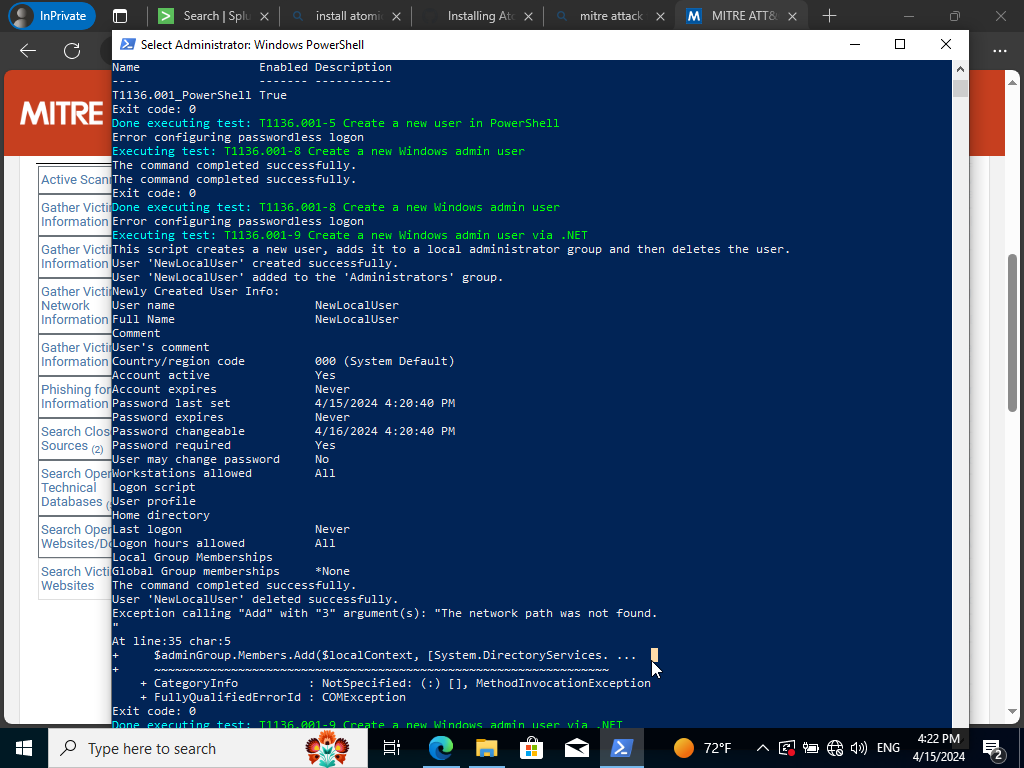
We shall see that our test technique created telemetry with the user ‘NewLocalUser’ being used. We can now go into Splunk and search specifically for the user ‘NewLocalUser’ even generated.
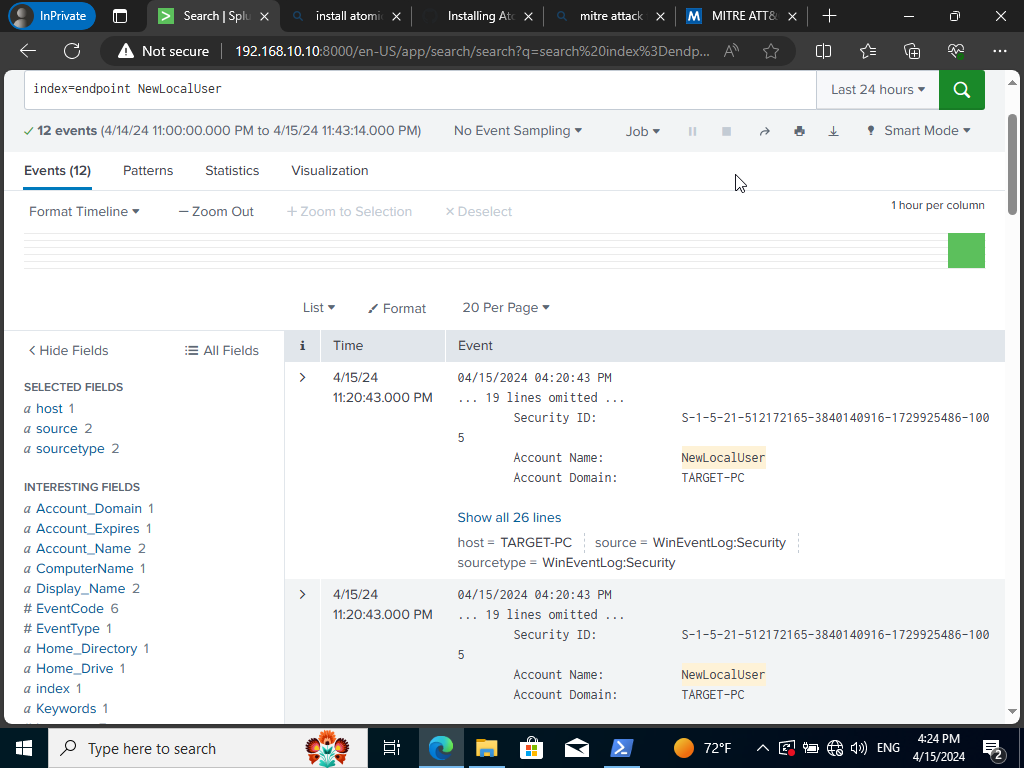
We might or might not be able to generate telemetry. In my case I was able to generate the logs for this specific attack technique but, just in case you may have not you might be blind to this specific attack and would need to prepare for this specific attack. Mitre Att&ck framework helps in finding gaps in your organization’s security posture and help improve upon by next time being vigilant on this specific type of attack.
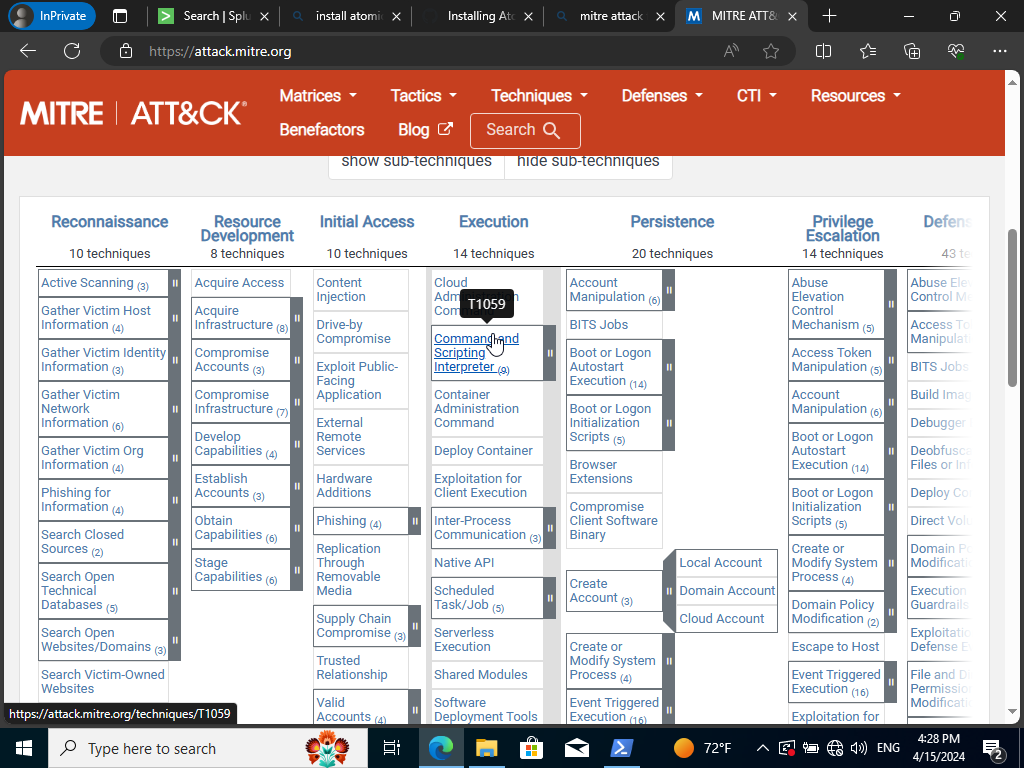
“We will hover now right under the ‘Execution’ section and look for the attack techniqueID T1059.”We will hover now right under the ‘Execution’ section and look for “Command and Scripting Interpreter” the attack techniqueID T1059.
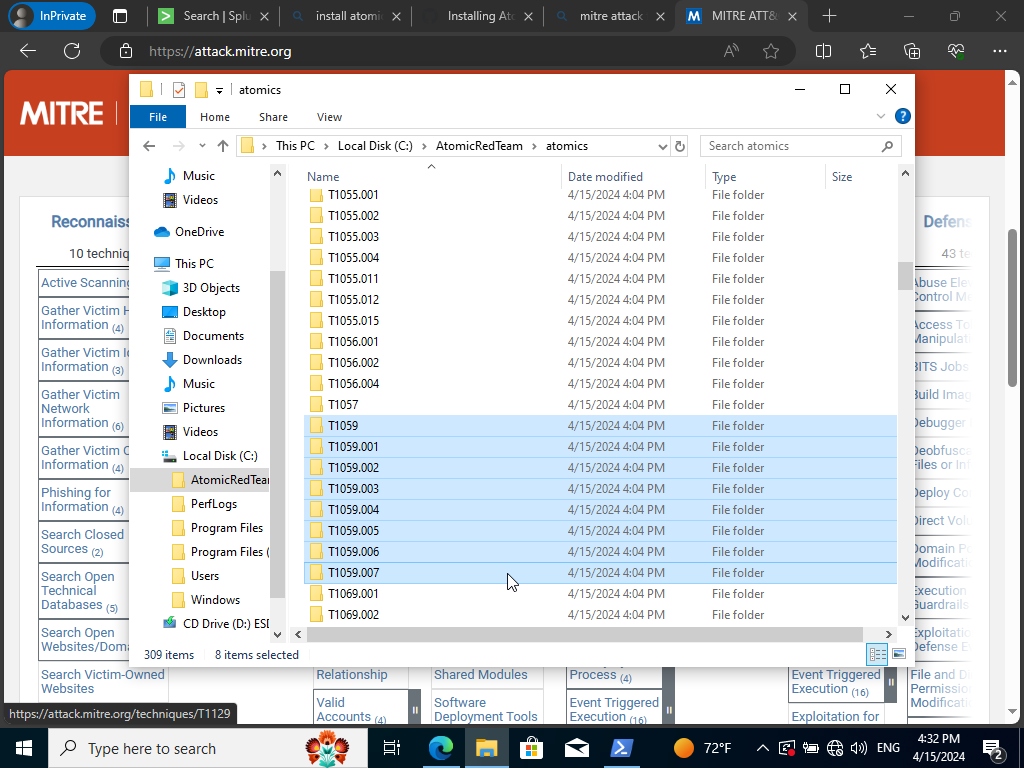
If we go into our Atomics directory and search for it we should we have 9 techniques to choose from.
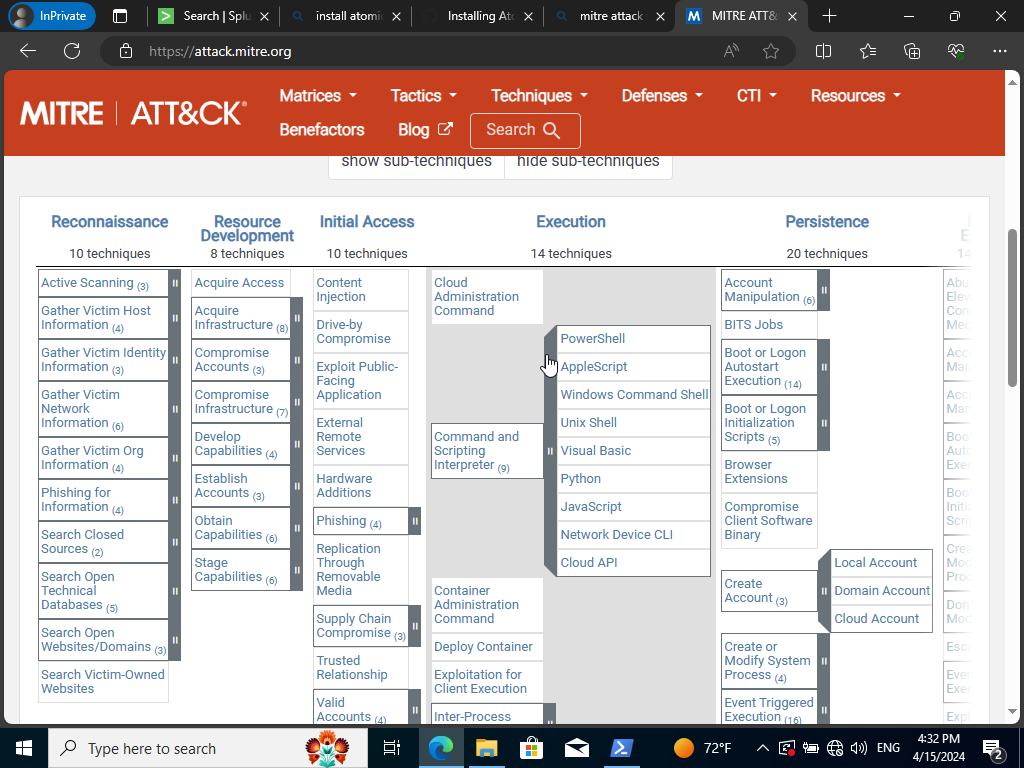
If we expand it we can see that there is quite of few script languages we can choose from to test. We are going to choose Powershell since we’re already there. Let’s open it back up and run the following command:
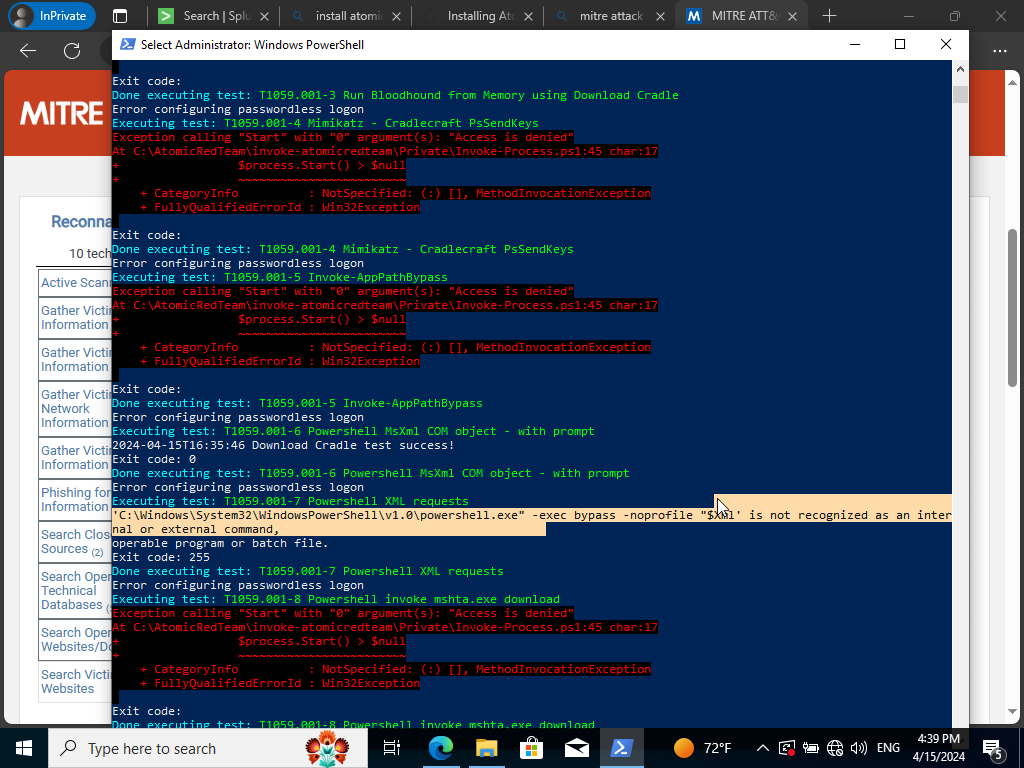
Invoke-AtomicTest T1059.001
Here is something specific we may search in Splunk by searching up ‘powershell’ and see what kind of telemetry it generates and filtering the time to the ‘Last 15 minutes’. In my case I let it do it’s thing for a while and had only 1 event within the last 60 minutes.
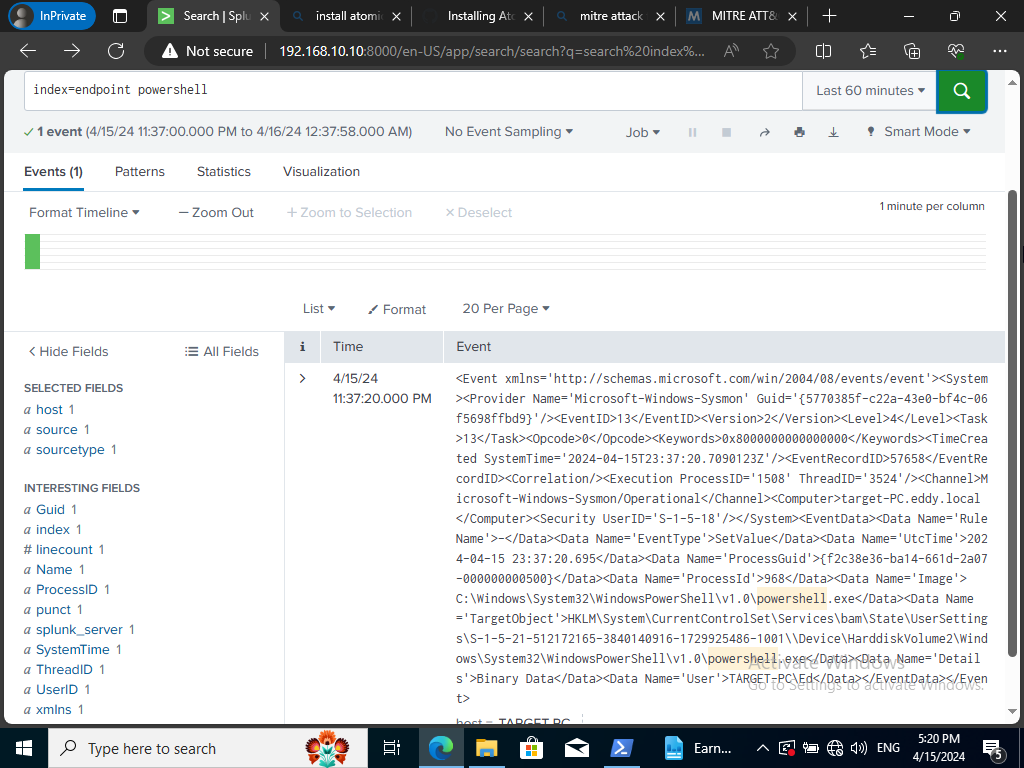
It was the -exec bypass I was looking for so, I queried for a more specific search
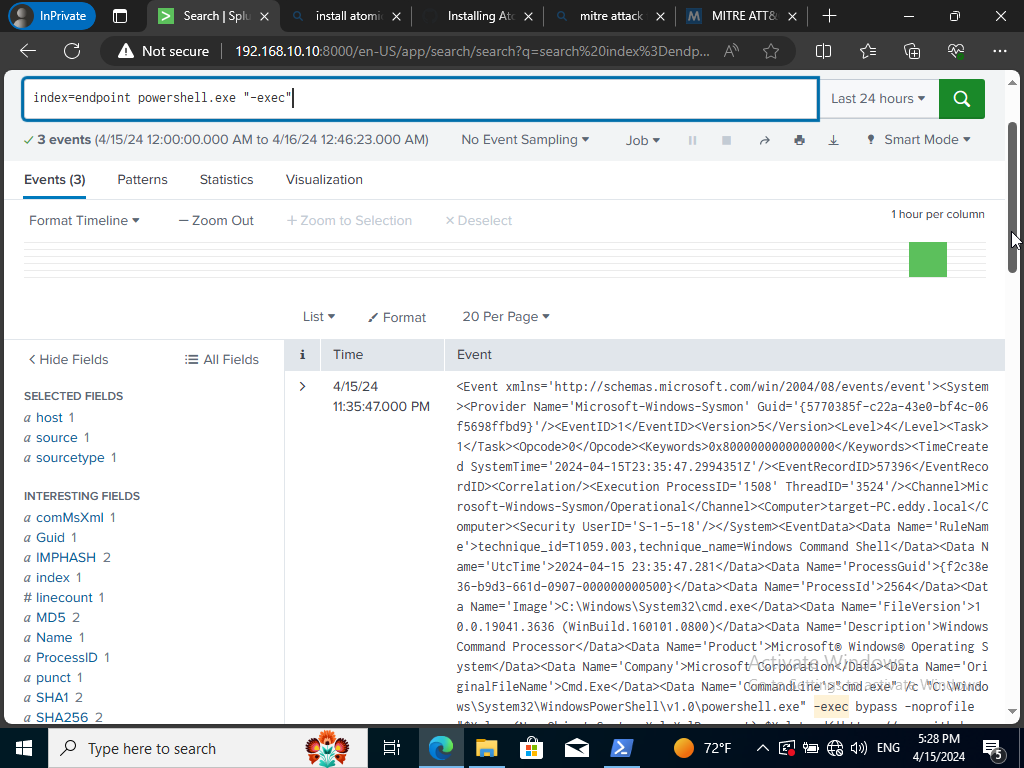
Now I am able to see the bypass no profile script being implemented now using the query above. We can create an alert to detect for this activity in the future since we were having issues detecting it at first.
This is why using the Mitre Att&ck Framework and as many resource as possible to test your environment’s security posture. Being able to detect as many positive alerts in your environment is key to threat prevention! Feel free to play around with this environment! Make sure to take snapshots just in case you break your machine! Real learning is done based off of breaking things! Next time I will be covering more on Active Directory and creating telemetry based off my actions. I also want to emulate a variety of attacks on my vulnerable machine to detect on them. Afterwards creating Detection and Response rules based off them to really simulate a SOC environment! Feel free to ride into the sunset with these ideas don’t wait for me and, remember to stay legendary! Cheers!


