I would like to give a huge shoutout to @MyDFIR for the idea of this project!
Objective: To have our Target-PC to join our newly created domain!
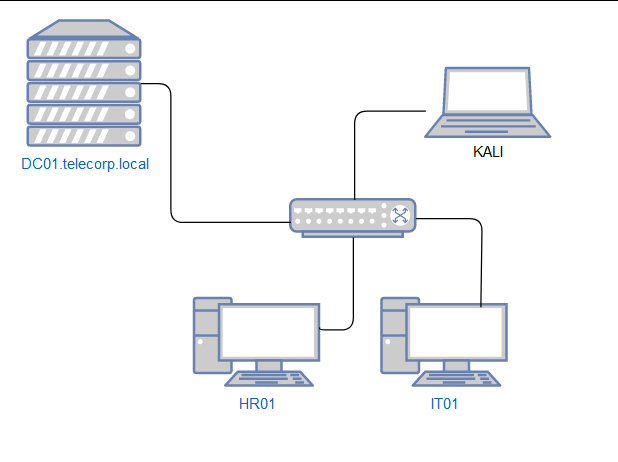
Firstly, we shall start by setting a static IP of 192.168.10.7 on our AD server. We reference this by looking our diagram we created.
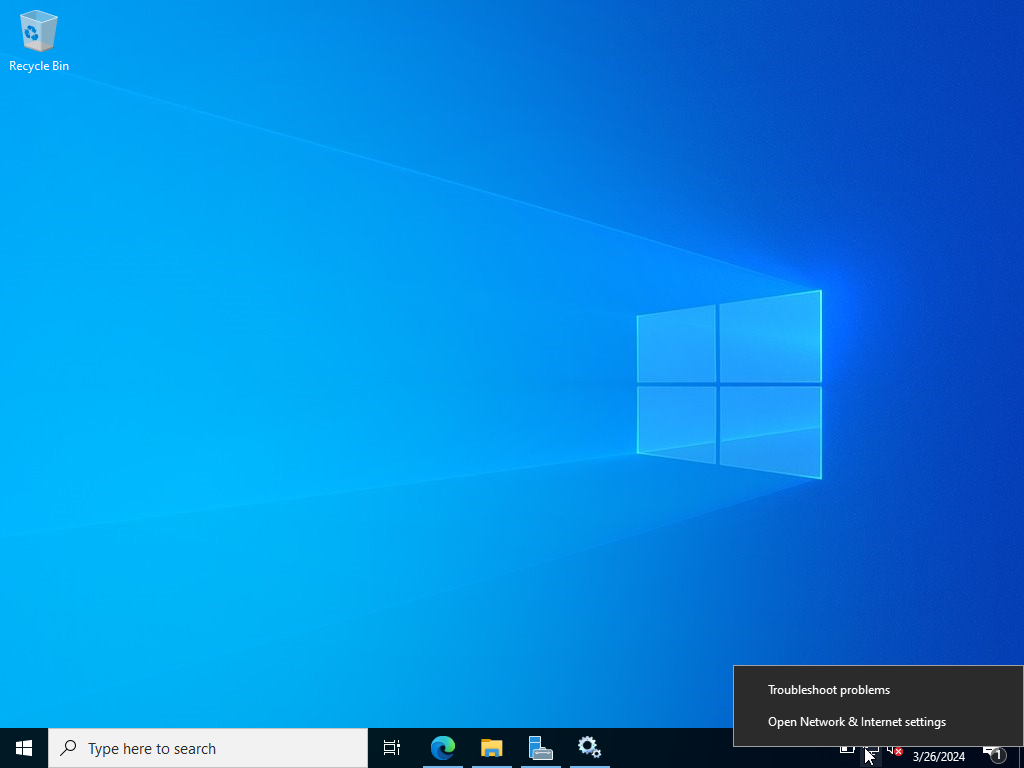
Click Change Adapter Options> Right click on ethernet>Properties>IPv4
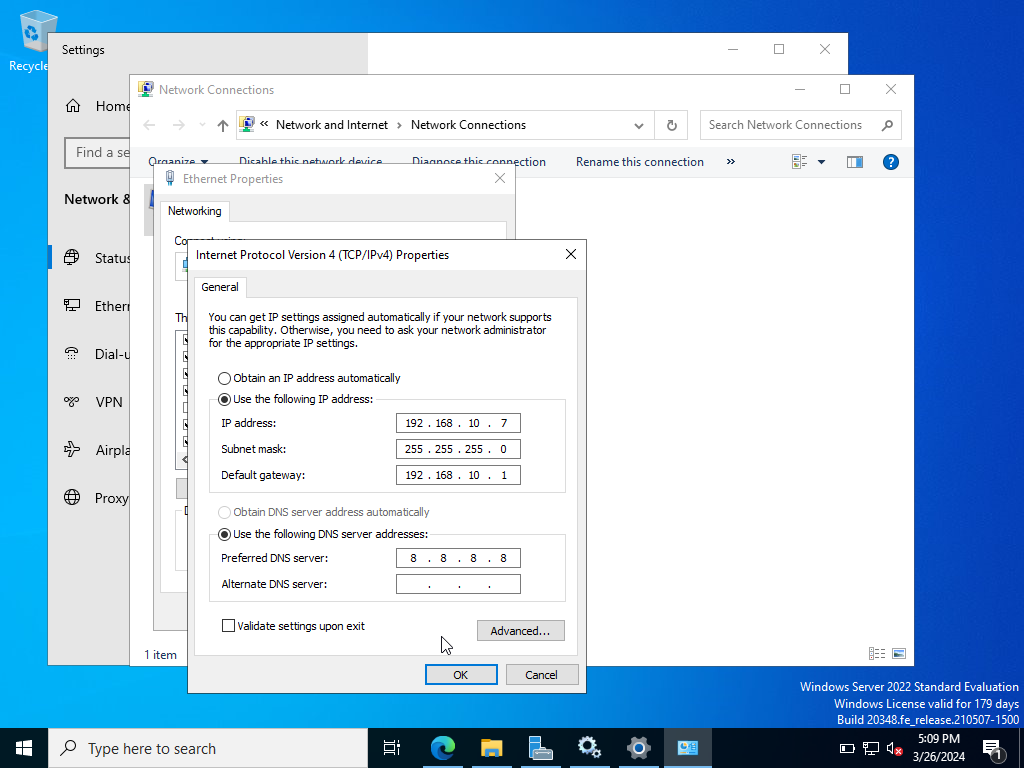
It should be changed to these configurations listed above to create our static IP and go ahead and click OK.
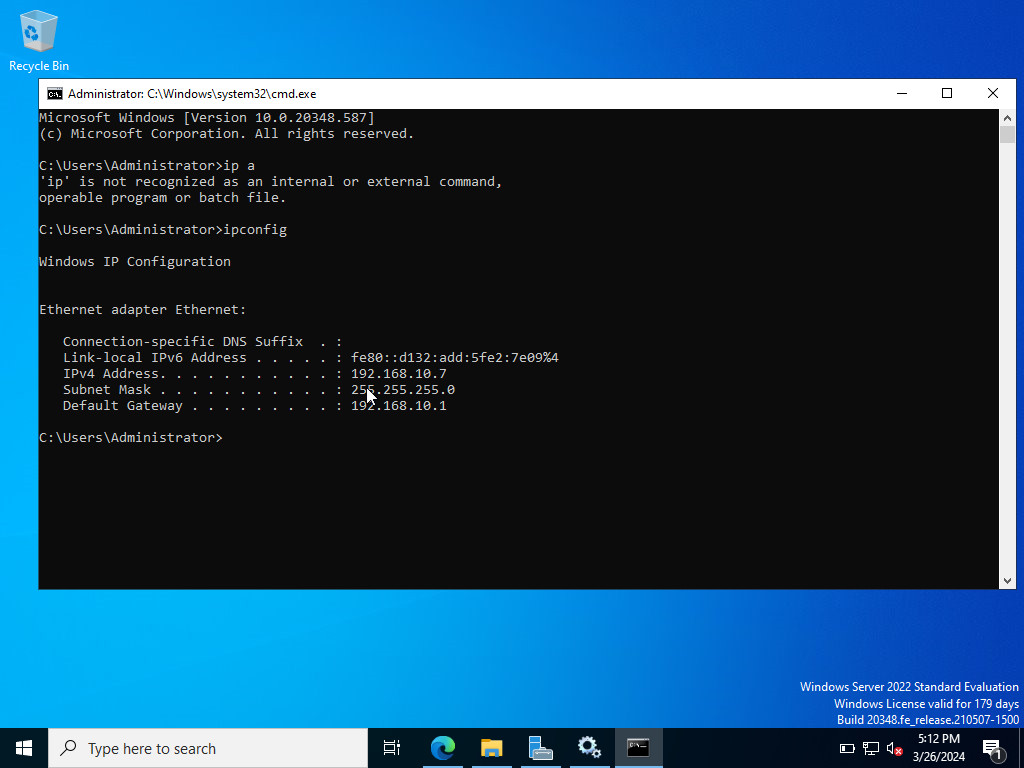
By pulling up command prompt we should have our static IP in place.
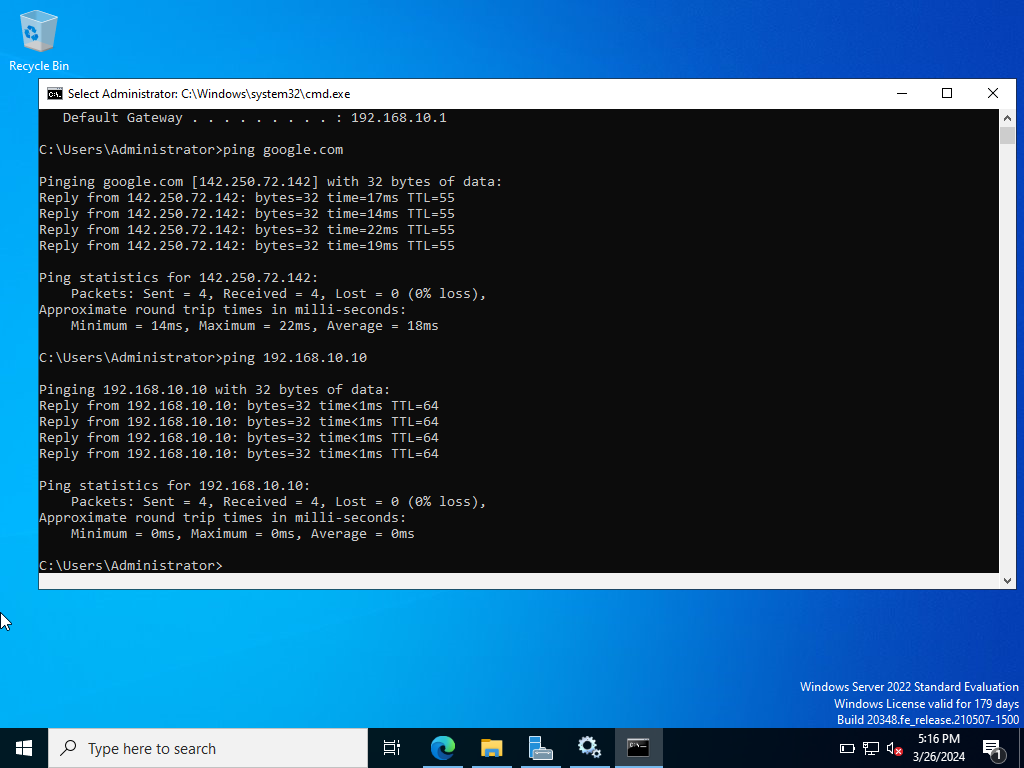
Next, lets ping google to check for network connectivity. Afterwards, let’s ping our Splunk server for connectivity as well. Note: In my case, I started the Splunk server VM from automatic bootup.
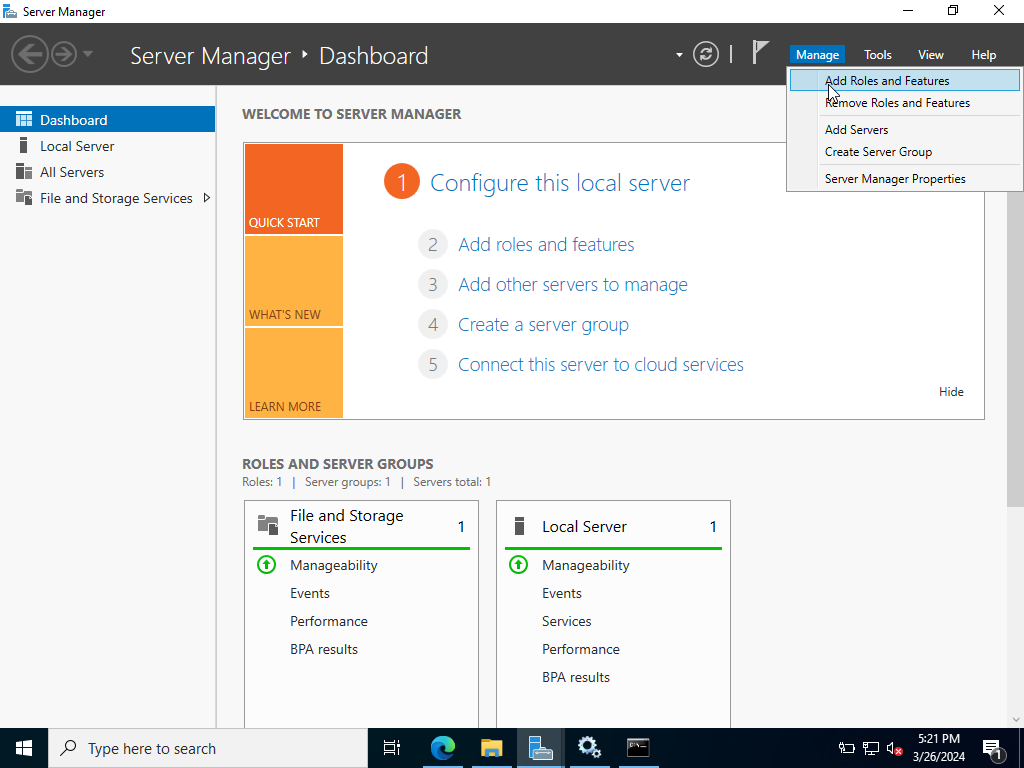
Let’s hover over to our Server Manager Dashboard and click on manage for options to show up and click on “Add Roles and Features”. Keep clicking Next until you get to Server Roles.
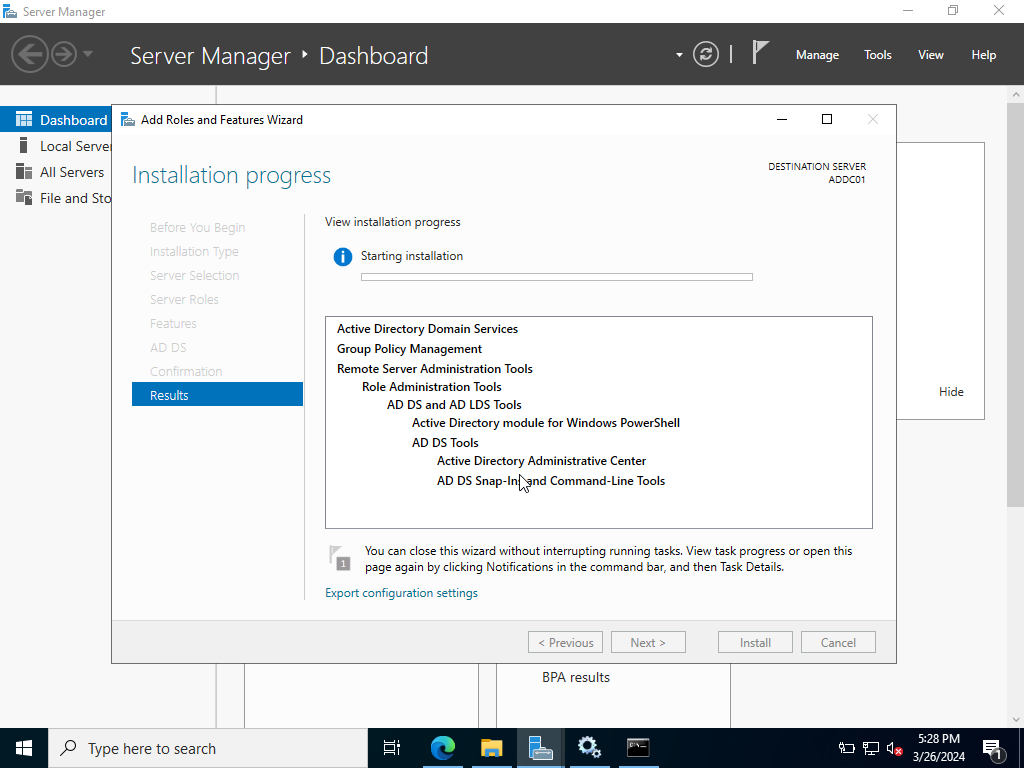
Click on “Active Directory Domain Services”. Then click on Add Features. Keep clicking “Next” till we get to the Results tab and click “Install”. It will prompt itself complete when done.
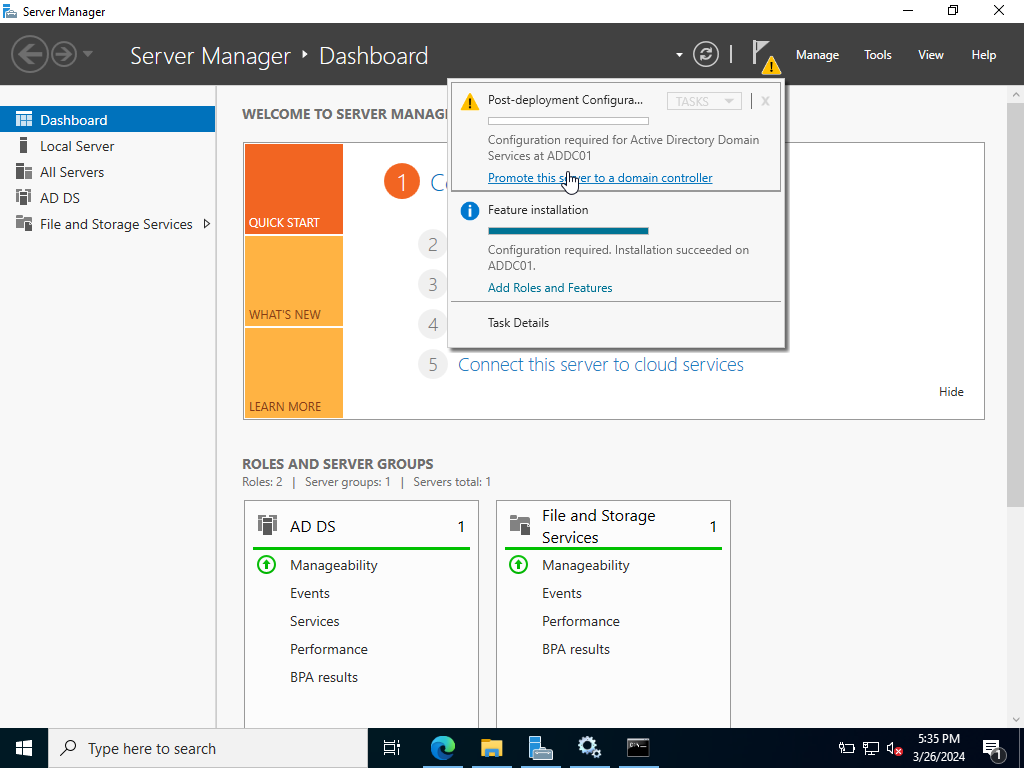
Back to our Server Manager. We shall hover over this flag icon with a caution right over it. Click on Promote this Server to Domain Controller.
Next, let’s click on create new forest.
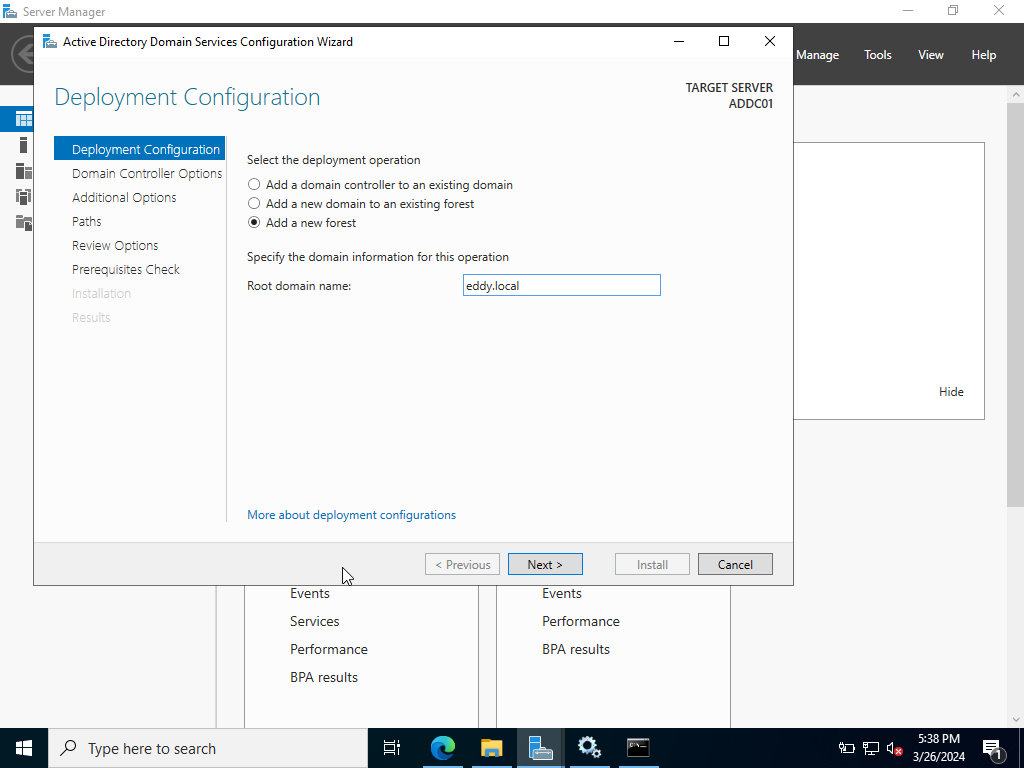
In my case I will be calling my Root domain name: eddy.local
Click Next
Leave Domain Options default but set a Domain Controller password and document it with the rest of our credentials. Click Next.
Click Next when you get to the DNS options tab as well.
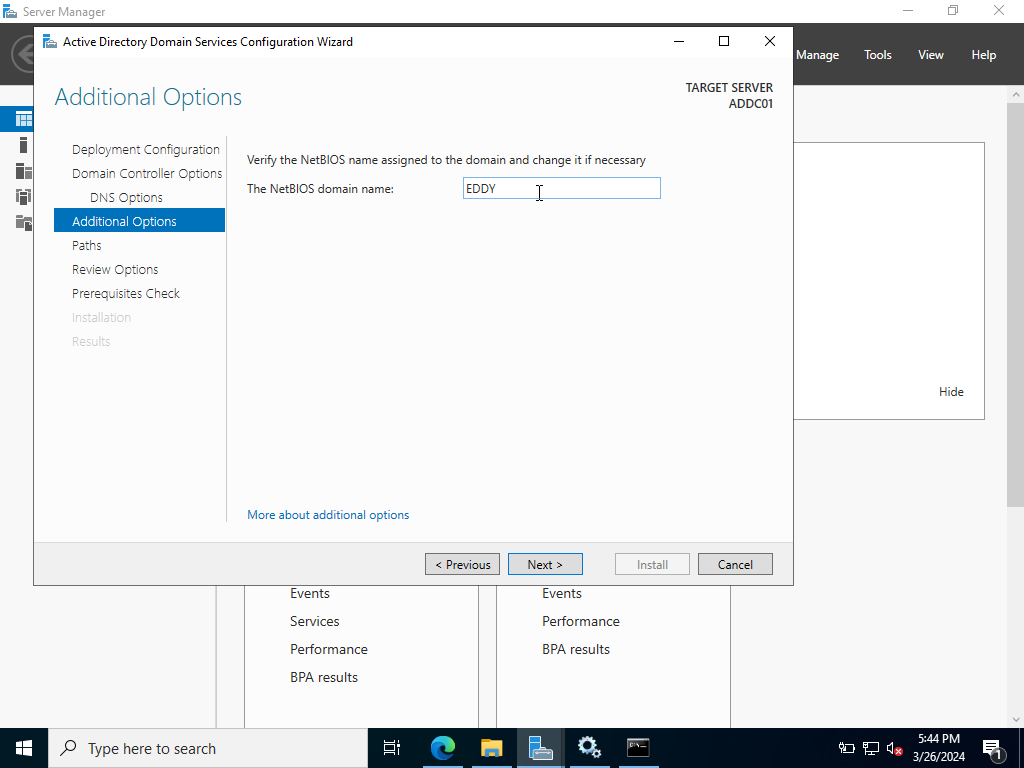
When we get to the Additional Options we are able to configure our NetBIOS domain name. Leave as is.
Keep clicking next till we get to the ‘Prerequisites Check’ tab let it do it’s check and click next afterwards. Proceed, to installing ADDS. It will then prompt us to sign out and automatically restart our AD server. Let’s log back in and begin to add users using our Domain Controller credentials.
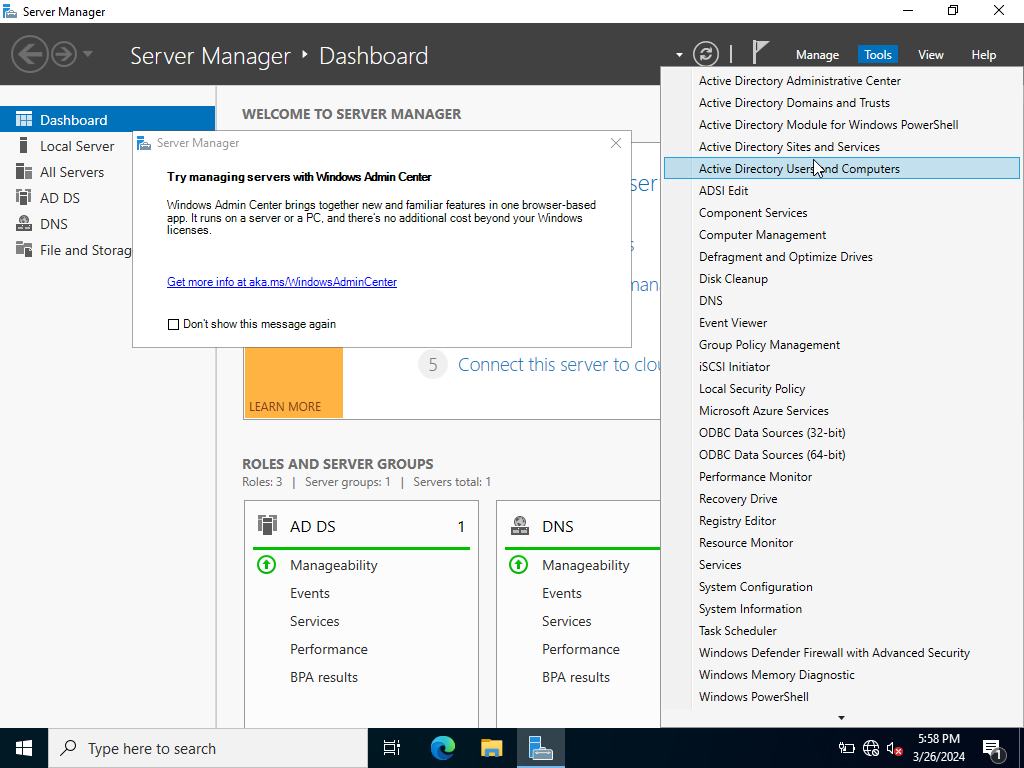
As soon as we’re given access let’s hover over to Tools as shown above.
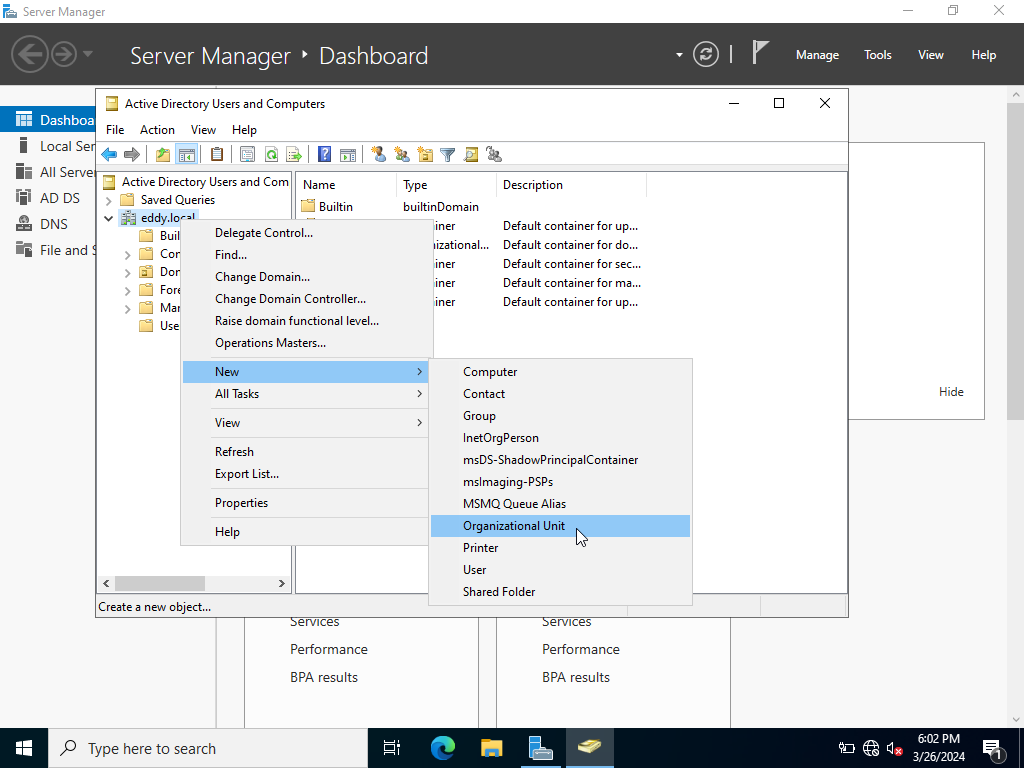
Let’s recreate a Enterprise environment and add users into a real world department by heading over to the local domain and creating it as shown above. Next, let’s create a department called “IT”. Right afterwards another called “HR”.
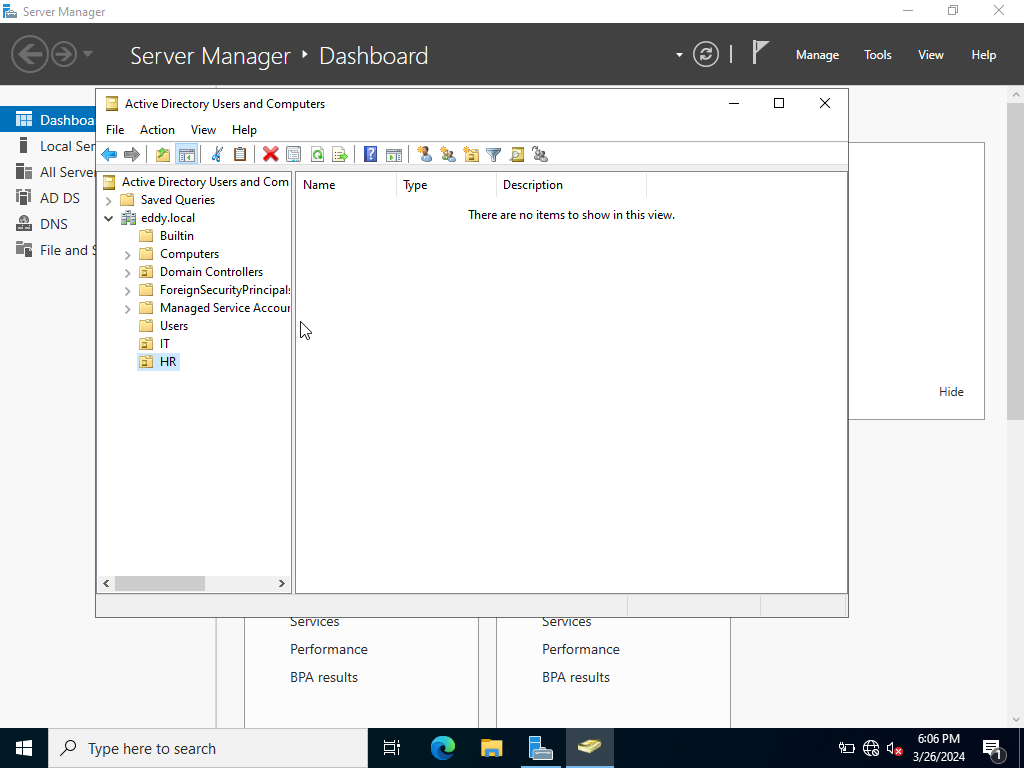
It should look like this. Next, we want to create new users for these groups.
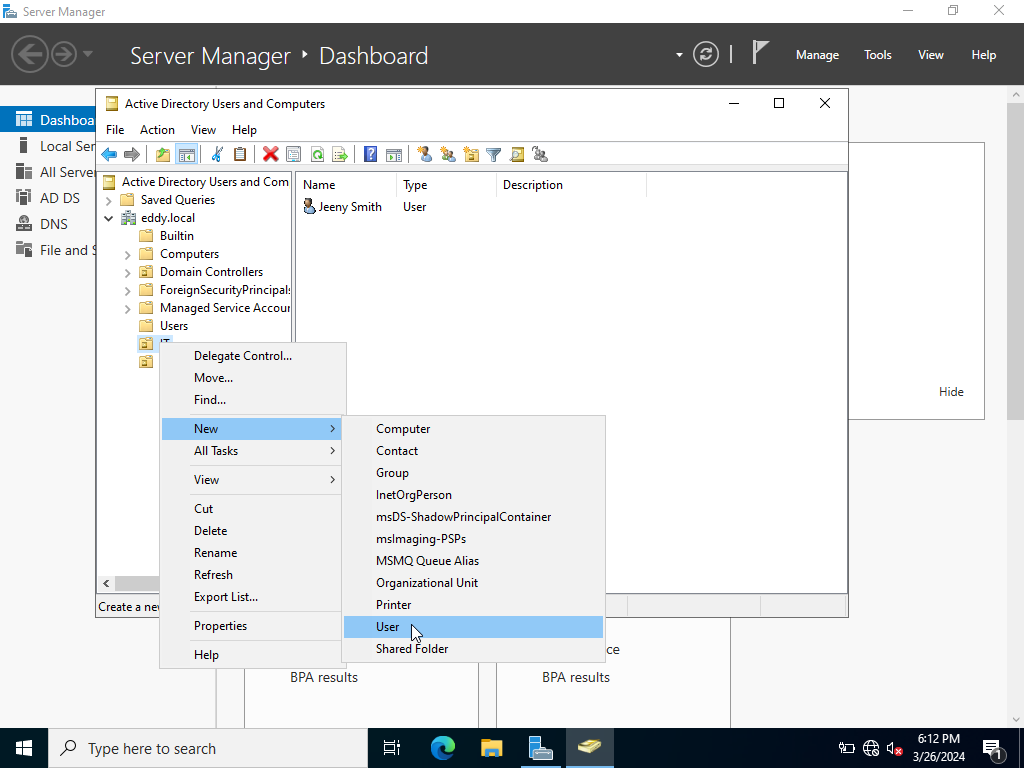
Jenny Smith at IT hypothetically speaking and Terry Smith at HR will be created for demo purposes.
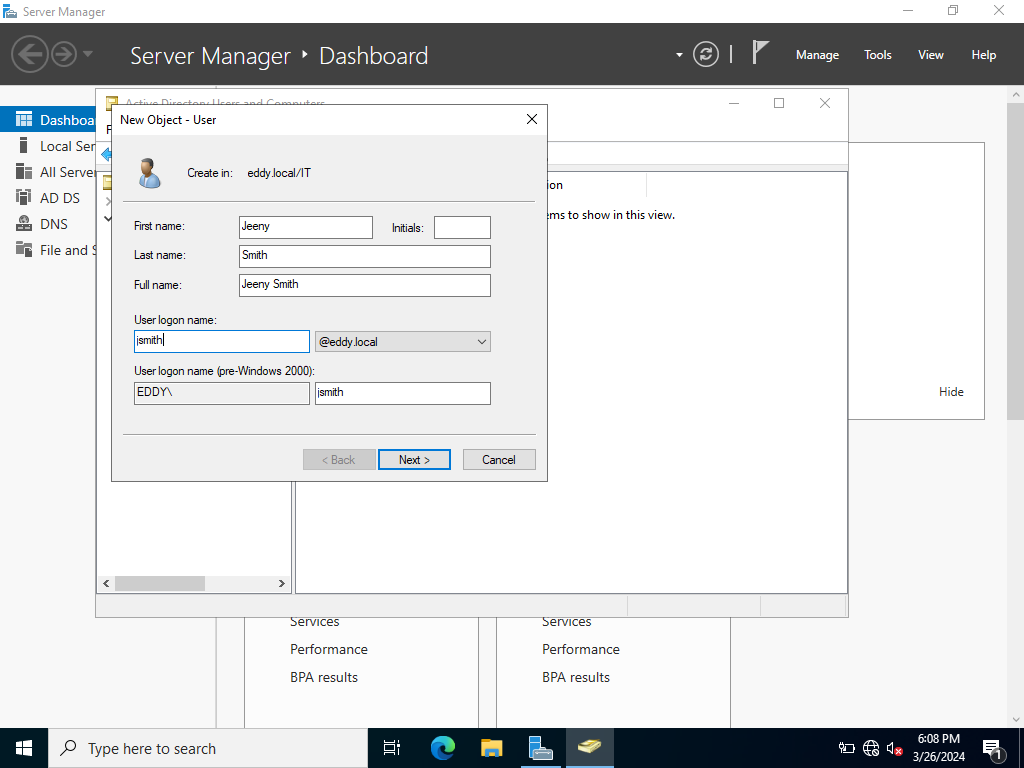
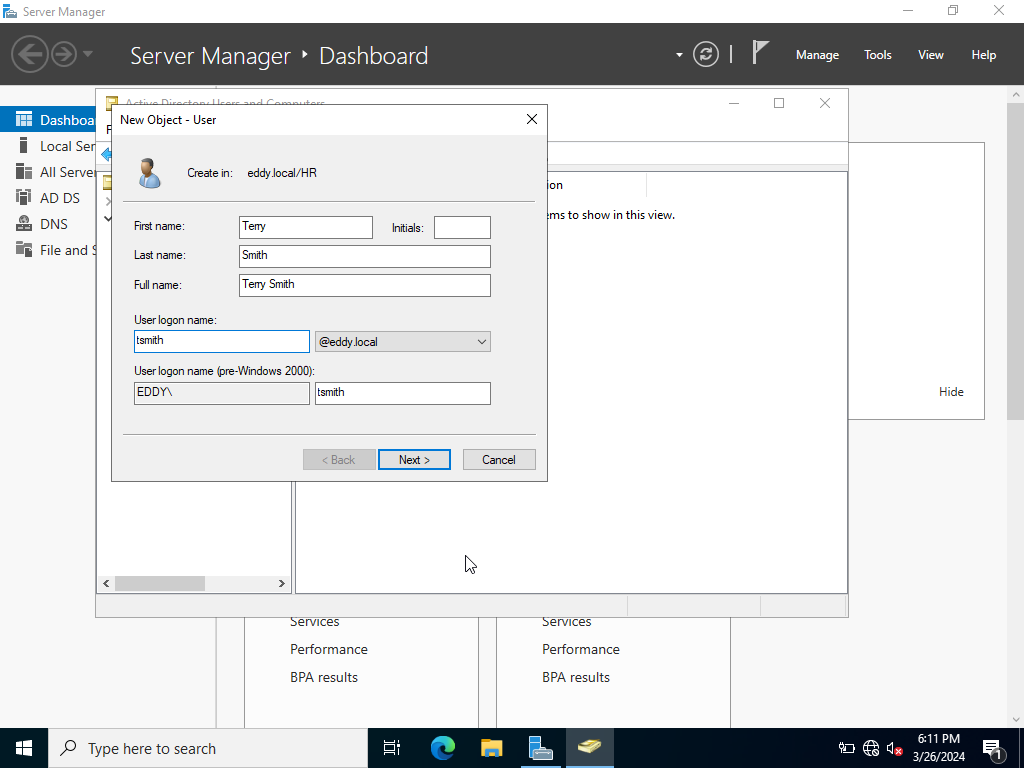
The configurations needed are shown above. Make sure to document how they are being named for later when we need to login. Let’s head over to our Target machine and join it to our newly created domain eddy.local and join it.
Next, Lets search up in search ‘PC’>Click on Properties>Advanced System Settings>Computer Name>Change>Domain>EDDY.LOCAL
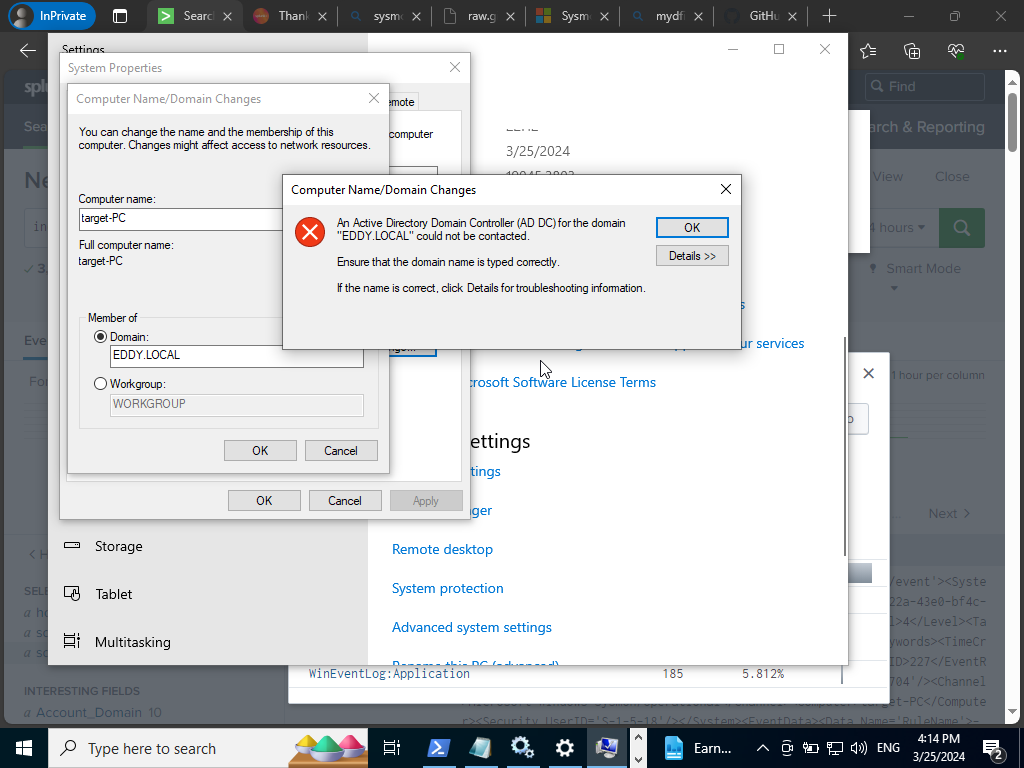
If you get this error it might be a problem with our DNS servers. Let’s go back to the way we configured our Static IP and click and configure our IPv4 settings.
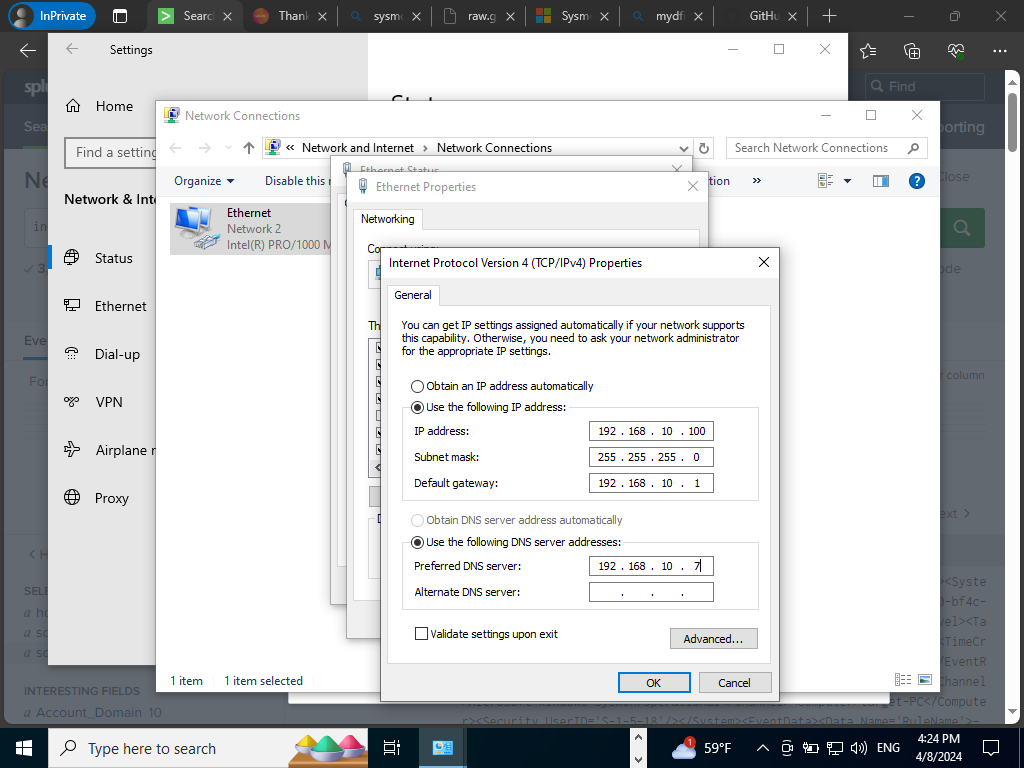
We shall point our DNS server to our AD server instead to join our domains together by adding 192.168.10.7 to our Target-PC IPV4 properties. Let’s check everything is running smooth by opening up the command prompt.
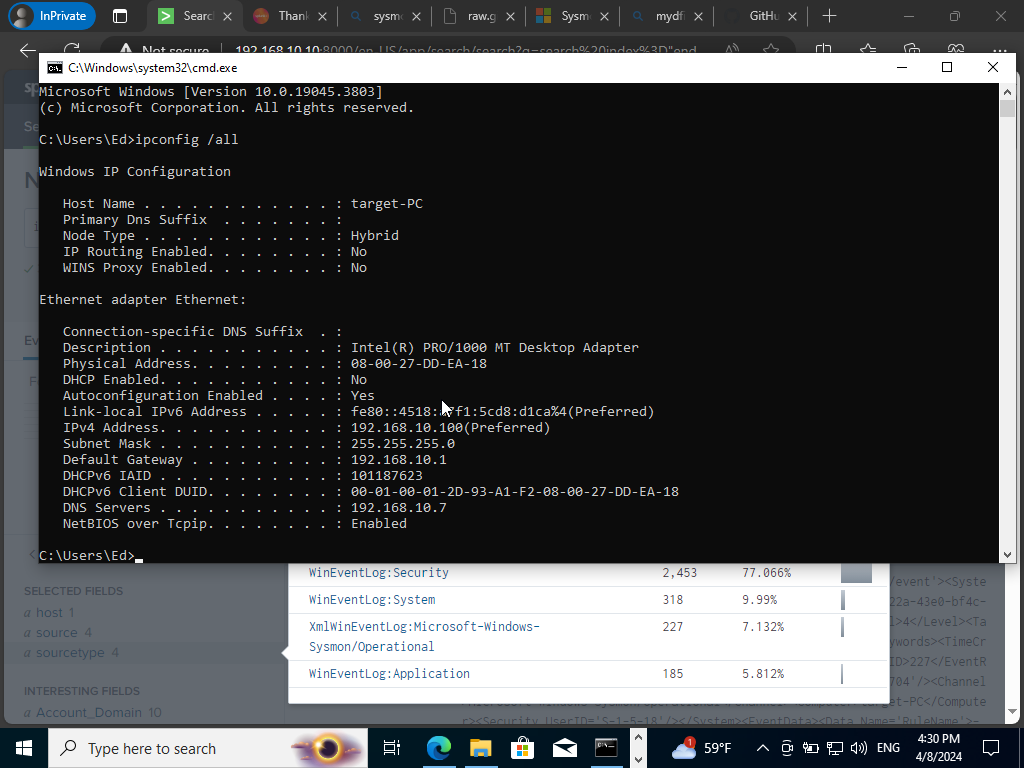
Now, we should have the DNS server properly configured upon checking. Now that is done let’s hop on over to joining our Target-PC to the domain controller. We will be using our administrator account. We will be using administrator as the username. Input the password we had saved in our credentials document.
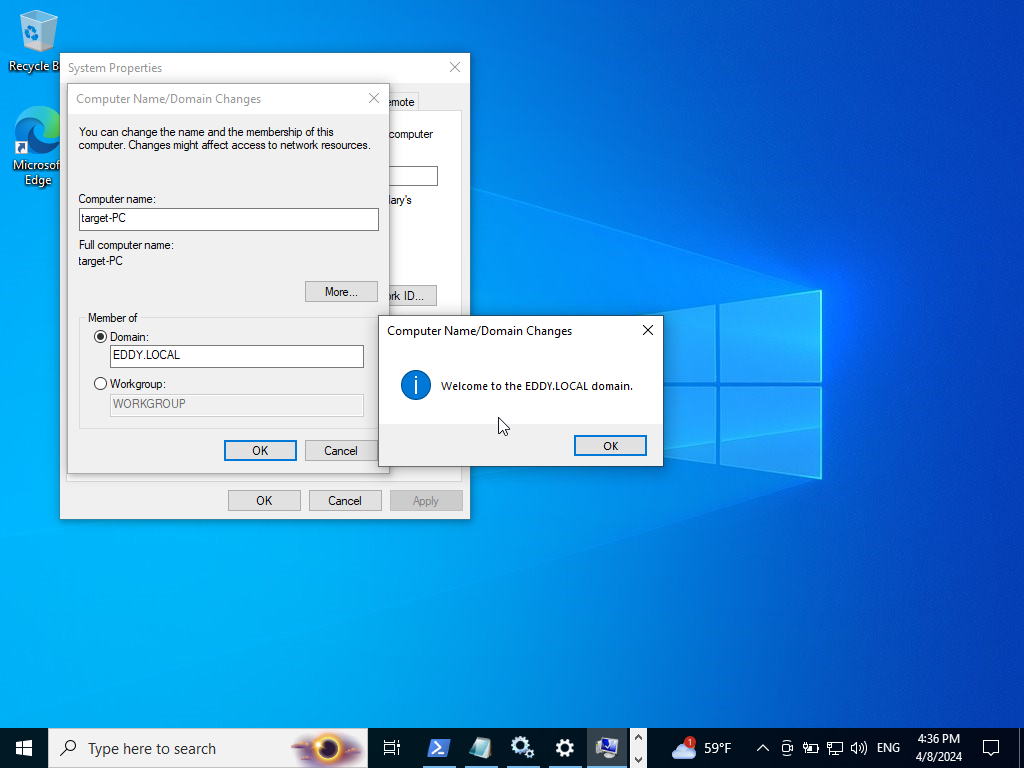
If everything was done correctly it should look like this! Restart the computer to apply changes. Once we are back in we will want to login as our newly created user Jenny Smith. We should have their credentials saved. Once we are in, we have successfully configured our AD server and created two users by also joining our machine to our newly created domain. We now have the environment to play around with Active Directory. Later on we shall do more with our newly configured AD server by using automation to create new users for example so stay tuned 😉 Remember to stay legendary!


