Today we’re going to take a deep dive in Microsoft’s cloud service Azure and how we can use it to our own advantage or be able to diversify your organizations security options. At its core, Azure is a public cloud computing platform—with solutions including Infrastructure as a Service (IaaS), Platform as a Service (PaaS), and Software as a Service (SaaS) that can be used for services such as analytics, virtual computing, storage, networking, and much more. It can be used to replace or supplement your on-premise servers. Let’s jump right in!
Why use Azure?
Its purely preferential, depending on your companies needs. If, your organization already using on premises applications like AD integrating on the cloud seamlessly would make sense. Especially if you use other cloud apps like Microsoft 365 it would all be centrally controlled on Azure. Since, many companies are running multi-clould to augment cloud failure. It’s a good idea to learn since it’s the second leader in most used cloud provider out of the big 3.
Difference from AWS
Azure and AWS share the same cloud concepts, but Azure was a more user friendly experience and handles permissions differently. While AWS uses a combination of IAM users, groups, and permissions. Azure uses role-based access control(RBAC) we will learn about this later in this guide!
Create an Account
Let’s start by creating an Azure account.
Now navigate to the official Azure URL and Click on the “Start free” button.
Proceed to sign up and put in all your info. Create your credentials for yourself
After you’ve signed up. Now click “Go to Azure portal.”

Basic Overview
You shall be redirected to “Quickstart Center.” Azure has a header where it has a dropdown menu on the left side, the search bar, shell, notifications, settings, and profile settings.(1)

And in the center you will find “Projects and guides” and also an option to take an online course to learn them. Also, quick options to deploy web apps, virtual machines, container database storage, and more.(2)
At the bottom, you can see setup guides for Azure.(3)
Now click on the hamburger icon in the header.T here you will see options like Dashboard, All Services, All resources, Cost Management and Billing, and more.

Now go, click on the notification icon and you will see Azure has given us $200 credits for you to use. We only have 30 days to try it out so lets’s maximize our efforts.

Deploying a Virtual Machine
We are going to create a virtual machine. In order to do so, we start on the “Quickstart Center” click “Deploy a Virtual Machine”, or we could use the search bar and search up the “Virtual Machine” option.

Upon selecting we will be redirected to a page where we choose our operating system preference between a Windows based VM or a Linux based VM. We will be going with Linux because it’s cheaper and want to maximize our credits.

Uh oh, seems to be not working.

Ok, let’s try something else by clicking “Create a resource” from the sidebar

From there you will find the “Virtual Machine” resource just click “Create” and you will be presented with a setup page.

The setup page has all the necessary tabs basics,disks,networking,management,monitoring, and more as you can see.

First, we’ve got to to click “Create new” in the “Resource Group” section.

Give it any name you want and press OK. Now give the virtual machine a name. You may also select which region for the VPS to be in. (Virtual Private Server)

The availability option is a solution that protects your VPS from data center outages using an availability zone or availability set. You can click on the “Availability options” and it will give you a subtitle explaining the difference.

The “Availability Zone” allows you to set up your virtual machine in multiple zones. The VPS will physically exist in each zones. Meaning it will cost you more.
There’s also the security type, which has some prepacked security control settings. For now, keep it as is.

Next, we have the option to selecting an operating system image. Click “See all images” to view the full list. Azure marketplace has over 7,291 as of the time of this writing!
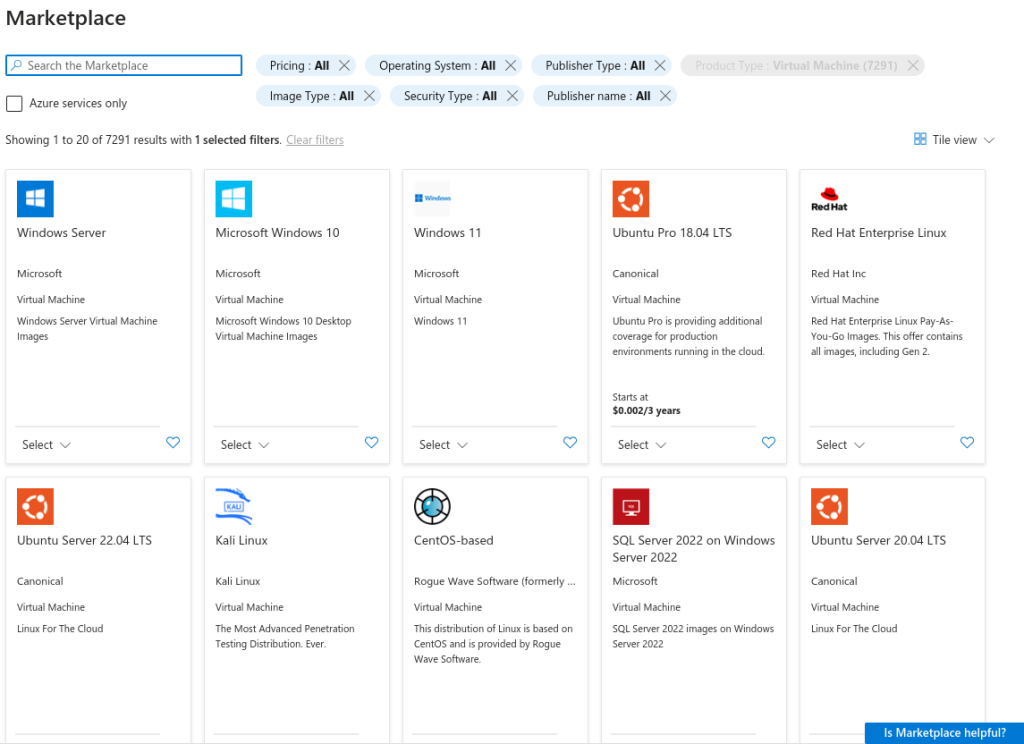
Scroll down and select Debian 11. Clicking on the OS will show you extra information about that including an overview, pricing, support,etc.

Now select from the select menu click on “Debian 11 Gen 2”.

And upon returning to the setup page you will see that it’s free service eligible.

Keep the VM arch as is.
Moving on to the next section “Size” matters. This is where we select what plan we are going to use.

Click “See all sizes” to get a full view. Now search “B1s” in the search bar and you will see the “B1s” plan with free services eligible.

This means that you can use this free for the first 750 hours and the monthly cost is $7.59. We shall finish the free $200 credit and learn everything possible.
For now, just select that.

For our demo purpose, the 1vcpu and 1 GB ram are enough,
Here in the “Administrator Account” section, you can select an Authentication type. Let’s keep it “SSH public key” and keep everything default. You can change the username, and keypair name, and choose an already created public key if you choose to. I will just go with default is fine.

Since we will be using ssh to connect to the server and http 80 to host the website. Let’s select both.

Now click “Next: Disks” and proceed.
Here we can select the disk size and its type. You may add additional disk to your VM. For now, keep everything default and proceed.

In the network section, you may select virtual network, subnet, public IP, and more. Default settings are fine let’s move on.

Now keep hitting next to get to the “Tags” tab. Keeping everything default is fine. Tags may help categorize the resources and also view their billing by the same tag name. Helping keep everything organized.

You can keep this empty or give it a name of your choice.
Now hit “Review + create” and check the details.

We will also see the final validation passed prompt on top.

If everything seems ok click the “Create” button and proceed.

A popup will occur to download the private key. Do that because you won’t be able to download it again.

It will download the private key and VPS for us. Please be patient while it deploys 🙂
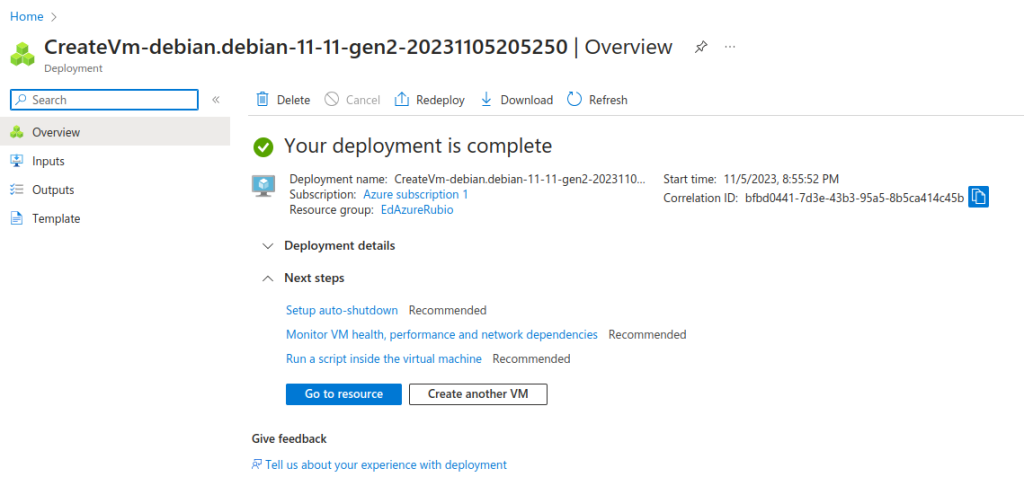
Once the deployment is complete click “Go to resource” and you will be presented with the VPS dashboard.
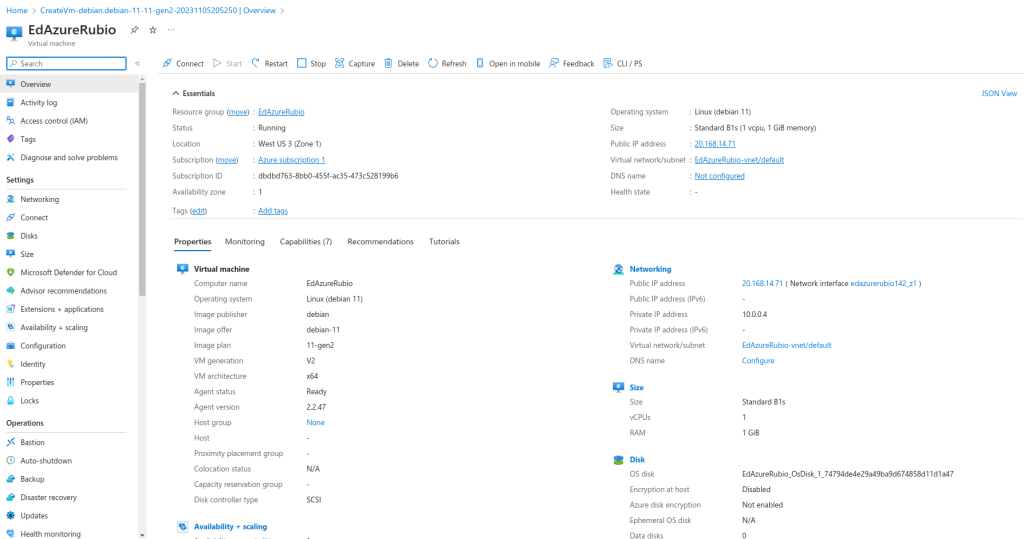
Just like the home dashboard menu it contains quick action tools like connect, start, restart, and stop more. Right under the dashboard menu it will display the basic information about the VPS in the “Essentials” section. Following that it contains the details view where you can see more information properties monitoring the VPS health and alert.
At last we have the sidebar menu for activity on the right, Access Control(IAM), and other necessary settings and operations. Before getting into them let’s connect to the newly created VPS.
Click the “Connect” and choose SSH, if you are using Windows RDP is a good option but, in a linux environment, a shell is all we need. Let’s connect the VPS by following the steps.
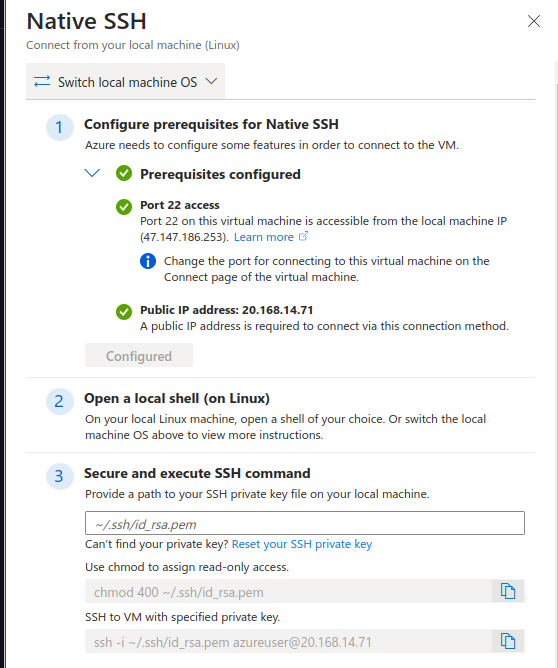
Just like that we are inside the machine!
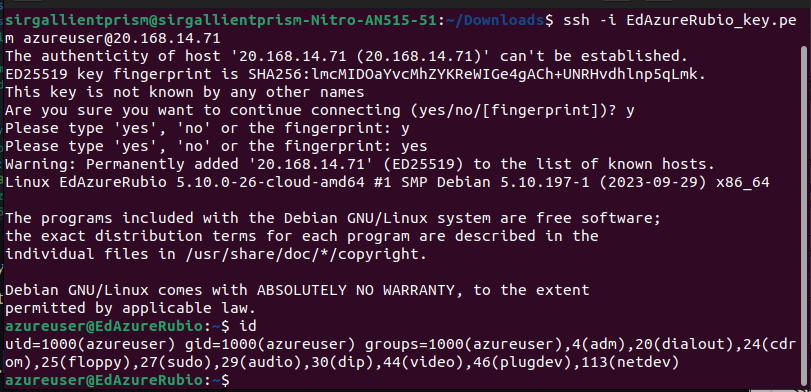
Remember this is a IaaS model so, we have to do everything on our own. First, let’s run our web server.
Installing the Apache Web Server
Before we do, you will notice that using ‘sudo’ won’t ask for any passwords from us. Upon checking the sudo permission ‘sudo -l’ you will see that we can execute all commands with no passwords. That’s a dangerous permission if we were on a enterprise environment but, it’s as expected since we haven’t given any password. We can change it or else, if the system got compromised for this user, bad actors will be able to gain full control of the system with ease.
First, change the password using ‘sudo passwd azureuser’ command.

Now let’s remove no password from sudo. Go tho this dir/etc/sudoers.d/ and you will find a file with a similiar name such as 90-cloud-init-users. Open this file with vi or any other text editors of your choice.
sudo vim “/etc/sudoers.d/90-cloud-init-users”

Now insert a hash and comment out the “azureuser” line. You can also remove it but comment out should do the trick. Now save the file and try executing sudo again using shift “:wq!”.

As expected it’s asking for a password and the NOPASSWD line is no longer present.
Now let’s install Apache using the ‘sudo apt install apache2’ command.

Also enable apache2 using ‘ sudo systemctl enable -–now apache2‘ Using the ‘–now’ will also start apache2.

And browsing our public IP we shall see that our website is up and running.

You can get the ip from dashboard > overview. Alternatively, you can use the ‘curl ifconfig.me’ command to get the ip from the terminal.
Now that the website is finished, we can explore other options.
Setting up the Open VPN Server
To do this we will be using a semi-automate bash script. You can download it from here. It’s recommended to go over the script before executing it. Open source doesn’t mean there isn’t malicious code attached to it.

Now execute the script and it will ask for the public IP address. Give it the IP address that we used to access the website. It will ask for IPv6, port, protocol,DNS, and other information. Keep everything default unless you want to change and proceed.

This will take time. Keep going with default settings till it’s done downloading therefore; it will ask to name the client. Give it any name!

Afterwards, it will ask you for protection. You can go with the default or use a passwordless client. I will go with passwordless but, you should use a password for a production environment.

That’s it we’re done! The VPN file should be in your home directory.

Let’s download it to our host. We can do this with SCP, a Python http server, or via the web. The SCP is the secure way to do that. Let’s download it using the command:
scp -i EdAzureRubio_key.pem azureuser@20.168.14.71:/home/azureuser/EdAzureRubioVPN.ovpn .
Input your private key and public IP and copy the rest onto your terminal.

First let’s check our host IP, and network interfaces using the ‘ curl ifconfig.me && ifconfig ‘ command.

It will show the public IP address and all the connected interfaces. Now let’s connect with OpenVPN.

As expected its not connecting because we have to enable the OpenVPN port from the Azure firewall.
Go to settings > Networking from the sidebar and add a new inbound port rule.

Just change the port number and protcol to UDP, add a name for quick identification, and click “Add.”

This will create a new rule for us.

You should see OpenVPN is connected successfully. You can confirm this by checking your host’s public ip. Launch the sudo openvpn command that didn’t work before and open a new tab to check your host’s public ip.

Now you can access the VPS privately with your own VPN and you can disable ssh public access. Even though you may give your static public IP to be the only IP to connect but, for those who use dynamic public IPs. This is the best option to secure login and using a VPN you can also perform dev tasks without exposing anything to the open internet. It’s like accessing the website with just the private IP.

After the whole setup is done you can make it public. This is a good way to protect your data from unauthorized access. We can also keep the database, phpmyadmin to this private interface. This will stop attackers from accessing from the outside.
The alternative way without a VPN is port forwarding where the process is too slow and requires complex forwarding. We were able to use the “Networking” section in practice that will match real-world scenario.
That will be it for this article. I hope you enjoyed this in the second part, we will uncover other Azure features including IAM, monitoring, pricing, backup, disaster,recovery, and more. Cheers, till next time be legendary!


