Hello, there again! We are back at it again with the second part of Intro to Azure Cloud. It will contain an overwiew of Cost Management, Access Control(IAM), and a few other services. Let’s jump right into it!
Cost Management
Cost management is a very important part. I’ve read about horror stories of employees disregarding this important aspect and rack up a 10k bill for their company. Knowing how to manage this can save and even help you not spend more than budgeted. Go to “Cost Management + Billing” from “All Services” > “Favorites.”

This is how the billing dashboard looks like.
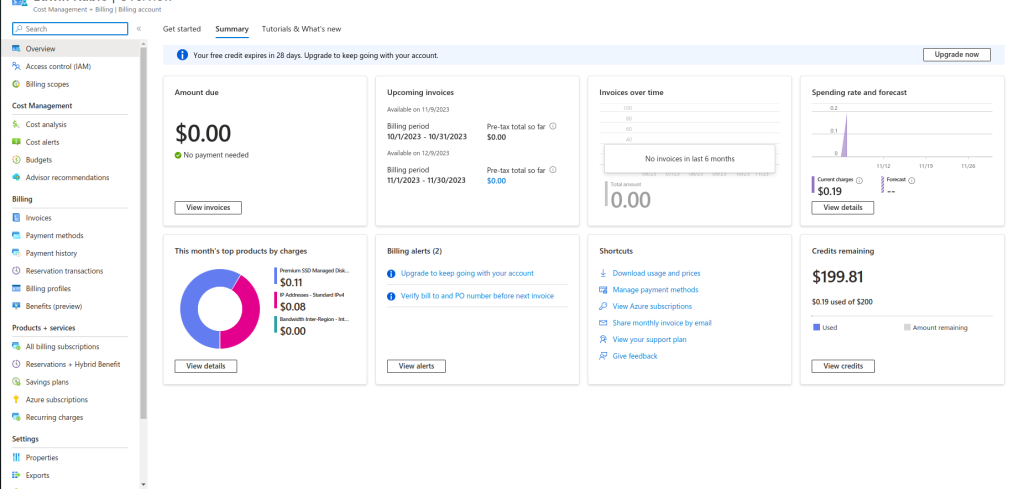
It shows you all the basic info graphs and statistics we are going to need to understand. The “Amount due” section will you amount due. Since we got $200 free credit the amount is zero. The “Upcoming invoices” gives you one month of billing status. “Invoices over time” gives you all the invoices for the past 6 months.
The “Spending rate and forecast” will show you the graph of your spending rate. It gives an estimate based on your usage level. This is useful because it shows a graphical visual of your spending. Then we have “This month’s top products by charges” which shows all products divided and their pricing over time. The “Billing alerts” will show you notifications regarding billing.
Lastly, we have “Shortcuts” and “Credits Remaining” that gives us quick shortcuts to Azure billing links and shows our remaining credits. All sections are expandable so you may go further into detail.
Now go to “Billing scopes” from the sidebar.

It will shot you the billing scope for your Azure resources. You can use billing scopes to organize your billing data and control who has access to it. For example, you could create a billing scope for each department in your organization so that only the people who need to know about their departments billing data can see it.
Now lets go to “Cost analysis” section, we will be able to visualize a detailed view of our spending.
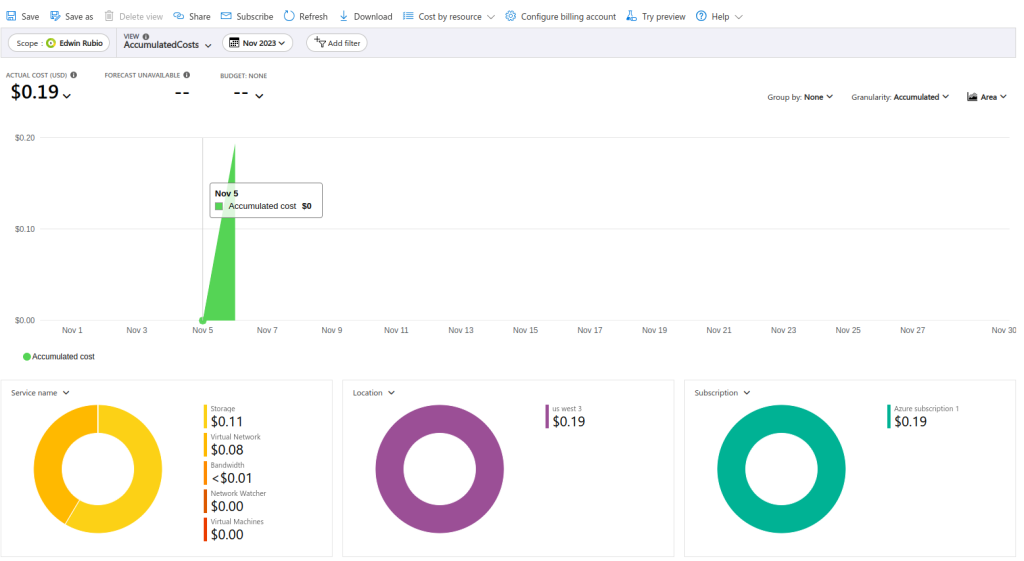
You can change the scope, view specific data, and time. You can also use filters and change the graph type as you need. Since, it’s a new account we don’t have much data for proper analysis.
Let’s move to “Cost alerts” below “Cost analysis.” This is used to give you an alert notification when you’ve reached your budget limit. This will help prevent unexpected expenses and having to explain to your boss on how you racked up a 5 figure bill.

It will be empty if you haven’t created any alerts before. Let’s create one by clicking “Add” > “Add budget.”

First, check the “Budget scope” if its the right scope fill in the information in “Budget Details. It needs a unique name, reset period(the timeline to calculate the budget), creation date, and expiration date(after the expiration date it will stop alerting for this alert).
Last, add the amount of your choice and click “Next.”

Now let’s go to the “Billing” section. The “invoices” is the same as the expanded view of “Amount due” section.

There isn’t anything much to show. Let’s skip that and move to “Payment methods.”

You may add another payment of choice or, if using on behalf of your company you can pay via wire transfer.
Going to “view details” will show us more information about our credits and their spending.
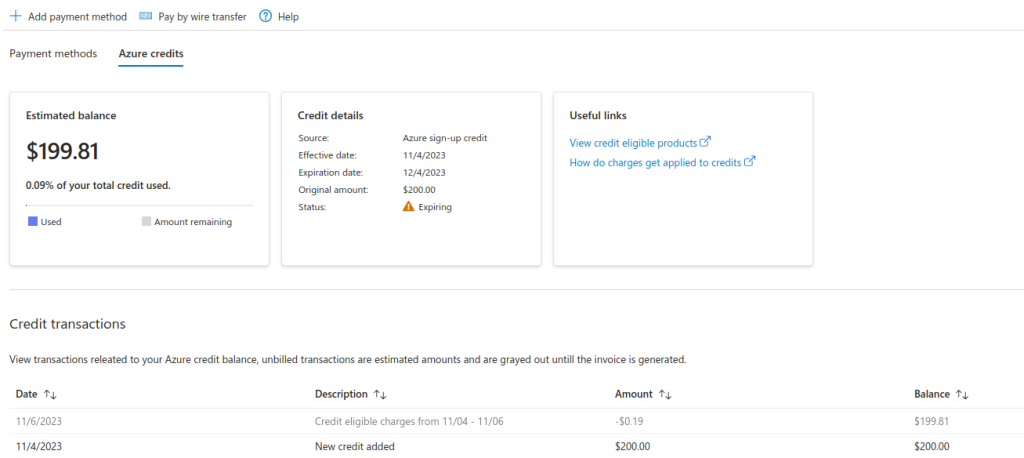
The “Payment History” after that will show you history of any payments made. A new account, won’t show any data.
Let’s jump into “Billing profiles,” it shows your billing info by the billing profile you choose.

That completes the “Billing” section. There’s two other sections we missed but you should look at them on your own time.
IAM
“Identity Access Management” is what they call the Role-Based Access Control system in Azure subscriptions. Basically, it allows you to give users certain roles on subscriptions, resource groups, or individual resources.
Let’s get to the Azure subscription page. You shall see “Access control(IAM).” Did you notice how the “IAM” is present on all levels?

This way you can manage direct access of your resource group. Like previously created VPS named “EdAzureRubio” this is a resource group. Why? You can get the answer by checking the overview.

Here all the resources, IP, key, disk, vm are actually used in one group purpose serving the VPS. So here your company could have multiple VPS or resource groups depending on their needs. For example; sales domain, dev domain, admin domain, DB each can be assigned permission to different people directly from here.
Make sure to look over at the IAM page to give you a good idea what lies in there. Now click the “Add” button from the “IAM” from the resource group of the VPS we created.

We will have three options to select from. The “Add role assignment” is where we will set the permission for the resource we have selected. The “Add co-administrator” will create a “co-administrator” for the resources but has to be created subscription level. Remember we explained levels. The “Add custom rule” will allow you to create custom roles according to your choices.
Just click the “Add role assignment” from the select the “Reader” role that will allow the user to read the resource group.

Now click next, this is where we will select the user who will have permission. Here we can type email of the user and select it.

Give the user a description and hit ” Review + assign

Review the role and click “Review + assign” again.
When assigning the role you may have noticed “Guest” after the email. That is because the user is outside the current directory and we have to invite the user to join. After azure sends an email to the user who can directly log in with their “Microsoft account” and upon accepting the terms they will be able to login into the Azure portal.
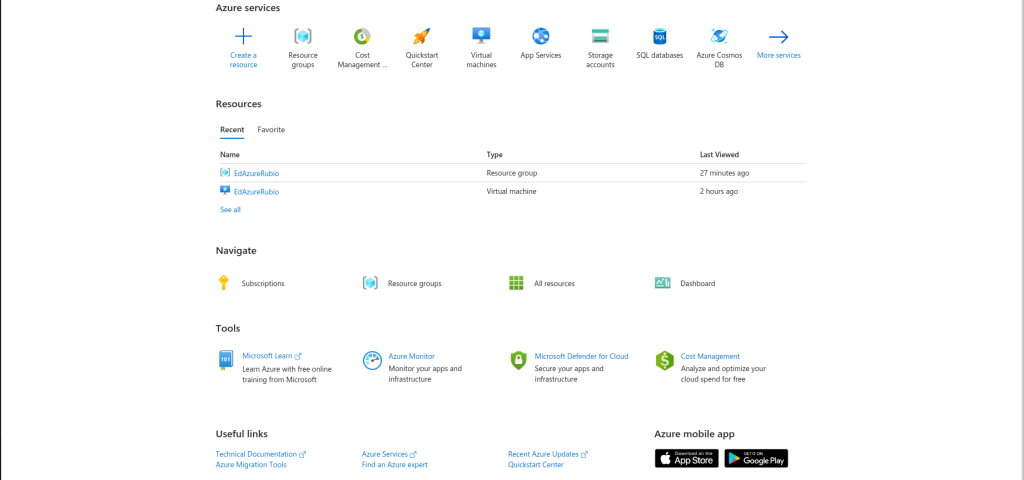
From the new account let’s go to the resource group and you will be able to see the “EdAzureRubio” resource group or your resource name.

I am viewing this from the new account.
Now let’s click the VM (first resource from the list and try to stop it.

You will see it going (had me shook for a sec) after a few seconds it gave me the error message.
Seems the permission is working well. Let’s modify the permission and give a higher level of permission so that we will be able to stop it.
Now from the “Resource group” IAM click on “Add” roles again and select the “Desktop Virtualization Power On Off Contributor” option. This will allow the assigned user to stop the VM.

Just follow as we did before. The role will be assigned to our user.

After that go to the second user and refresh this page. Now click stop again on the VM.

Now we have successfully stopped the VM! It takes for the role to properly work. Start the machine again.
You might have noticed there was still some guest users. This is because we didn’t assign the user from “Azure Active Directory” but we can change it now.
Go to the “IAM” page “Role assignments” click on the new user profile.
It will take you to the users dashboard. From there click “Edit properties.”

It will redirect you to the properties page here we will be abe to change a lot of information about the user. We will skip that part and go straight to the “User type.” Now select “member.”
Click save. Return to the “IAM” again and check the “Role assignments.” We shall see that the “Guest” label is gone.
Now go back to the “New user” dashboard or search for “Audit logs” you will see all the changes made that have been made.

We can also try out other options available here. Since, it’s not directly related to “IAM” we will skip it.
This is one way we can create the user by directly assigning it to the resource groups but, we can also create a new account in the main domain from the “Azure Active Directory” page.

Click “Add” and select “User.”

Select the type “create new user” will create a new user to the domain “newaccount.oldaccount.onmicrosoft.com” and invite the user like the email invite we sent earlier.
Fill in the remaining info if needed. Leave whatever is not needed as blank. When finished, click the “Create” button.
This will create the new user in my case “Max” and send you a notification.

You may manage all users on “Azure Active Directory” > “Users.”

It’s up to us now how we use the users. This will the end “IAM” for now. I might go further into it in the future as it is a great cybersecurity niche I am interested in. We will play with it more another day and experiment with it more to gain more skills. For now, remember to watch your expenses!
SQL Server
Let’s start getting into SQL which is another service Azure has to offer. We will create a “SQL database” and connect it with SQL Server Management Studio (SSMS)/DBeaver(for linux).
Go to “SQL Databases” service and click “Create” button.

In the “Project Details” section select the subscription type and resource group. We will choose the same as previously “EdAzureRubio” so it will be easy to manage.

Next on the “Database Details” section choose a name for your database and select a DB server, since we don’t have any we’ll have to create a new one. Click “Create new” then you choose a unique name for your server and location of it. I chose the closest server to me for speed sake. On authentication part just use “Use SQL authentication” and input a creative username and password.

Now click “OK” while keeping “elastic pool” and “Workload environment” default.

After that we choose the “Compute + storage,” is where the majority of cost lie in. We see that it’s a whooping $372/month! That’s overkill for just a demo.

Let’s configure it to a more affordable plan. Click “Configure database” and it will take you to configuration page.
From the “Service and compute tier” choose “Serverless.” This uses the auto-scaling and billed per second used. Since we will be using it for this article only it will cost us significantly less. In a theoretical sense you company will have a good estimate based on its needs. The purpose is to show how it can be done.
For the rest of the settings keep it at the lowest possible setting.

Click “Apply” when done.
In the “Backup storage redundancy” section select “Locally-redundant backup storage.” Which means all backups will be conducted locally on the local machine. For “Zone-redundant storage” it will have a backup copy in different zones. Last, “Geo-redundant storage” will have those backups in different regions. More information can be found on the official MS learn documentation.

Click “Next: Networking>.” Select “Network connectivity” section as shown.

Now input the “Firewall rules” as shown.

Keep everything default and continue next to “Security” and keep skipping and leaving everything as default until tags tab. You may choose to input a name but I chose not to. Last, continue to “Review + create” page. Now review the configurations if everything looks good hit “Create.”
This will take some time to create the service. Once done it will redirect you to service dashboard. After its done click “Go to resource.”

The edsqldb is up and running!

We can connect the database using the “Query editor” and the username and password used when creating the DB.

Now that the SQL server is running let’s try to connect it with DBeaver. Create a new db connection and select MS SQL Server.
I am running Ubuntu so the commands for me are as shown:
sudo add-apt-repository ppa:serge-rider/dbeaver-ce
sudo apt-get update
sudo apt-get install dbeaver-ce
You may go on the official site here to download it for your computer here for many OS.

Fill in required information here.

The host, database/schema, authentication, user and password. Check both ‘show all schemas’ and ‘trust server certificate’. This information can be obtained from db > “Connection strings.”

If everything is done correctly you should see it connected to the database successfully.
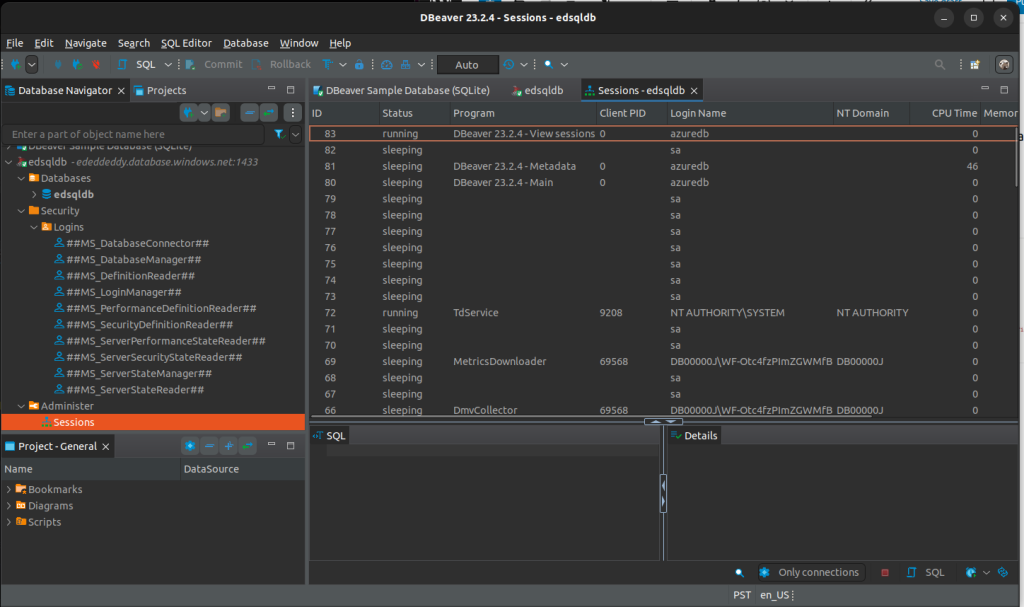
You may connect this database with other applications but you must be careful about the configuration tls, firewall etc.
Static Web
There are a lot of services that you can use from Azure. Let’s close this article by hosting a static website using the “Static Web Apps” service.
To start go to “Static Web Apps” service and click “Create.”

Just as before choose the resource group and subscription type.

Next choose a “Name” and select the plan type “Free” Keep everything default and click “Review + create.” There’s only one step that sets the tags that we won’t be needing now.

After that click “Sign in with Github” or other of our choice. Sign in, Select a repository branch, and type the website and click “Review + create.” ( I got my code from another github example html static website for demo purposes).

If everything looks good hit “Create” and it will create the new static web app.
It will take some time to create once complete click “Go to resource.”

It will generate a live url all you need to do is copy and paste it to see the live website.

Let’s change this code in github and add a litte sprinkle of CSS to it.

It will take some time for the changes are done to the repo via the azure static web app workflow repo. Now, if we refresh the website the changes should have applied and worked!
Completely destroyed my site but I did it! Cx just love messing around with code.
This is an example of CI/CD. That’s it for todays lab. Don’t forget to shut down and delete services not being used :). Cheers, and always be legendary.


